This post provides at a high level description of how to do the following tasks using an Azure pipeline
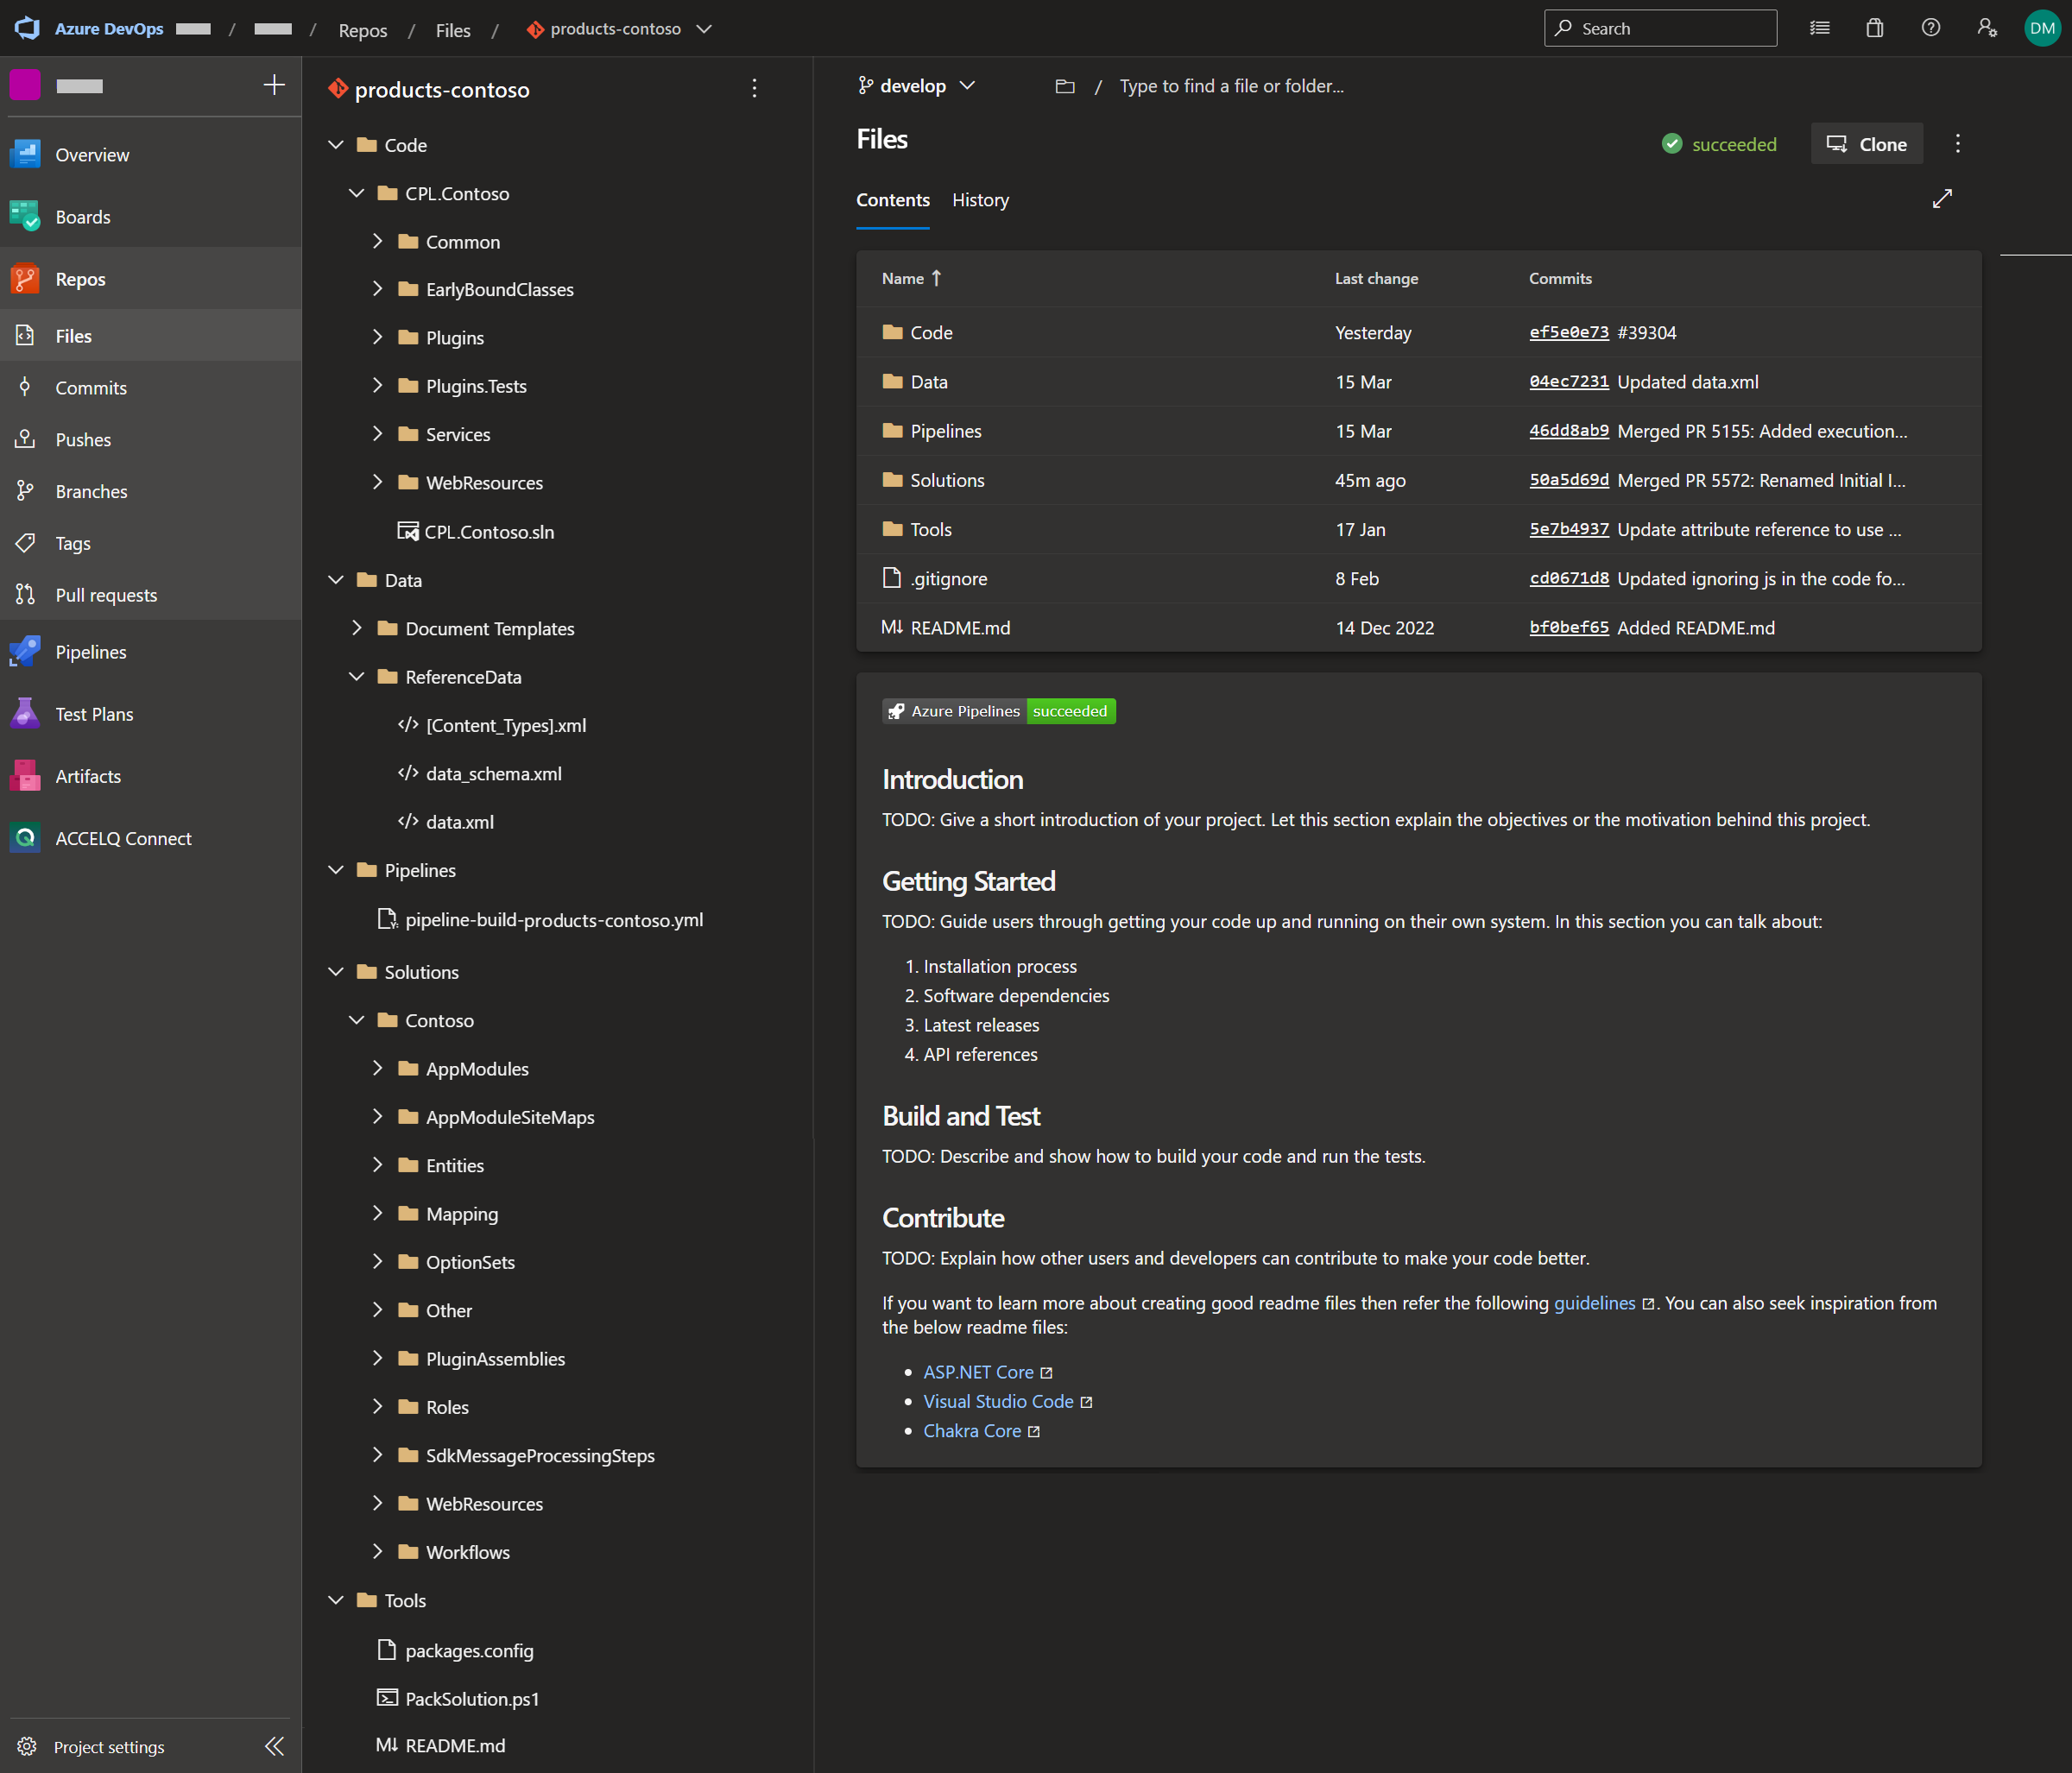
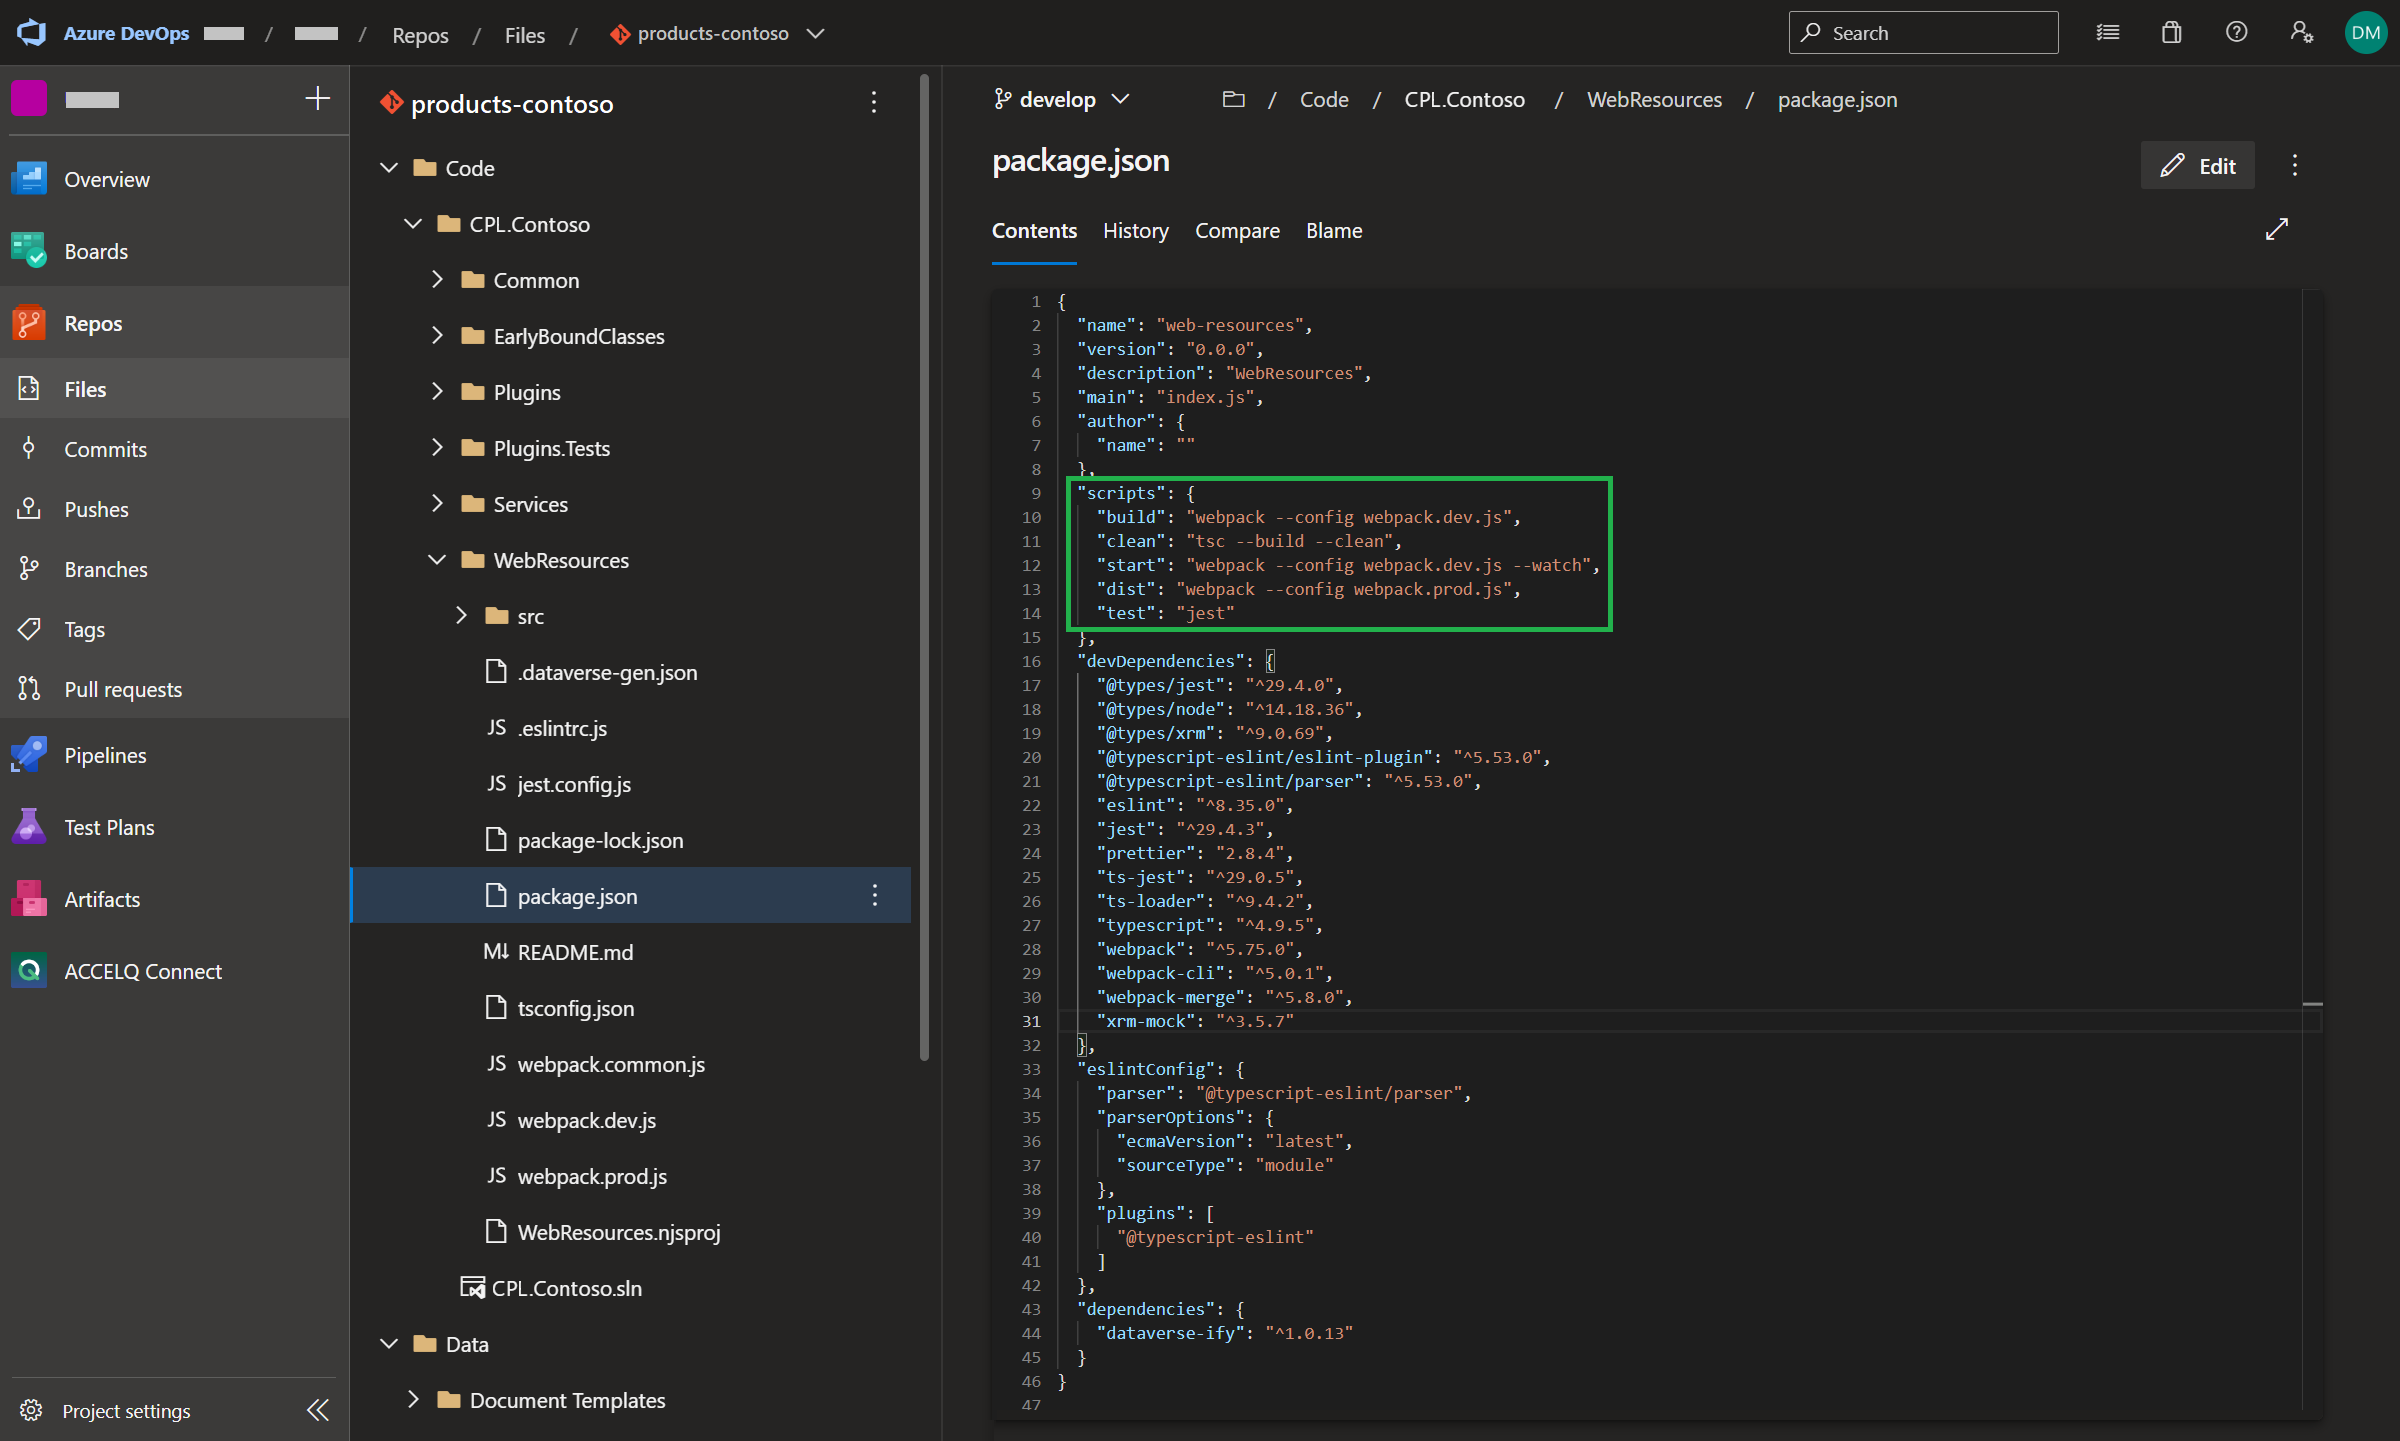
- Build a Dynamics 365 Visual Studio solution (i.e. building the ‘Code’ folder as shown in Figure 1). This includes:
- Transpiling TypeScript to JavaScript (as only TypeScript should be stored in the repos)
- Building plugin dlls (as only the plugin C# files should be stored in the repos)
- Test components within a Dynamics 365 Visual Studio solution
- Executing plugin and TypeScript unit tests
- Publishing the plugin unit test results as an artifact
- Pack and publish Dynamics 365 managed and unmanaged solutions as artifacts (i.e. packing the ‘Solutions’ folder (Figure 1) as well as any JavaScript and plugin dlls that were generated earlier in the pipeline). This also includes:
- Setting the version of the solution
- Publish reference data (i.e. the ‘Data’ folder in Figure 1) as an artifact
Running the pipeline
The pipeline (i.e. pipeline-build-products-contoso.yml) is triggered either manually or by a pull request. Figure 2 is an example of the output of the pipeline after being triggered by a pull request
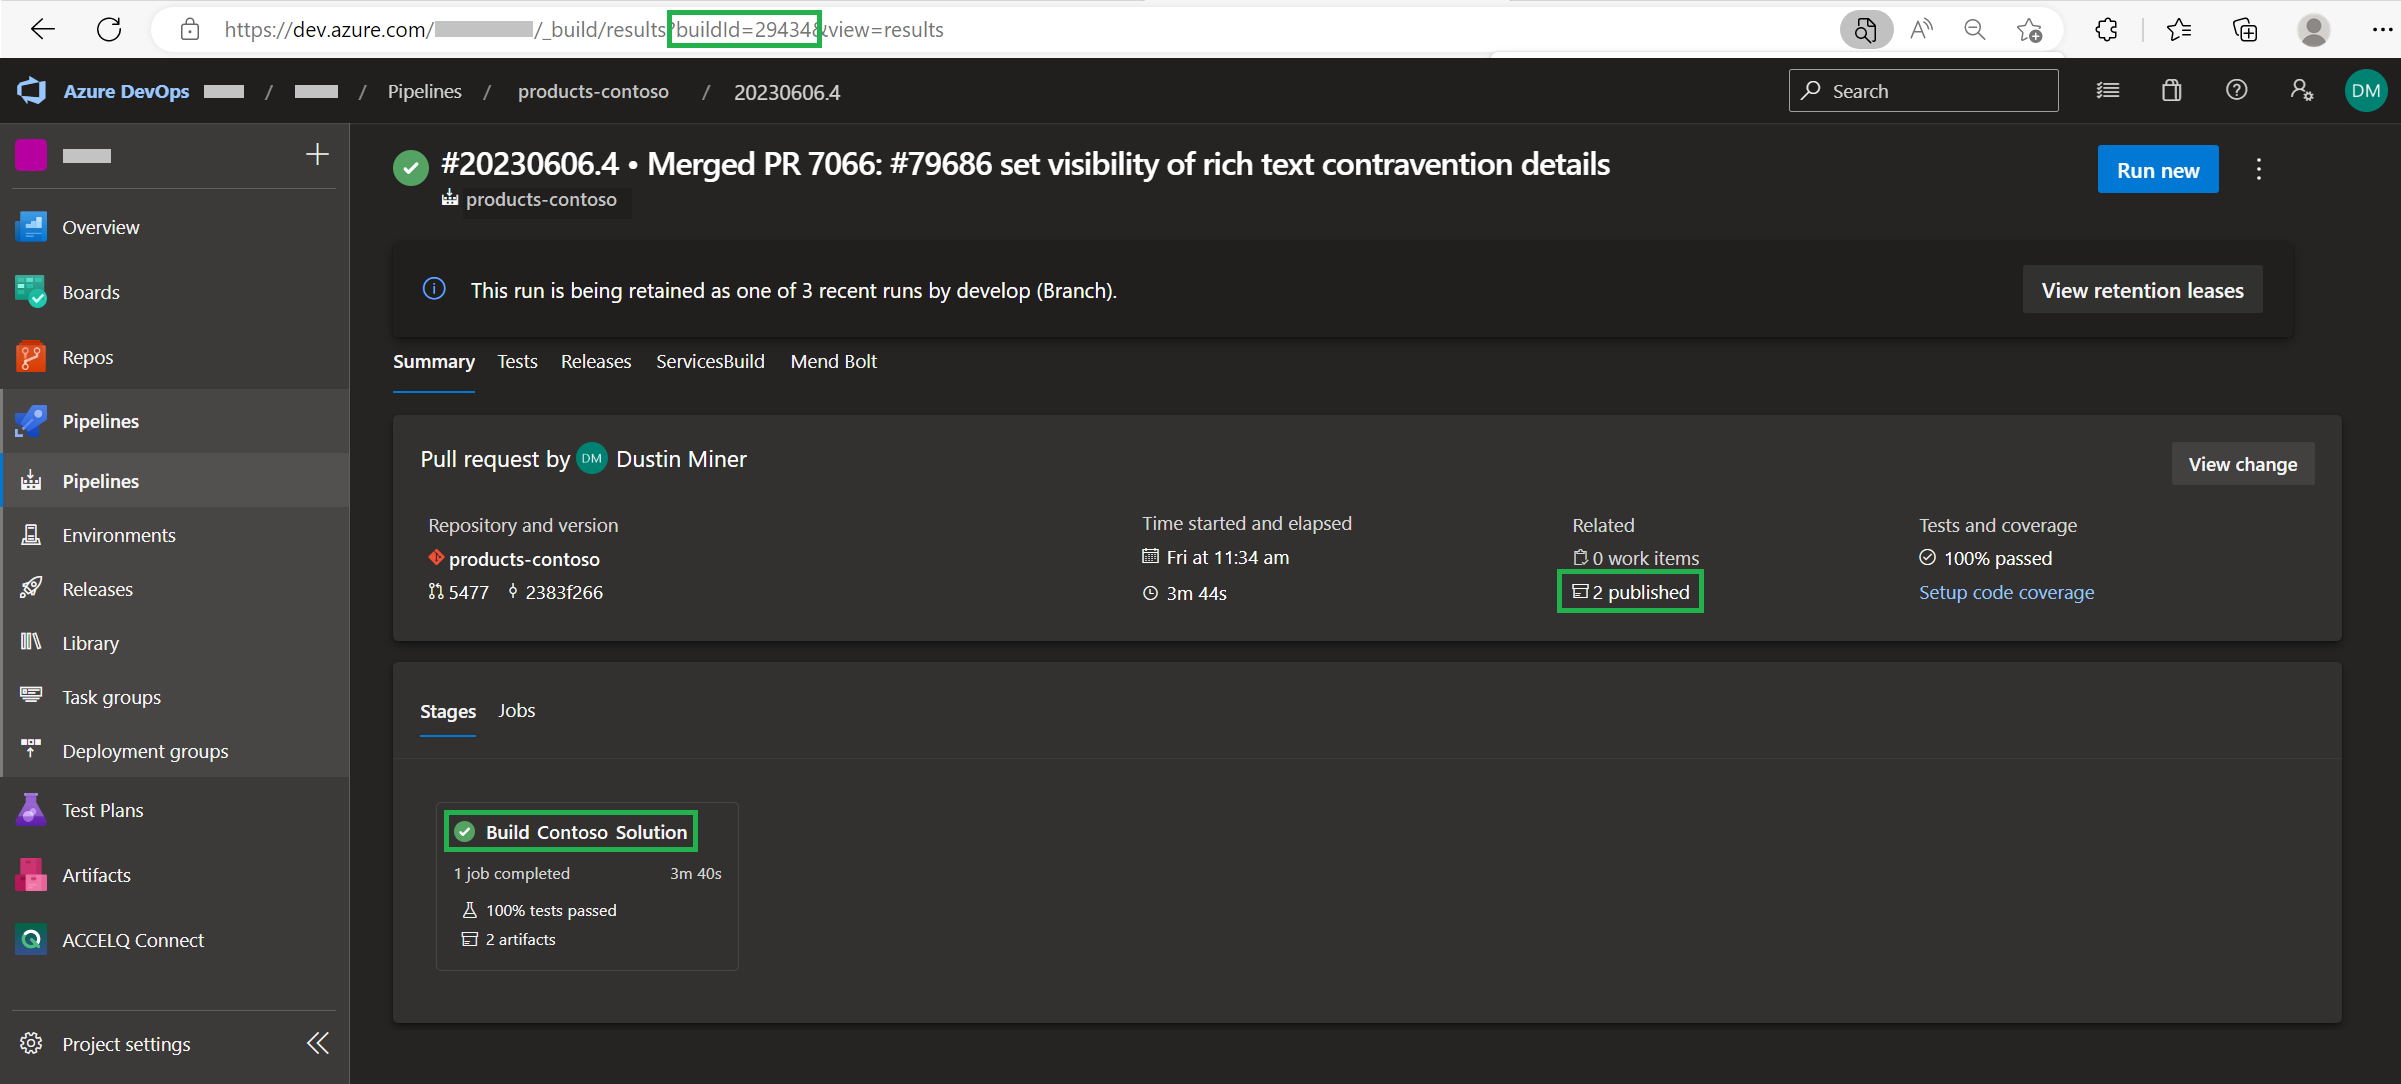
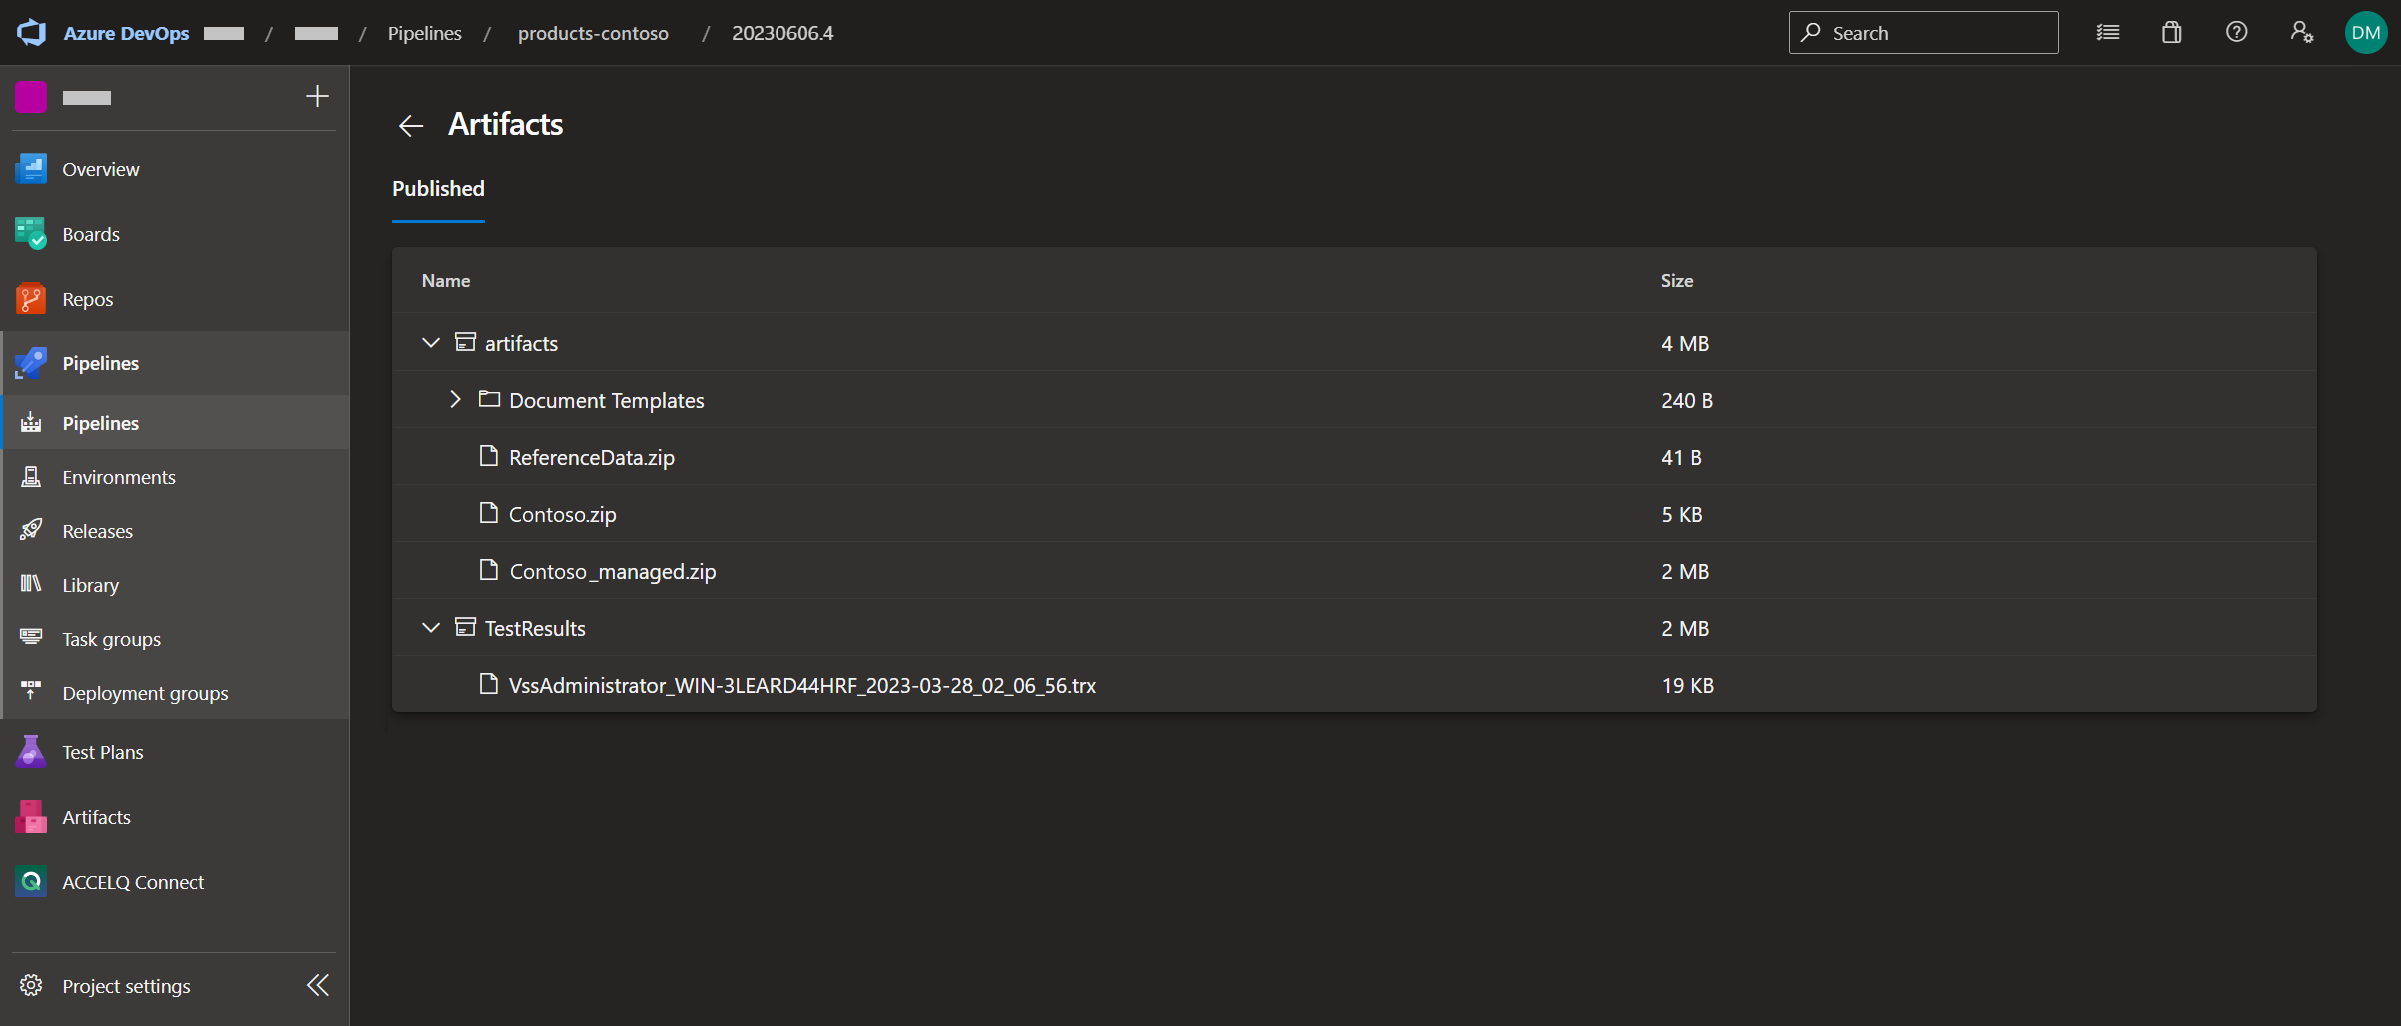
Note: referring to Figure 2, clicking on ‘2 published’ displays the artifacts that the pipeline has built (Figure 3)
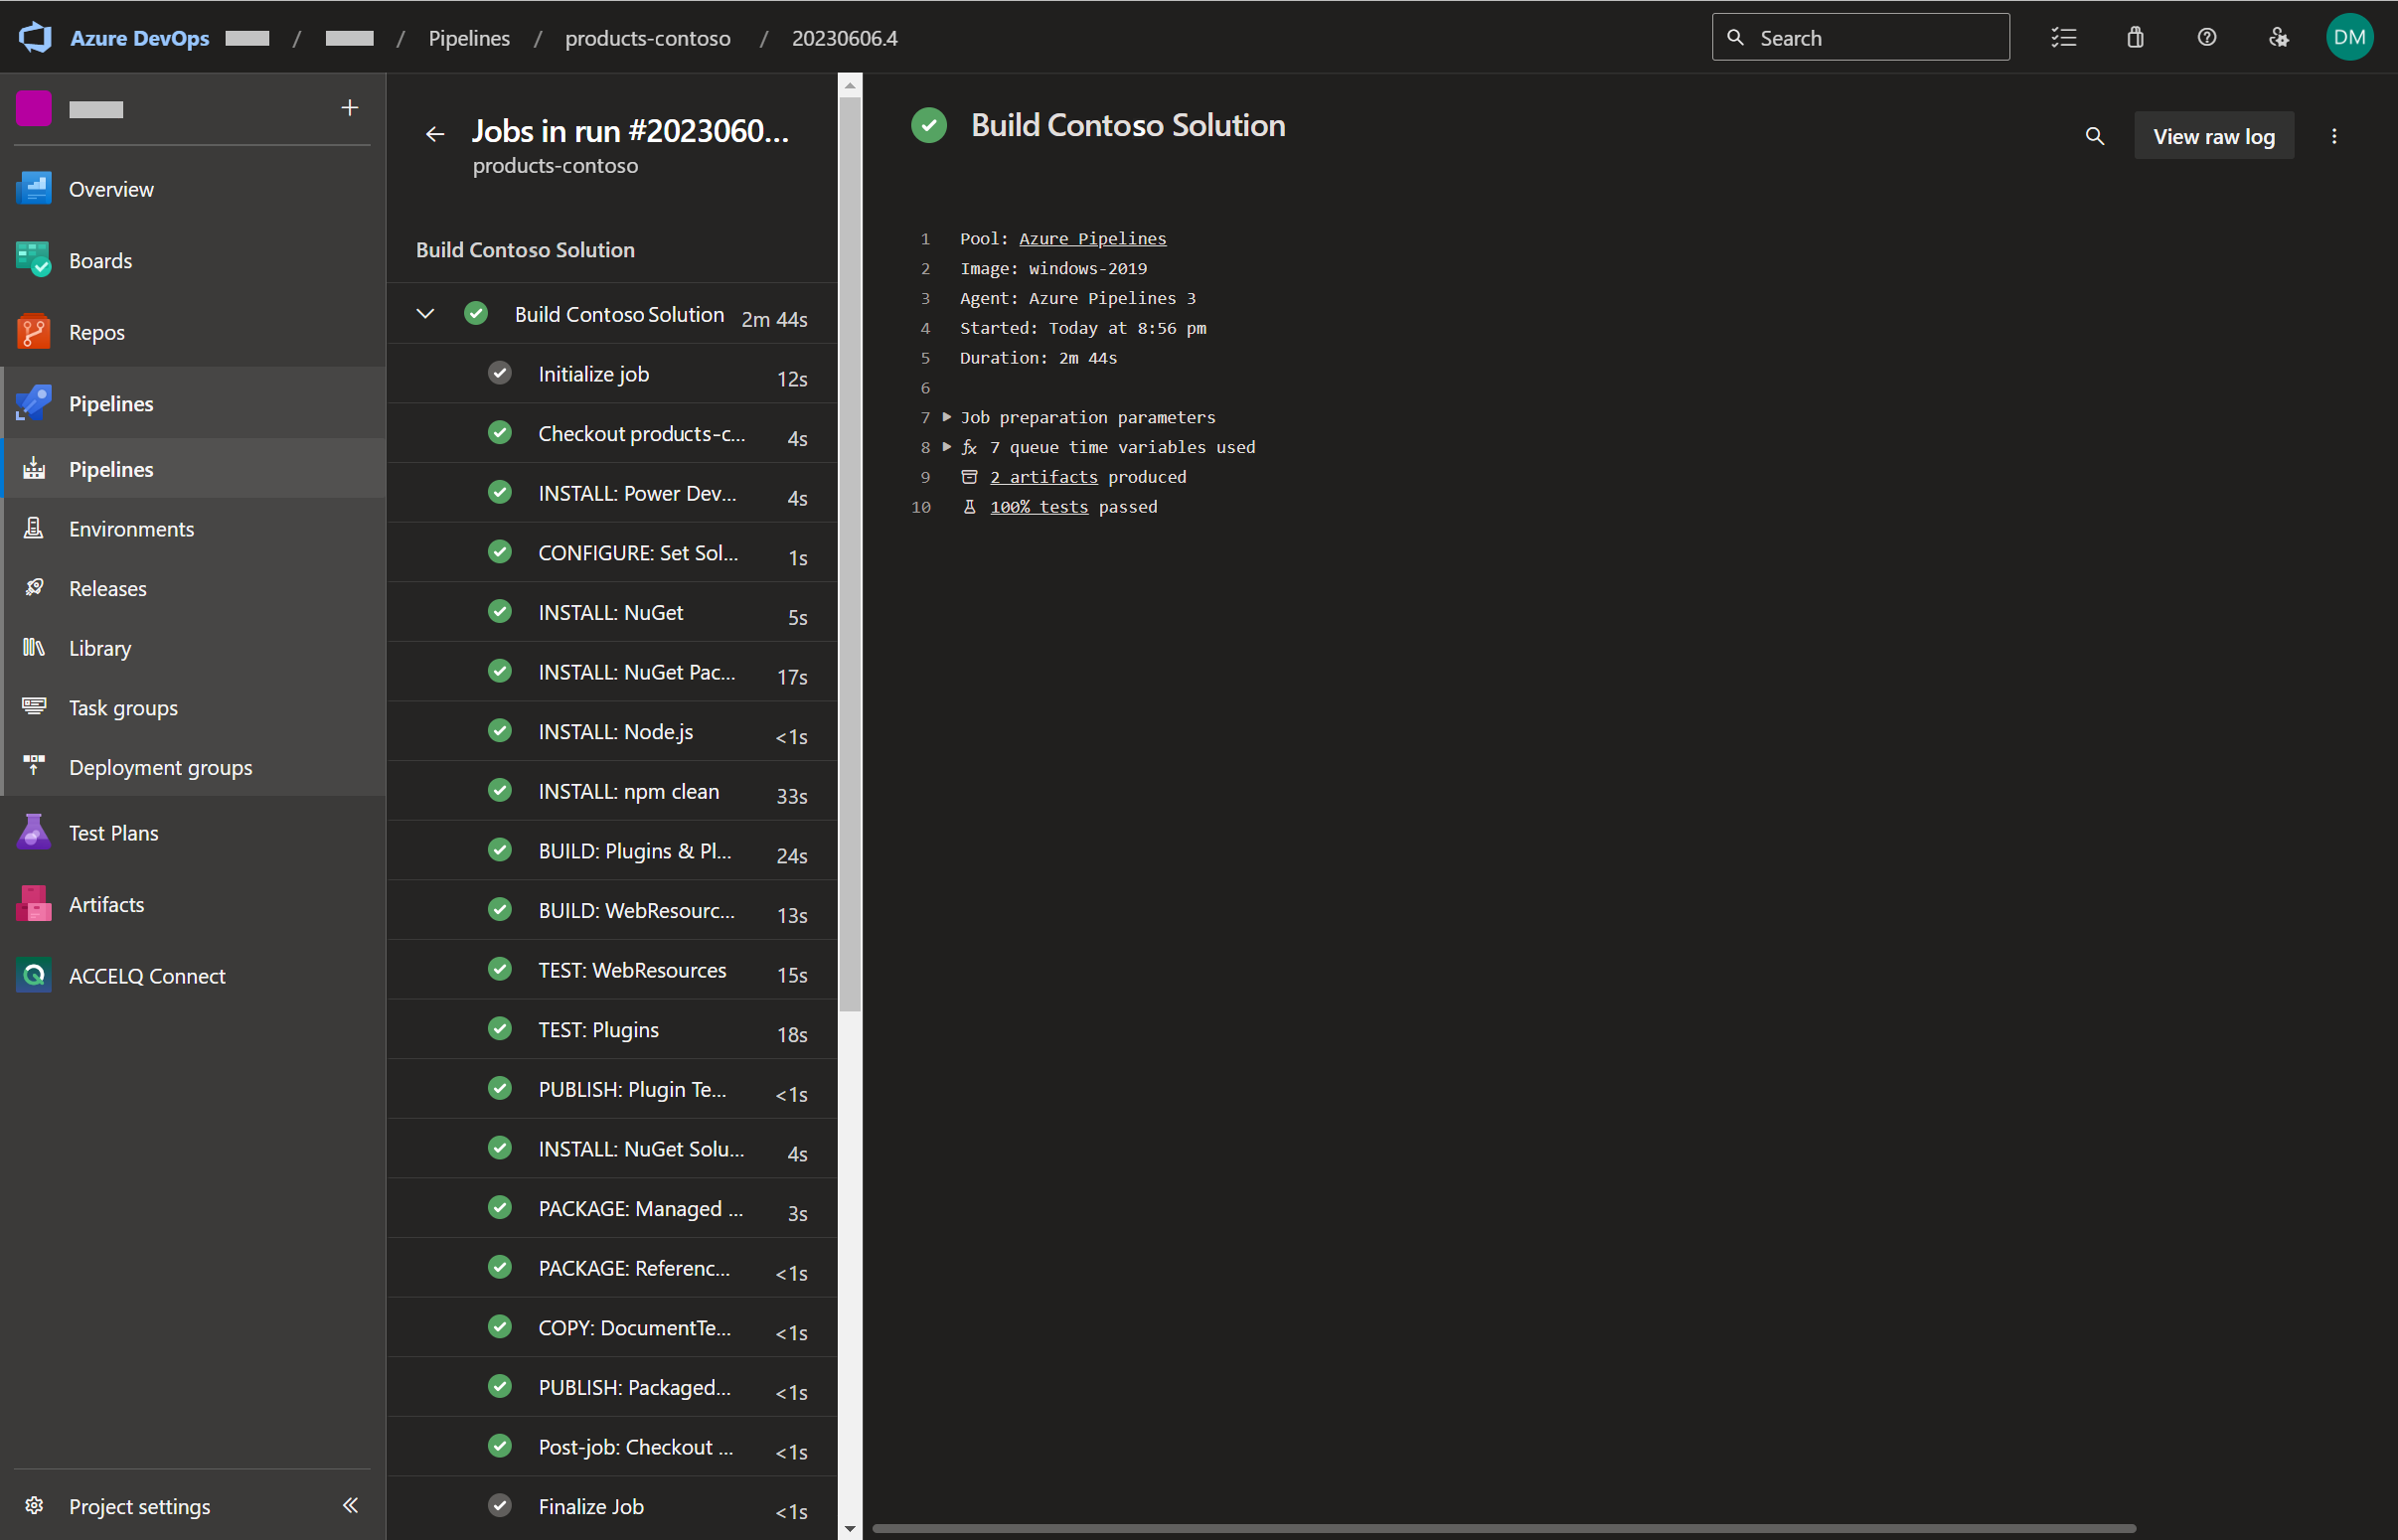
Note: referring to Figure 2, clicking on ‘Build Contoso Solution’ displays the the results of the pipeline run (Figure 4)
Stepping through the pipeline
The steps displayed in Figure 4 are described below
1.) Initialize job
Prepares build directory D:\a\1
Prepares artifacts directory D:\a\1\a
Prepares test results directory D:\a\1\TestResults
Prepares binaries directory D:\a\1\b
Prepares source directory D:\a\1\s
Downloads all tasks specified in the pipeline to D:\a\_tasks
2.) Checkout products-contoso@develop to s
Places the ‘develop’ branch of the Git repos products-contoso in D:\a\1\s
3.) INSTALL: Power DevOps Tool Installer
The pipeline consists of a stage and many tasks as illustrated in Figure 5 through to Figure 21
The task in Figure 5 (Power DevOps Tools Installer) is required to install the dependencies that are required for subsequent tasks such as the ‘Set solution version’ task

4.) CONFIGURE: Set Solution Version
The task in Figure 6 (Set Version) sets the version of the produced solution to include the build id. That is, it updates the version number in D:\a\1\s\Solutions\Contoso\Solution.xml to 1.0.0.29434. (The build id can be seen in the url displayed in Figure 2, that is ‘build id = 29434’)

5.) INSTALL: NuGet

6.) INSTALL: NuGet Packages
The task in Figure 8 (Nuget) takes the Visual Studio solution /Code/CPL.Contoso/CPL.Contoso.sln and restores the packages it references to D:\a\1\s\Code\CPL.Contoso\packages

7.) INSTALL: Node.js
The task in Figure 9 (Node.js tool installer) is required in order to build the ‘Code\CPL.Contoso\Web Resources’ project. The reason being is that the project was created from a Blank Node.js Console Application.

8.) INSTALL: npm clean
The tasks in Figures 10, 12 & 13 are also required for the ‘Code\CPL.Contoso\Web Resources’ project.
The task in Figure 10 (npm) installs the npm packages to D:\a\1\npm

9.) BUILD: Plugins & Plugin Tests
The task in Figure 12 (MSBuild) builds the solution D:\a\1\s\Code\CPL.Contoso

10.) BUILD: WebResources
The task in Figure 13 (npm) builds the project (Figure 11 displays the script being executed). That is, any TypeScript files that reside in the WebResources folder is transpiled into JavaScript. This task overwrites any transpiled JavaScript generated by the previous task (Figure 12)

11.) TEST: WebResources
The task in Figure 14 (npm) executes any xrm-mock based unit tests defined in the project (Figure 11 displays the script command being executed)

12.) TEST: Plugins
The task in Figure 15 (Visual Studio Test) executes the unit tests in D:\a\15\s\Code\CPL.Contoso\Plugins.Tests

13.) PUBLISH: Plugin Test Results
The task in Figure 16 (Publish build artifacts) publishes the artifact ‘TestResults’ (Figure 3)

14.) INSTALL: NuGet SolutionPackager.exe
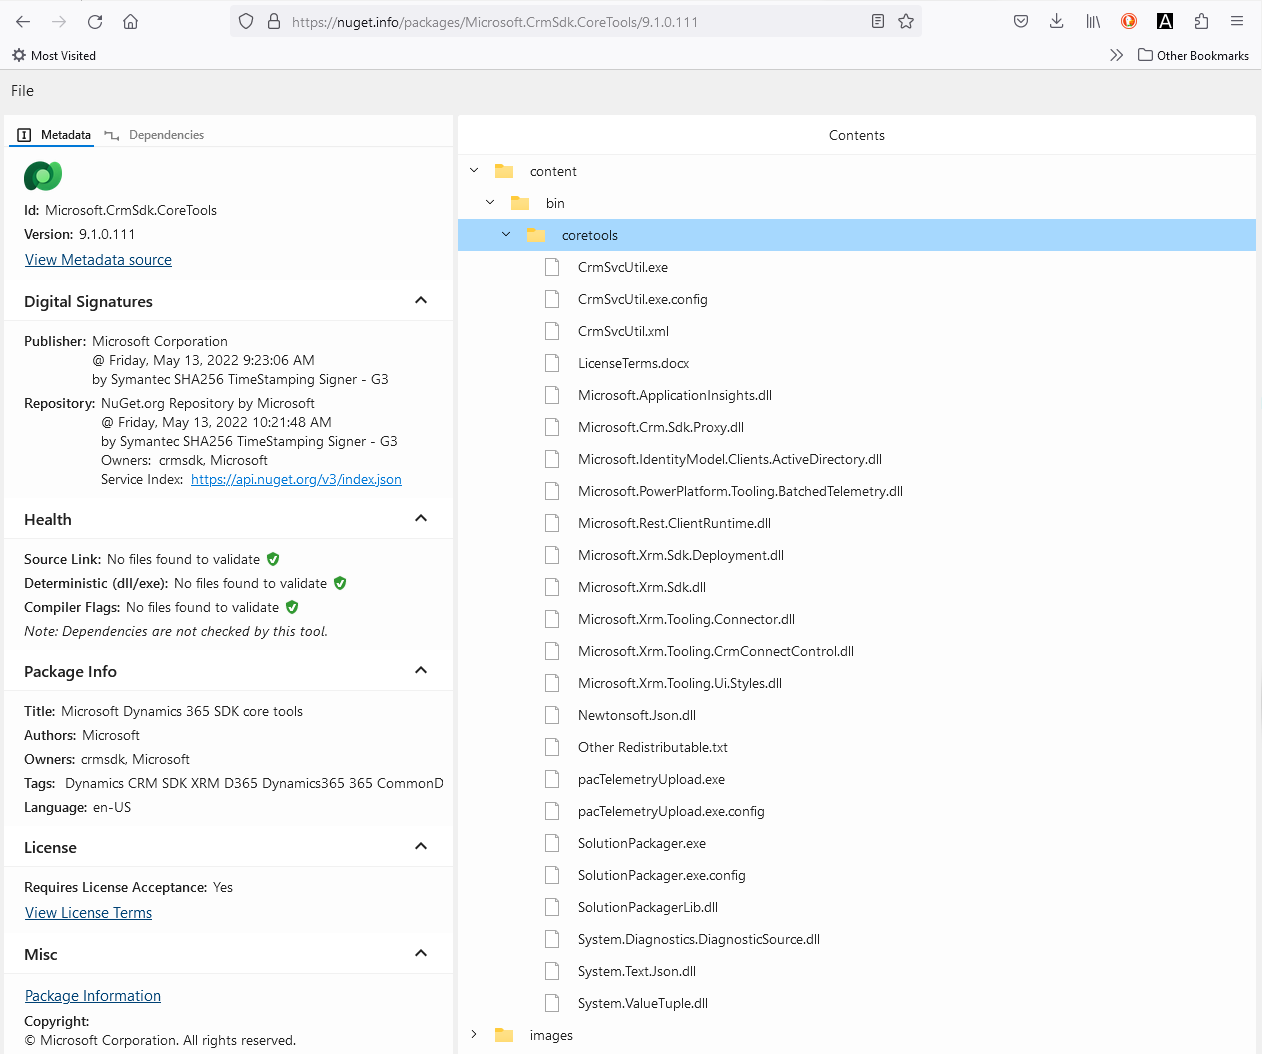
The task in Figure 17 (Nuget) takes /Tools/packages.config to restore D:\a\1\s\Code\CPL.Contoso\packages. See Figure 22 & 23

15.) PACKAGE: Managed & Unmanaged Solutions
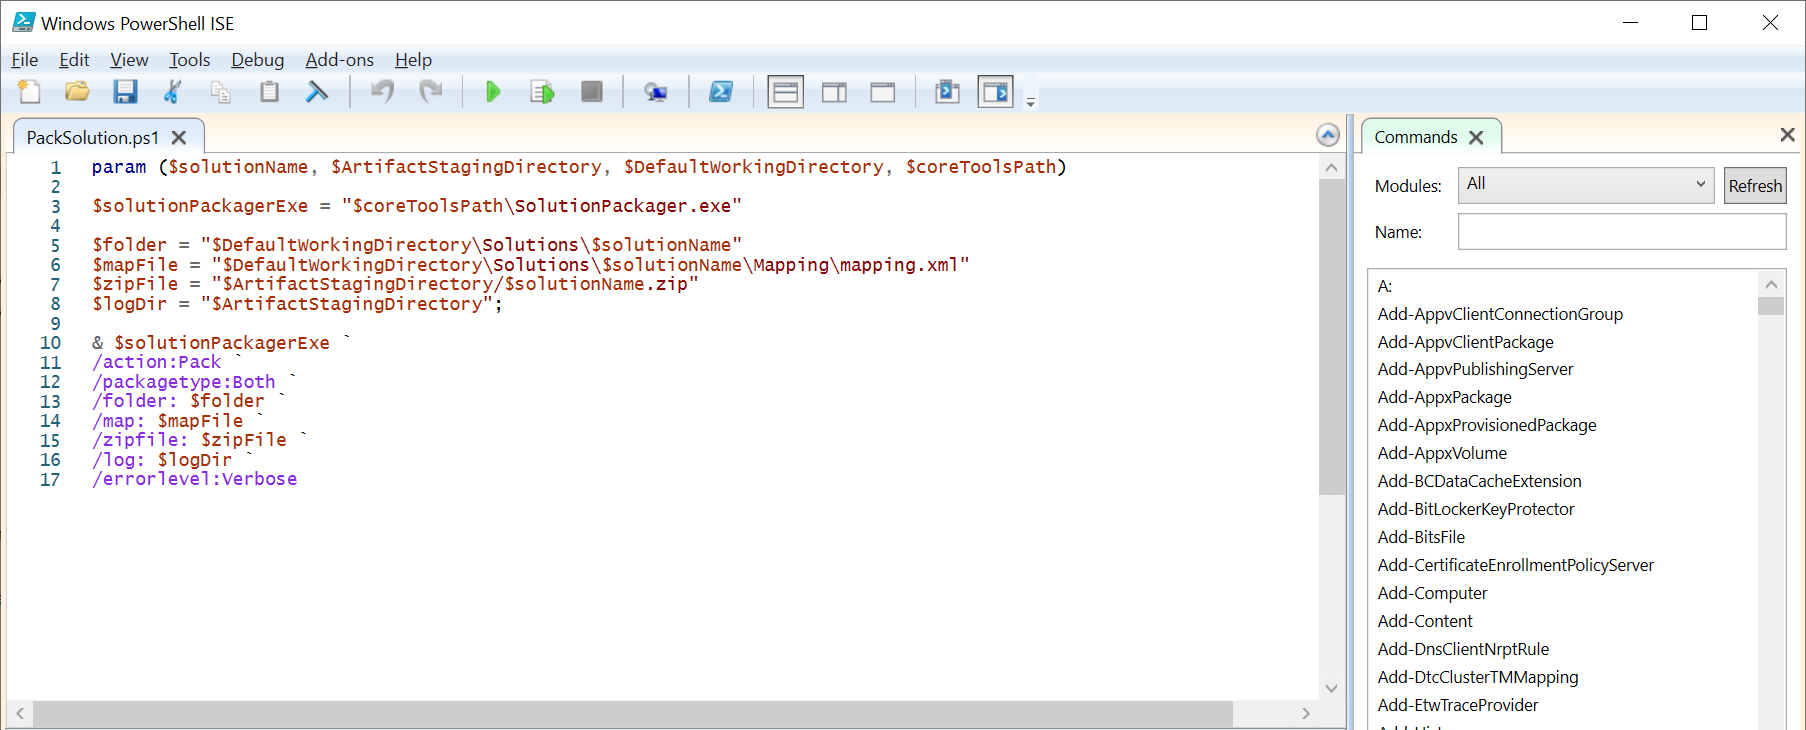
The task in Figure 18 (PowerShell) executes the script PackSolution.ps1 (Figure 24). It’s a custom script that wraps SolutionPackager.exe. The script packs the files from the ‘Solutions’ folder as well as any JavaScript or plugins that the pipeline has built (as specified in the mapping.xml (the contents of this file isn’t described in this post))
D:\a\1\s\Tools\PackSolution.ps1 generates D:\a\1\a\Contoso.zip and D:\a\1\a\Contoso_managed.zip
Note:
-ArtifactStagingDirectory = D:\a\1\a
-DefaultWorkingDirectory = D:\a\1\s

16.) PACKAGE: Reference Data
The task in Figure 19 (Archive files) takes files (created by the Configuration Migration Tool) placed in Data\Reference Data (Figure 1) and creates an artifact (Figure 3)

17.) COPY: DocumentTemplates

18.) PUBLISH: Packaged & Copied Files
The task in Figure 21 (Publish build artifacts) publishes the managed and unmanaged solutions as artifacts (Figure 3)

18.) Post-job: Checkout products-contoso@develop to s
19.) Finalize Job
Appendix

Further reading
Deploy a Dynamics 365 based solution via an Azure DevOps pipeline
References
Create your first pipeline – Azure Pipelines | Microsoft Learn