This blog post provides a high level example of how to create and unit test a Dynamics 365 plugin using FakeXrmEasy
Create the plugin
JourneyTeam.Xrm
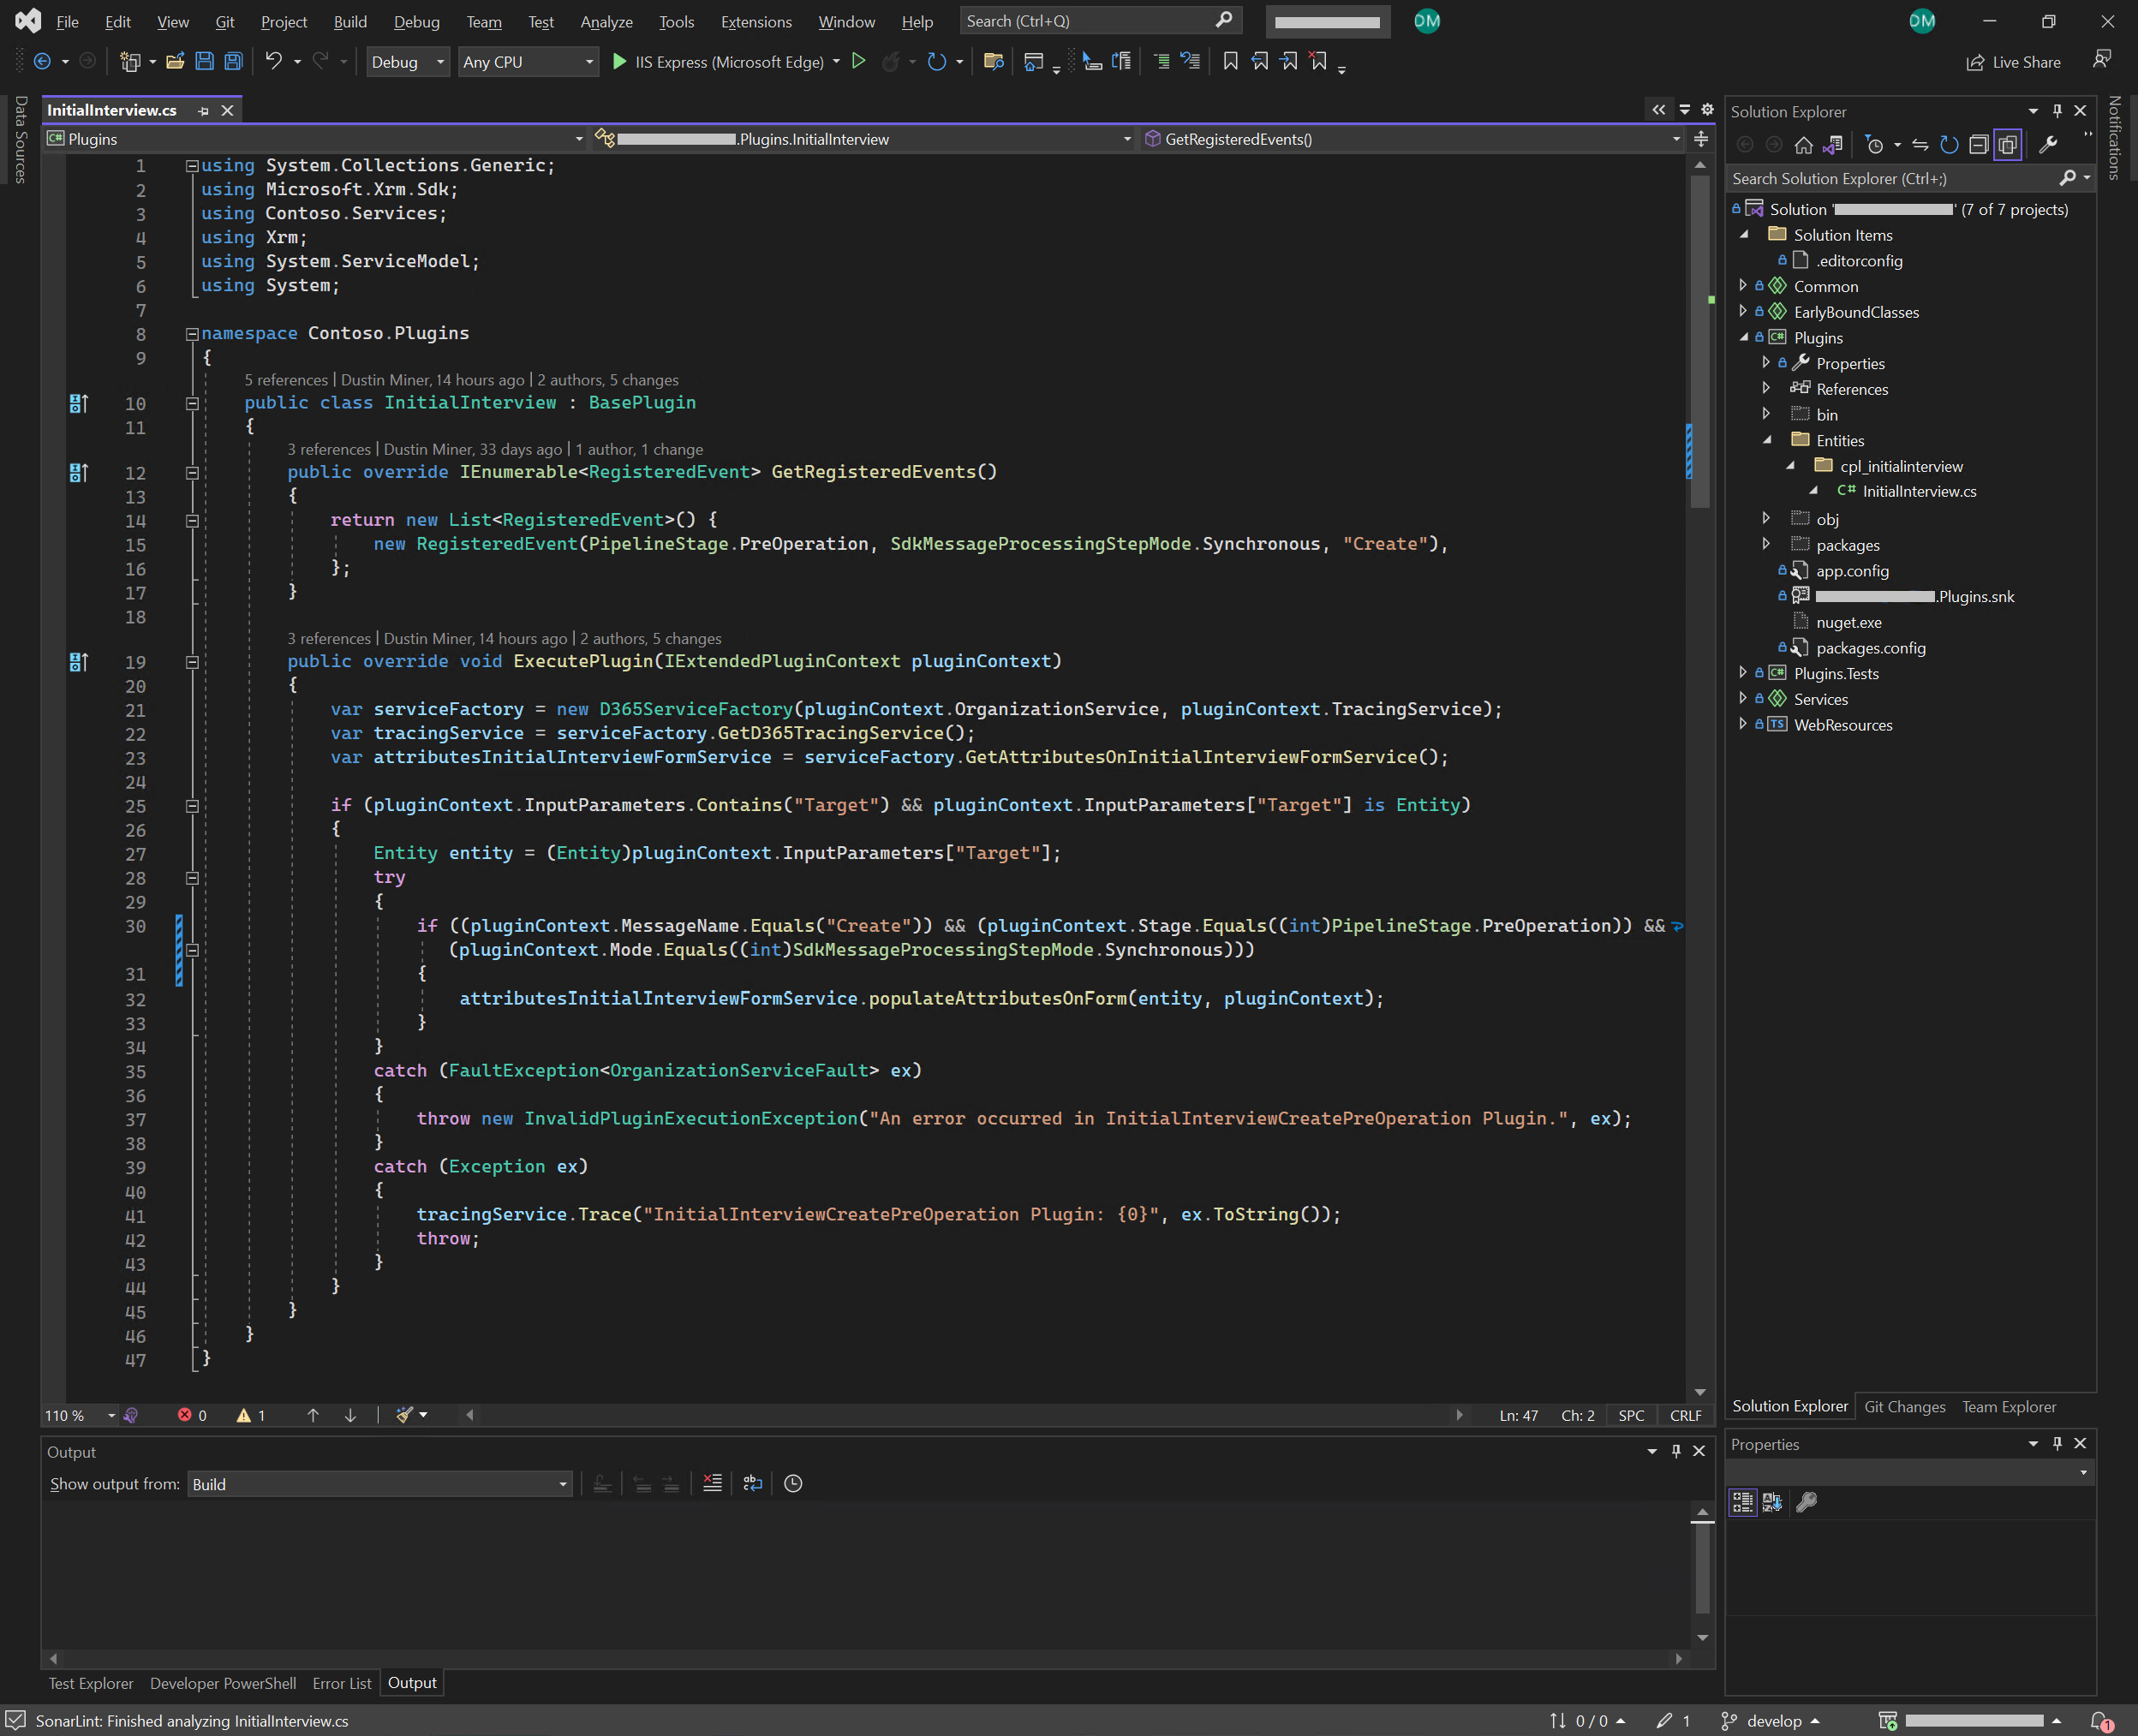
On line 10 of Figure 1, it implements BasePlugin rather than the IPlugin interface. BasePlugin has been designed by JourneyTeam.Xrm. There are benefits to using a wrapper like this rather than directly using IPlugin. One of the benefits is specifying the events that the plugin will handle (as defined on line 15). This specifies that the plugin is expecting the specified event to be registered. If another event is registered by mistake, it will generate a plug-in trace log message such as: “No Registered Event found for event: Update, Entity: cpl_initialinterview, and Stage: PreValidation!”
SOLID principles
The business logic has been separated from the plugin, and an attempt has been made to follow SOLID principles. Note: One benefit of doing this is that if the Xrm object isn’t referenced in the business logic, FakeXrmEasy wouldn’t be required. (The appendix describes an example of this.

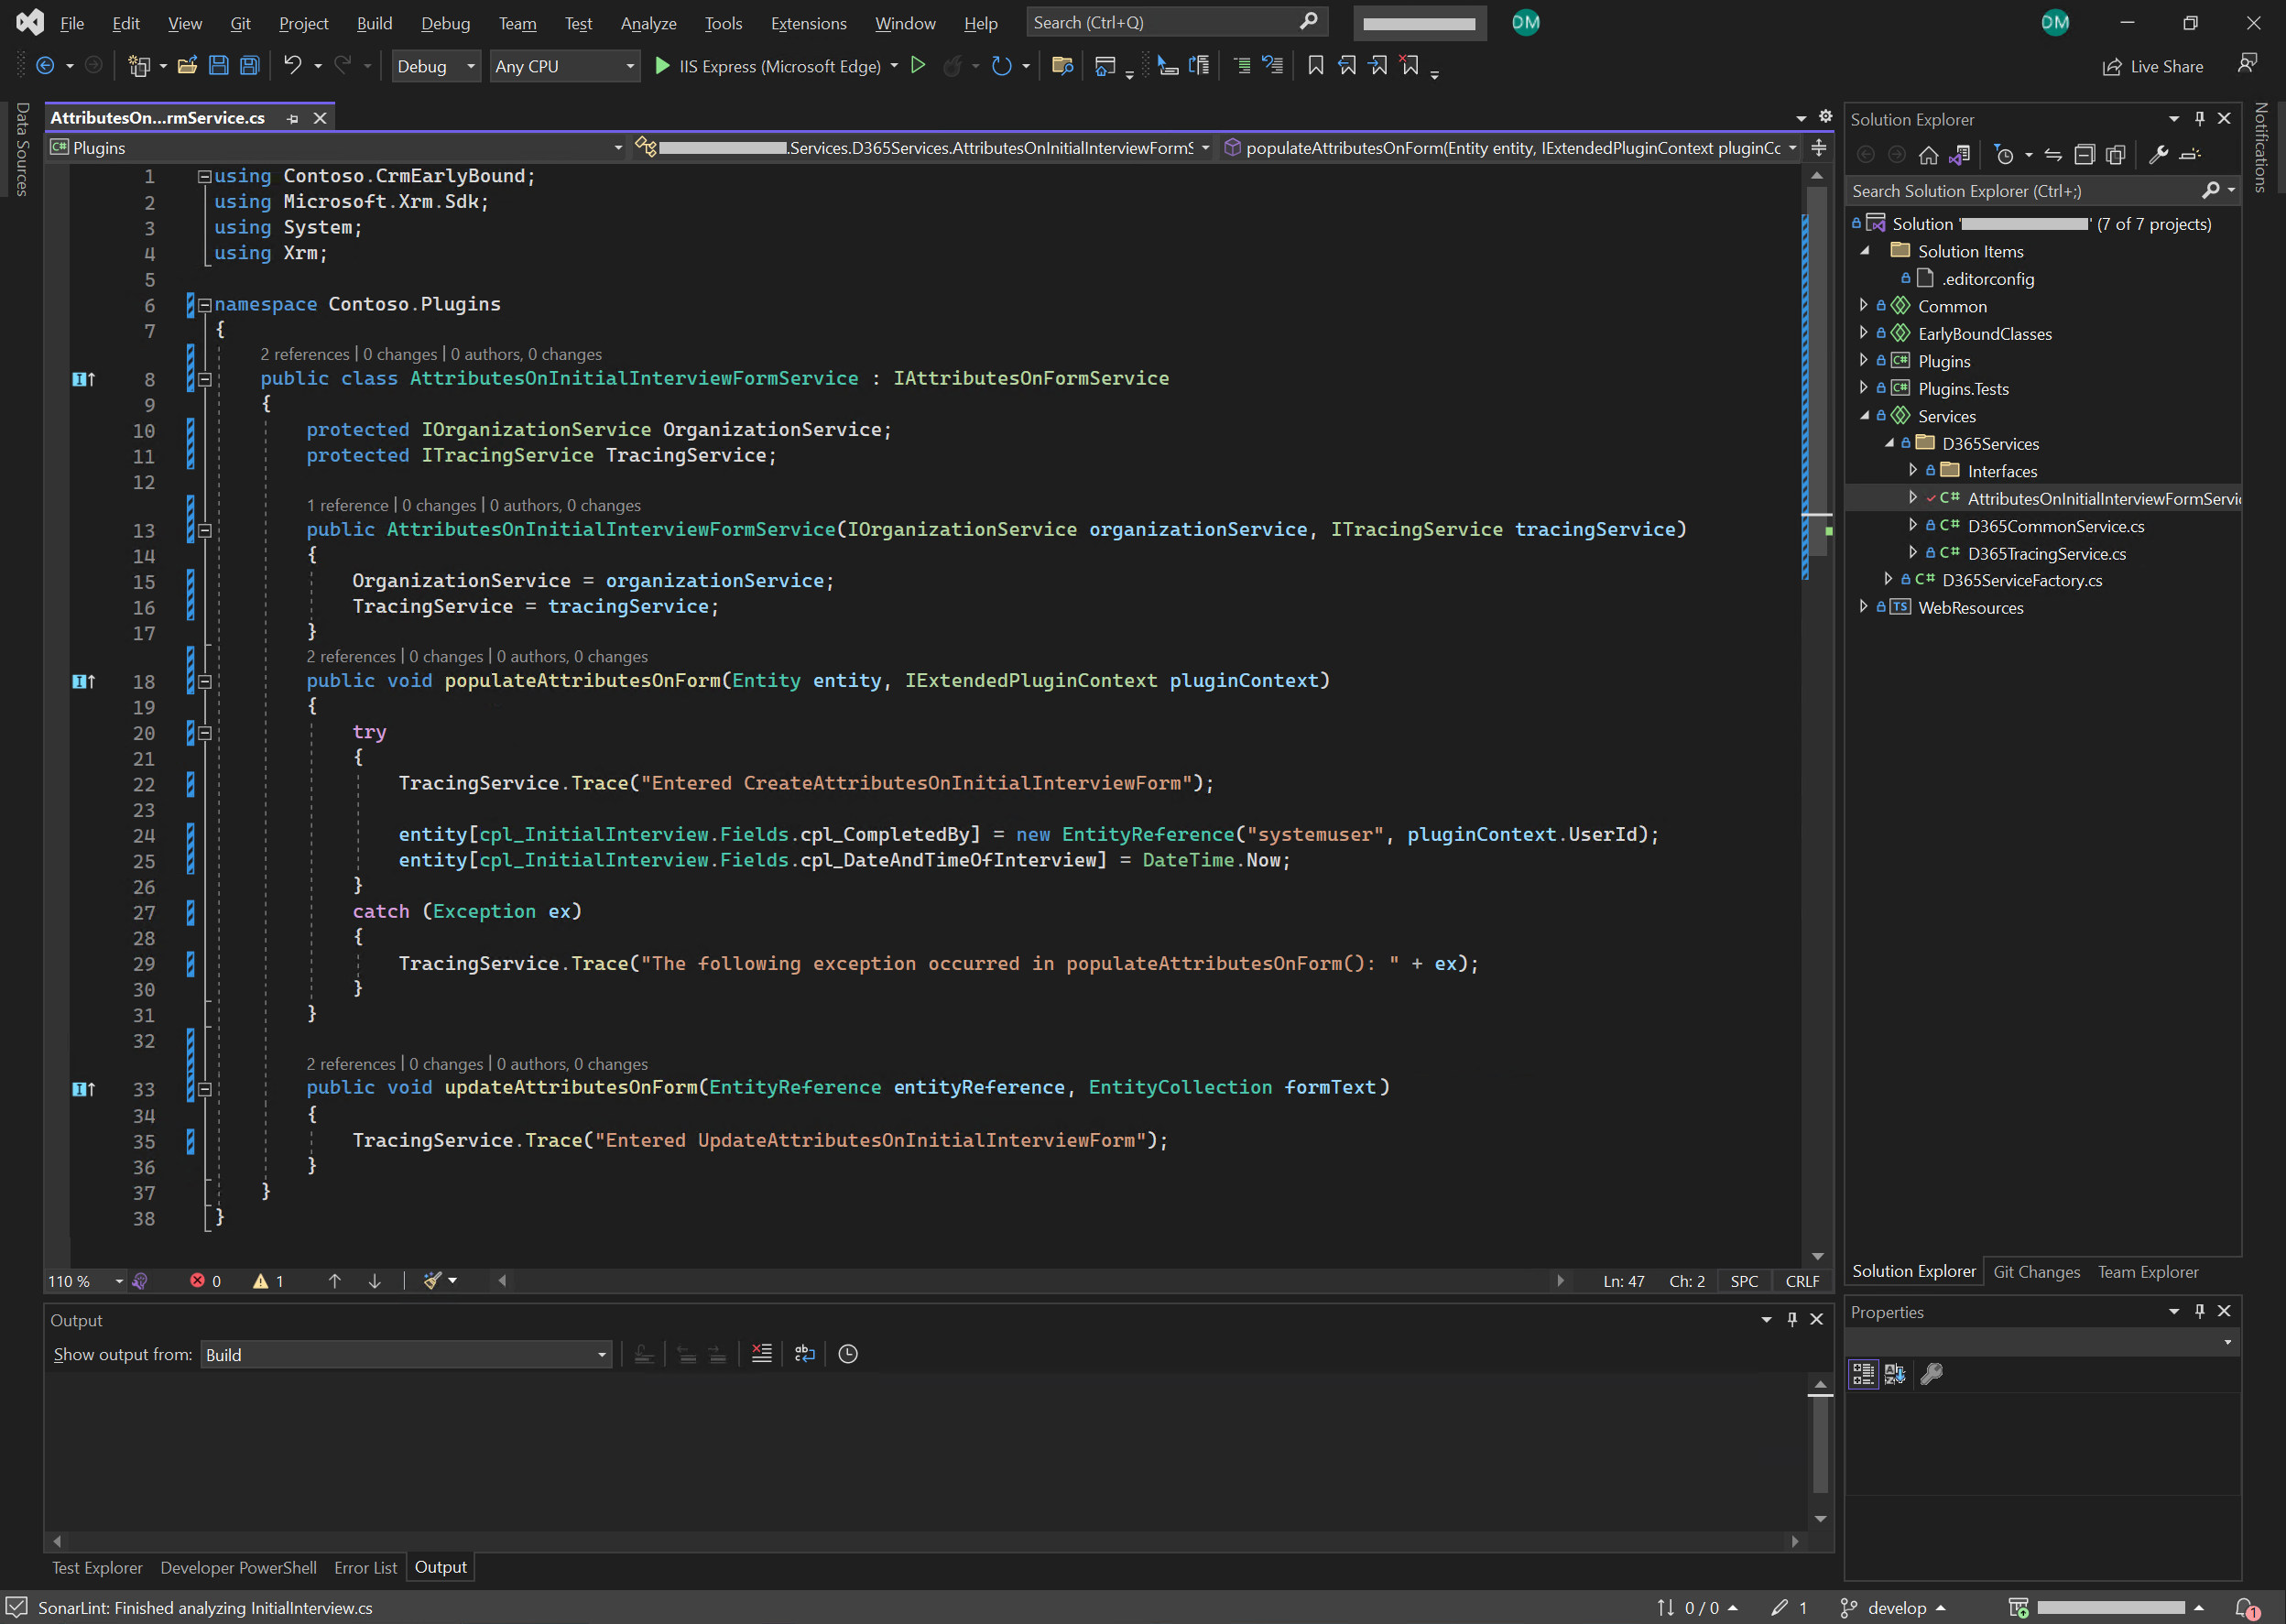
Figure 2 illustrates how an interface has been designed to encapsulate the logic of interacting with attributes on a form. Figure 3 demonstrates the implementation of this interface for a specific form
Line 32 of Figure 1 represents how the function populateAttributesOnForm() is referenced in the plugin
Unit test the plugin with FakeXrmEasy
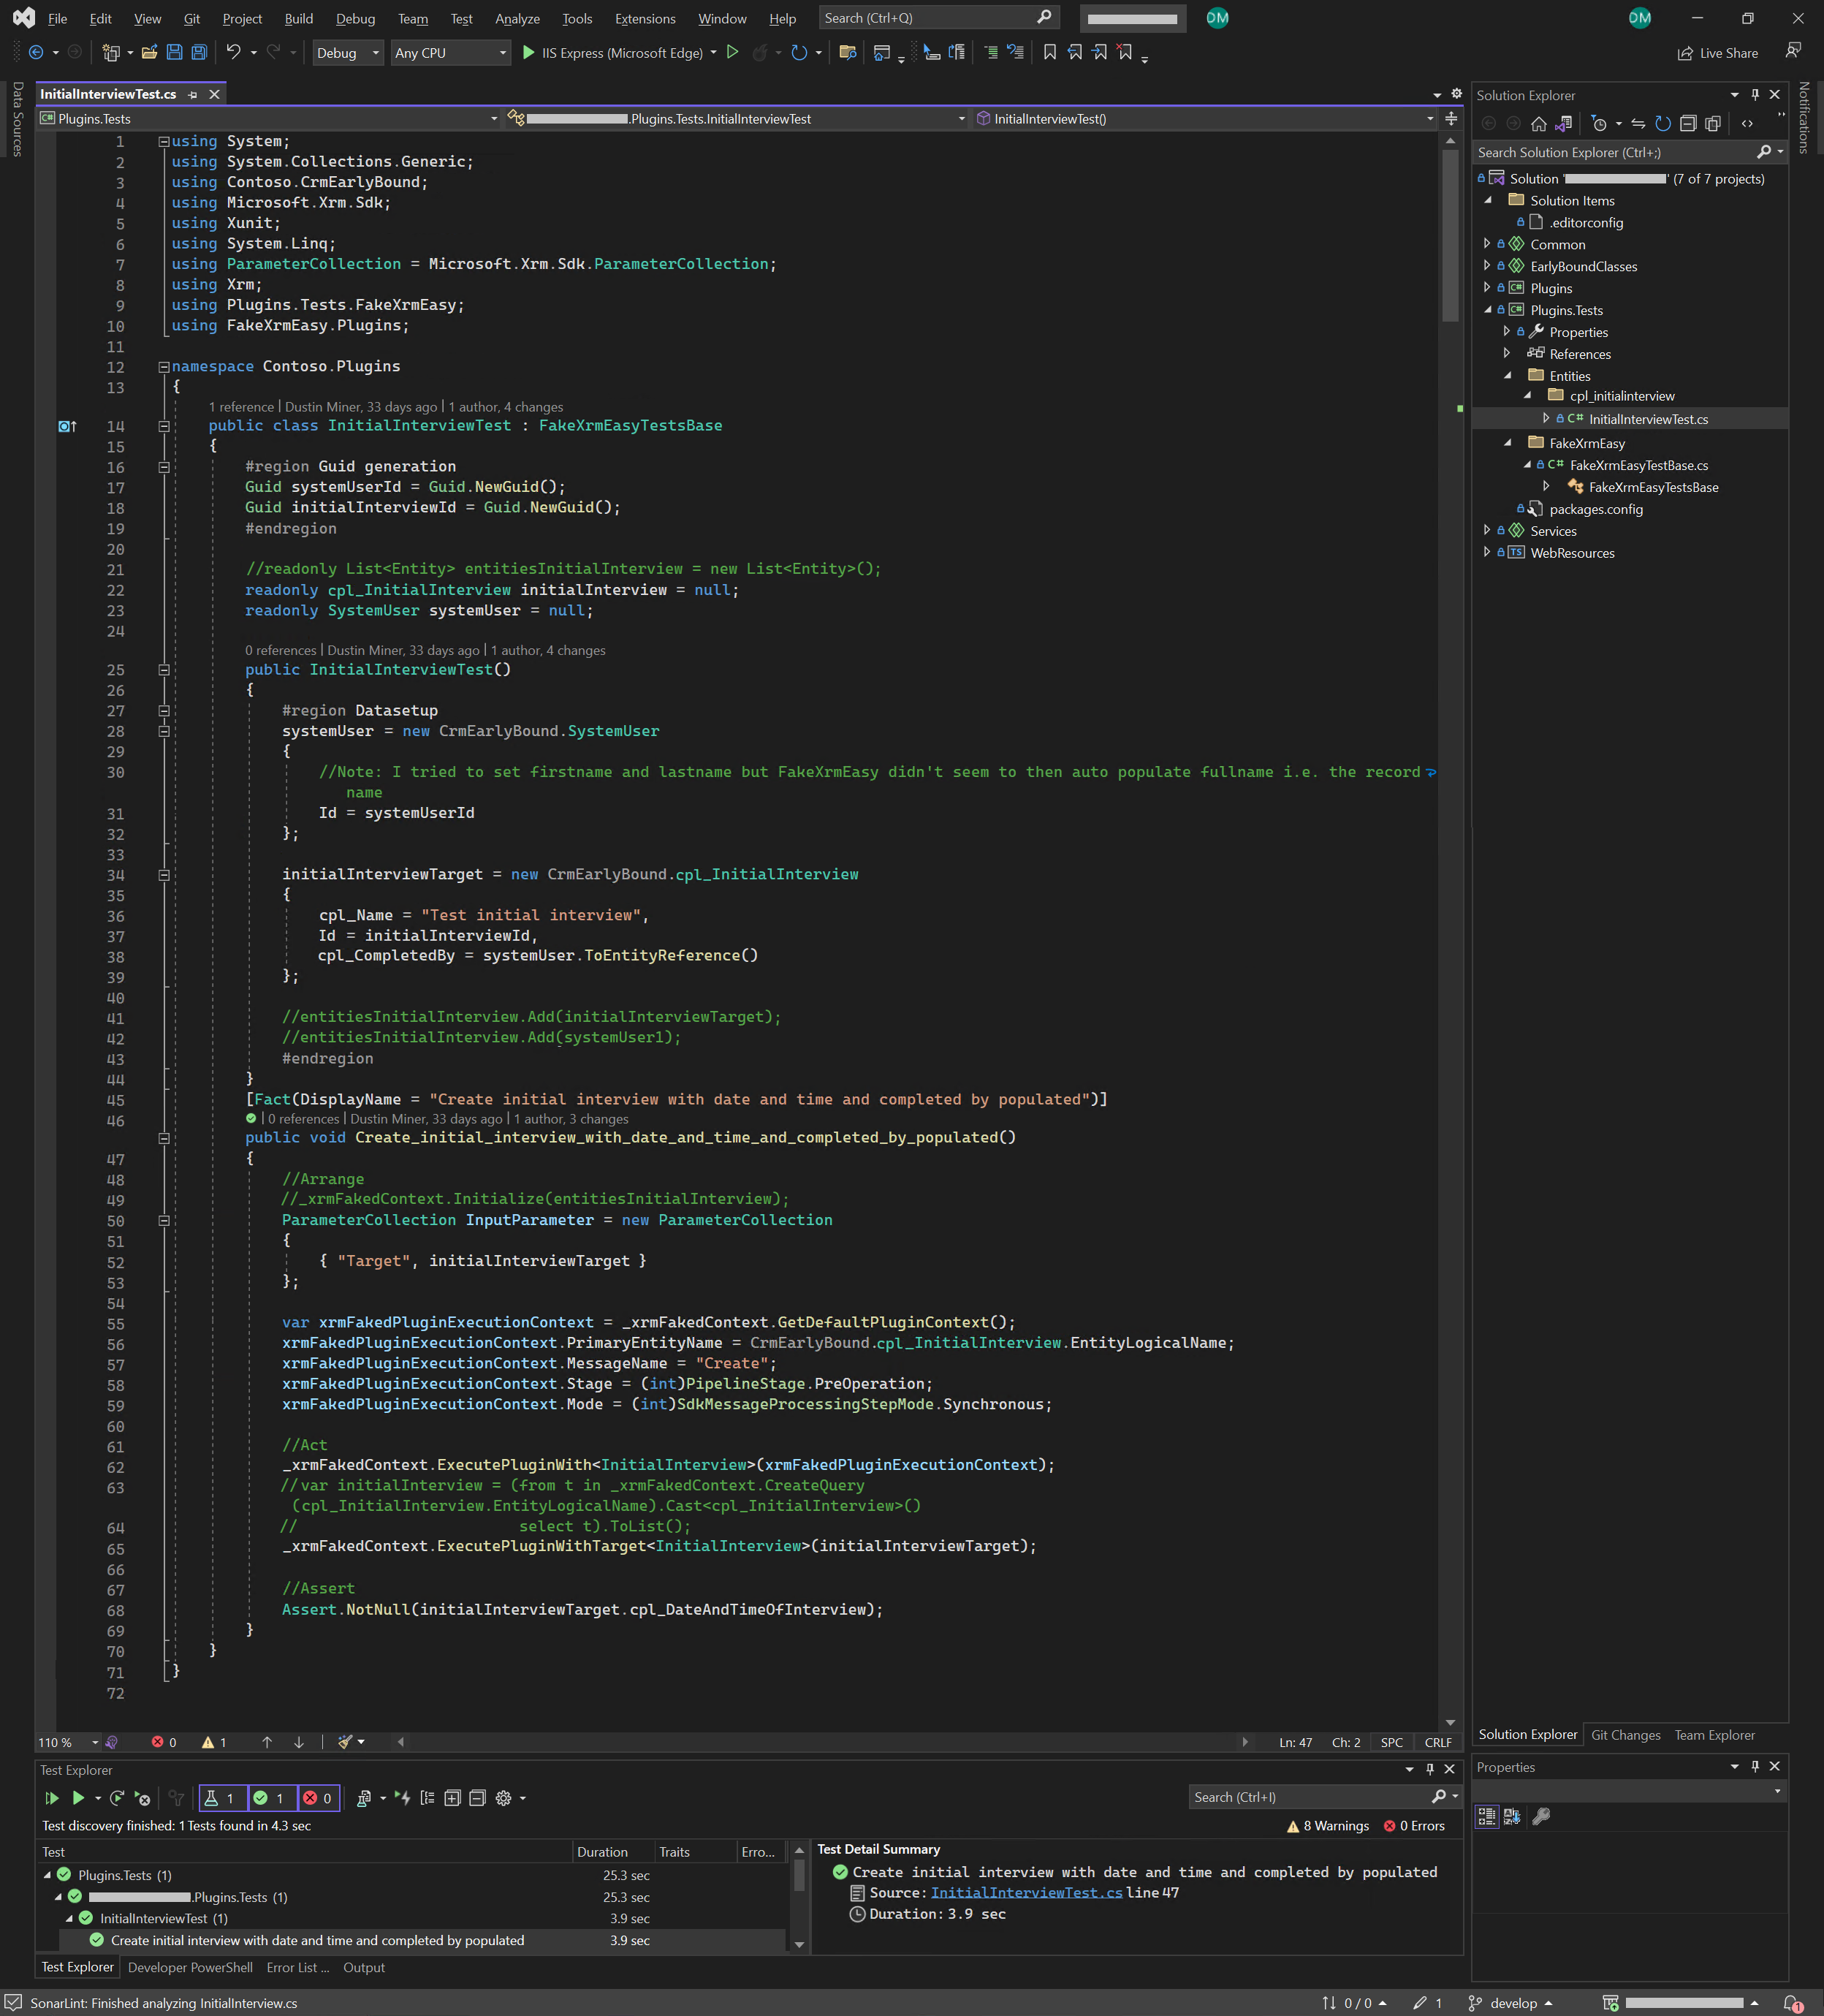
When developing a plugin (assuming it’s only interacting with Dataverse), it’s recommended to create unit tests simultaneously (e.g. Figure 4). The reason is that it’s much easier to debug a plugin in Visual Studio (i.e. stepping through the plugin code) rather than adding trace statements in the plugin code and continually re-uploading the assembly.
The NuGet packages installed in the Plugins.Test project are:
- FakeXrmEasy.v9 version 2.3.1
- xunit version 2.4.2 – allows the test system to be able to find the unit tests
Appendix
Unit test without using FakeXrmEasy
Consider a C# Custom API (Dataverse) called DocumentAPI, which interacts with SharePoint.
A Visual Studio MSTest Test Project could be created to test a method within this Custom API (e.g. UploadFile() on line 13 in Figure 6).
- The first part of the test would involve connecting to Dataverse (via CrmServiceClient) and retrieving the SharePoint connection information stored in a Dataverse table (line 9 in Figure 6)
- It could then connect directly to the SharePoint server to perform an action such as uploading a file (line 13 in Figure 6).
The benefit of doing this is
- The developer could easily step through UploadFile() in order to debug it
- SharePoint wouldn’t need to be mocked

Further reading
Create a temporary plugin assembly
References
1.) https://dynamicsvalue.github.io/fake-xrm-easy-docs/quickstart/plugins/overview