In Power Pages, controlling which records a logged in portal user (contact) can access is essential for secure and personalised experiences. This post will describe how three portal users (contacts) be be configured to each have a personalised view of Provider records. To achieve this, the following steps will be followed
- Create the N:N relationship table
- Populate this relationship table
- Define table permissions
- Confirm contact level filtering
Walkthrough
Step 1: Create the N:N relationship table
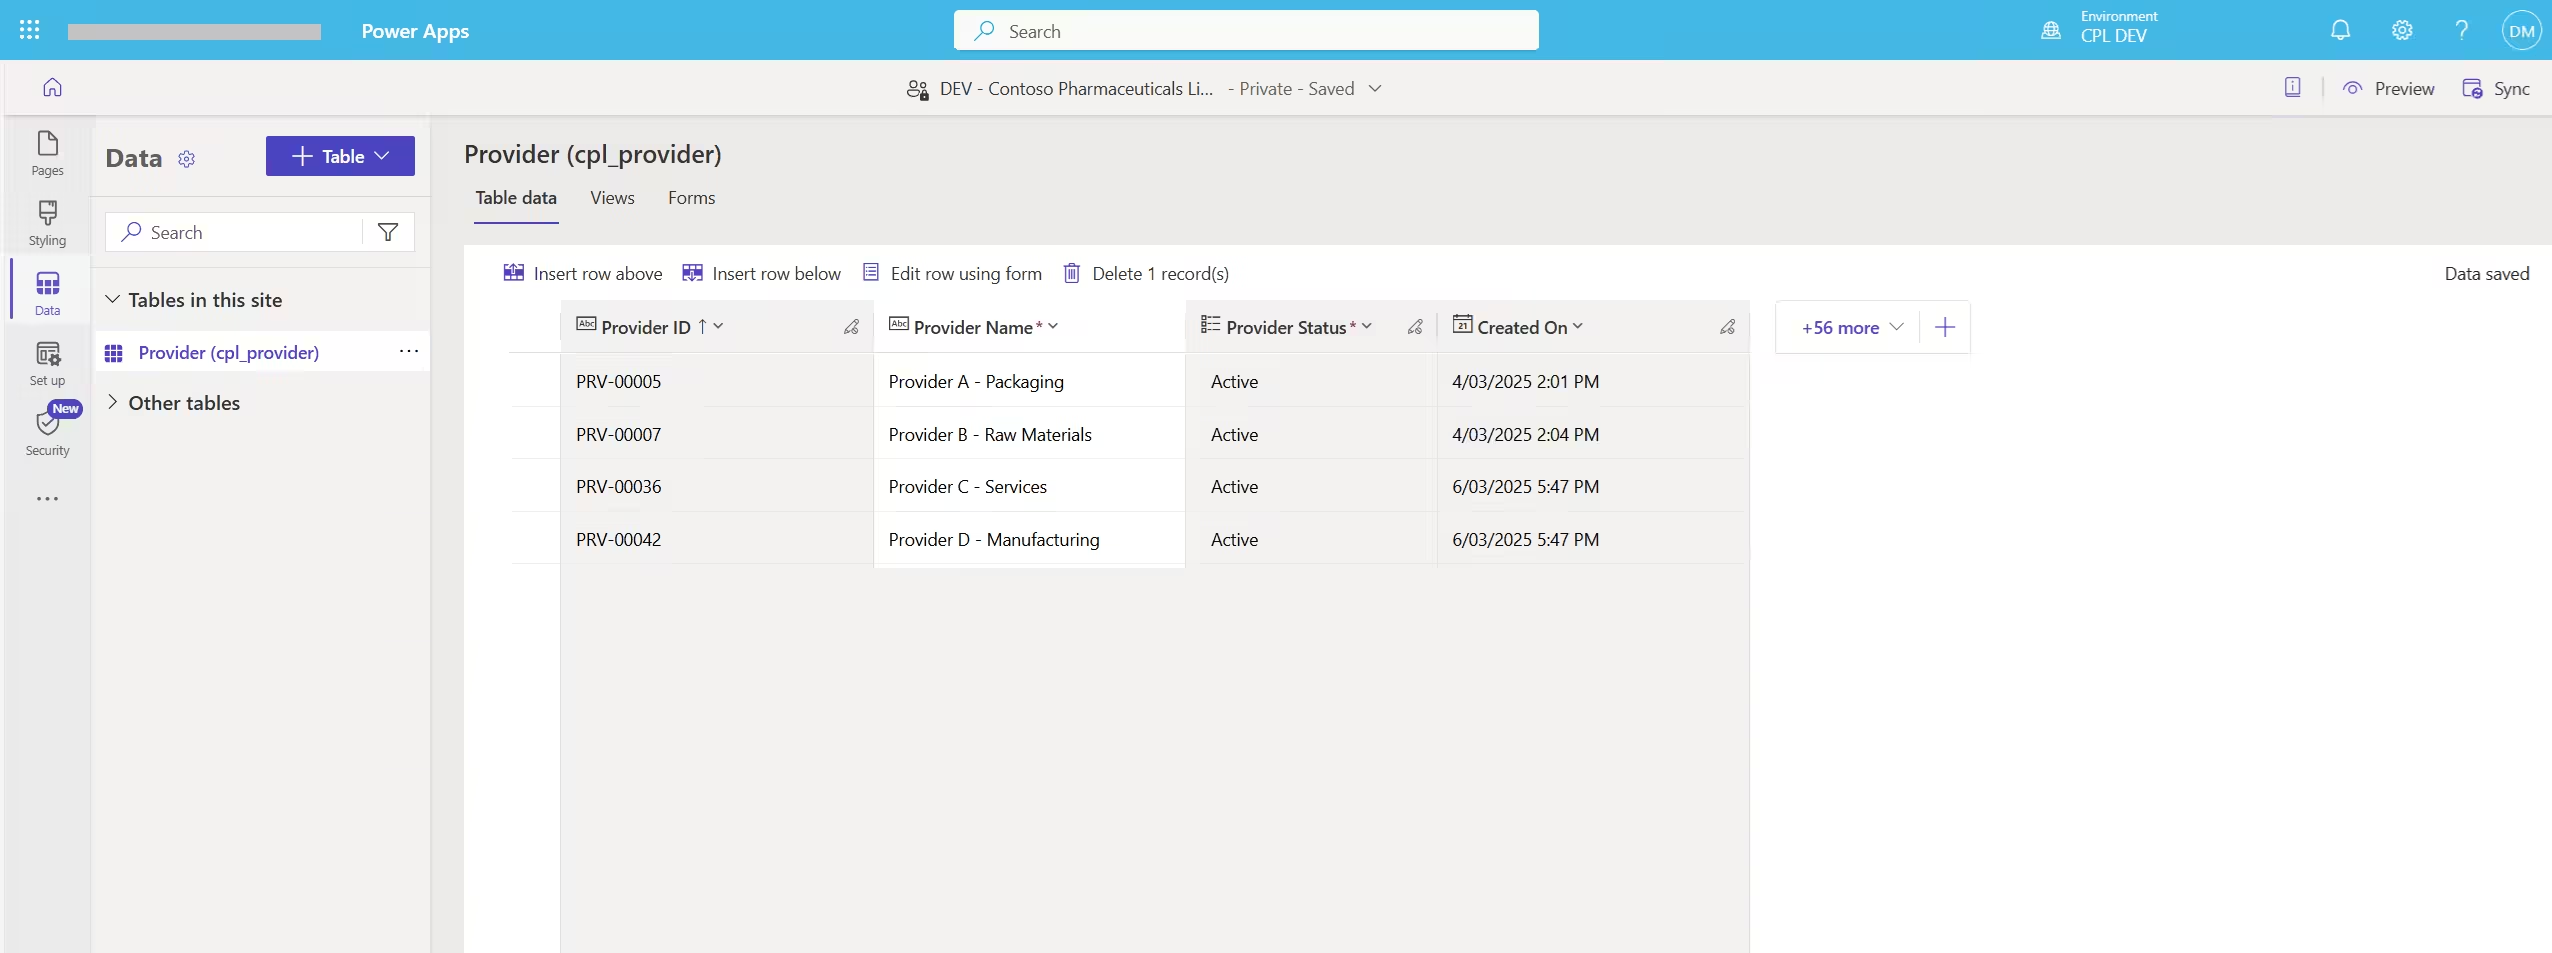
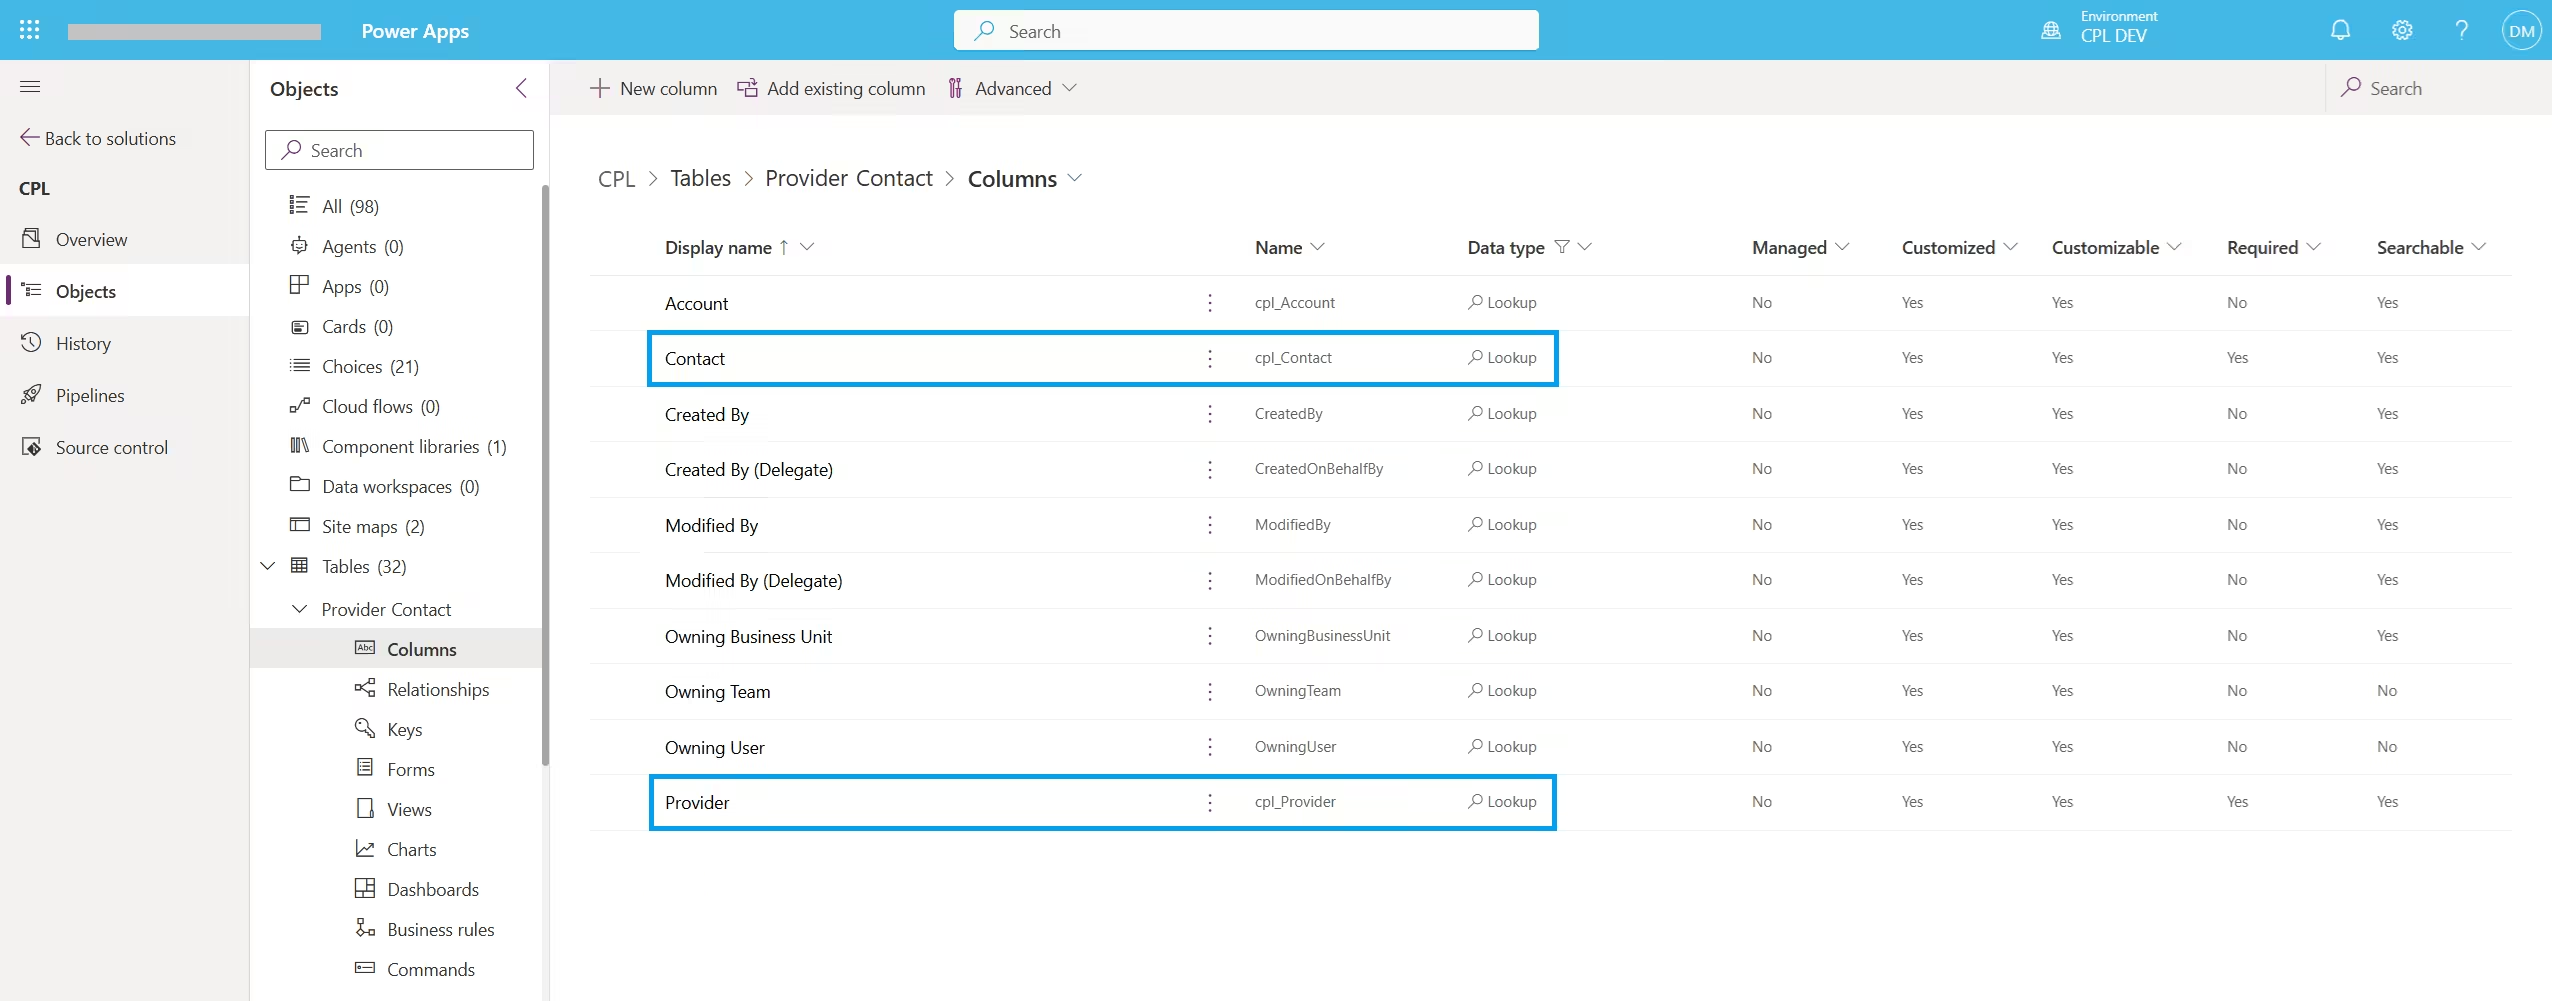
Start by creating an N:N table between the Contact and Provider tables. This enables multiple contacts to be linked to multiple providers
Step 2: Populate the relationship table
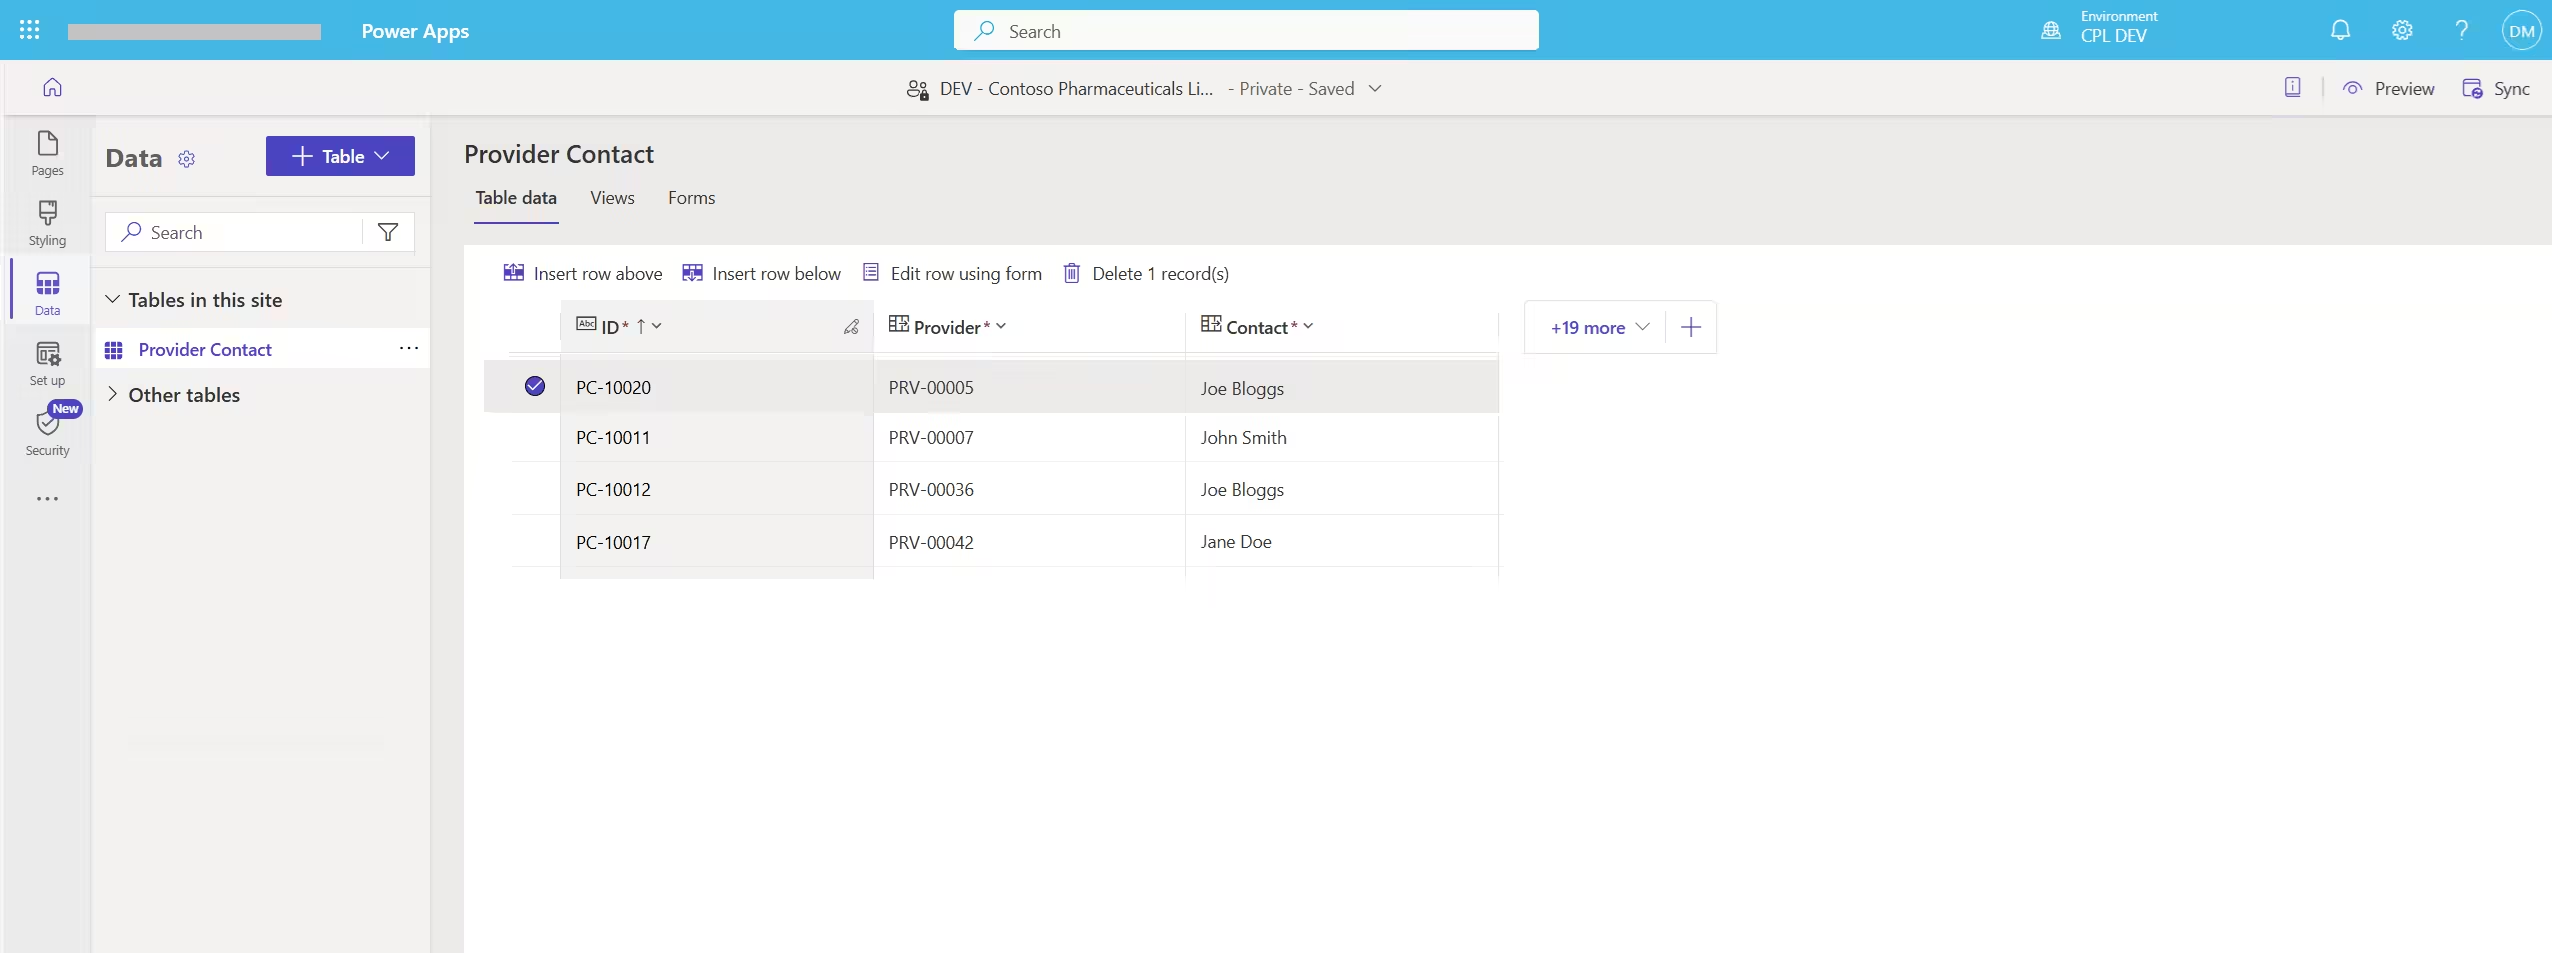
Next, populate the relationship table with records that define which contacts should have access to which providers
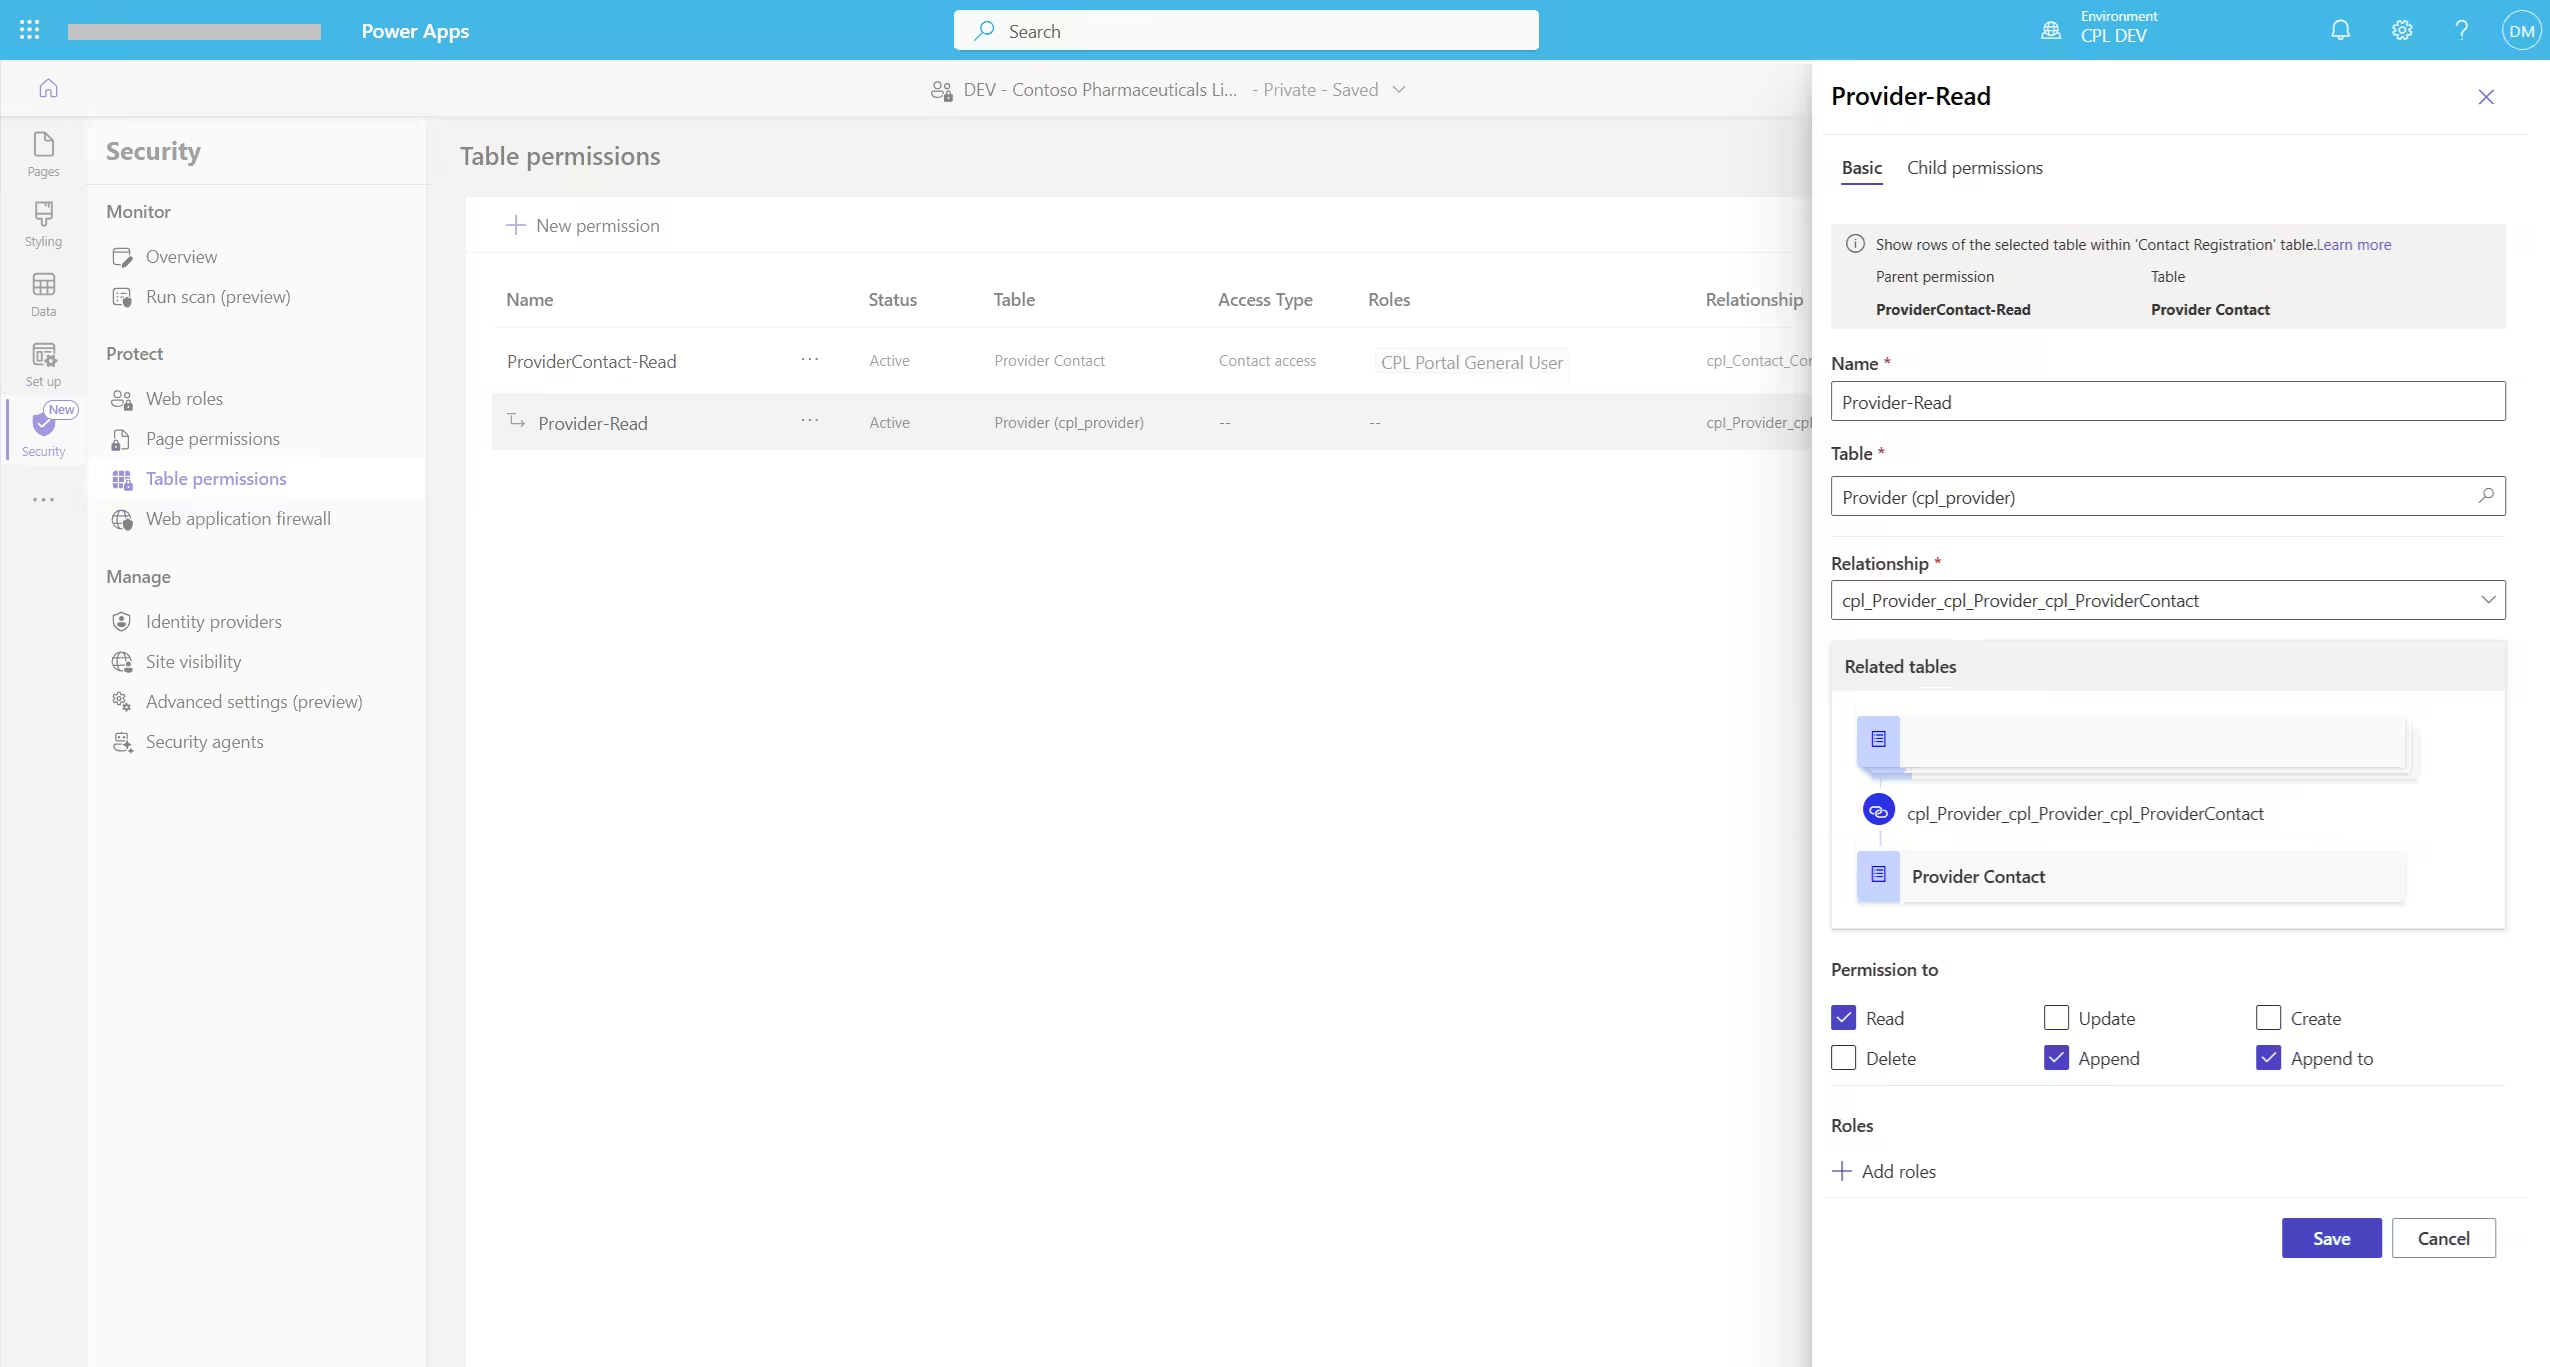
Step 3: Define table permissions
To enforce access control, configure a table permission on the Provider Contact table with Access Type = Contact.
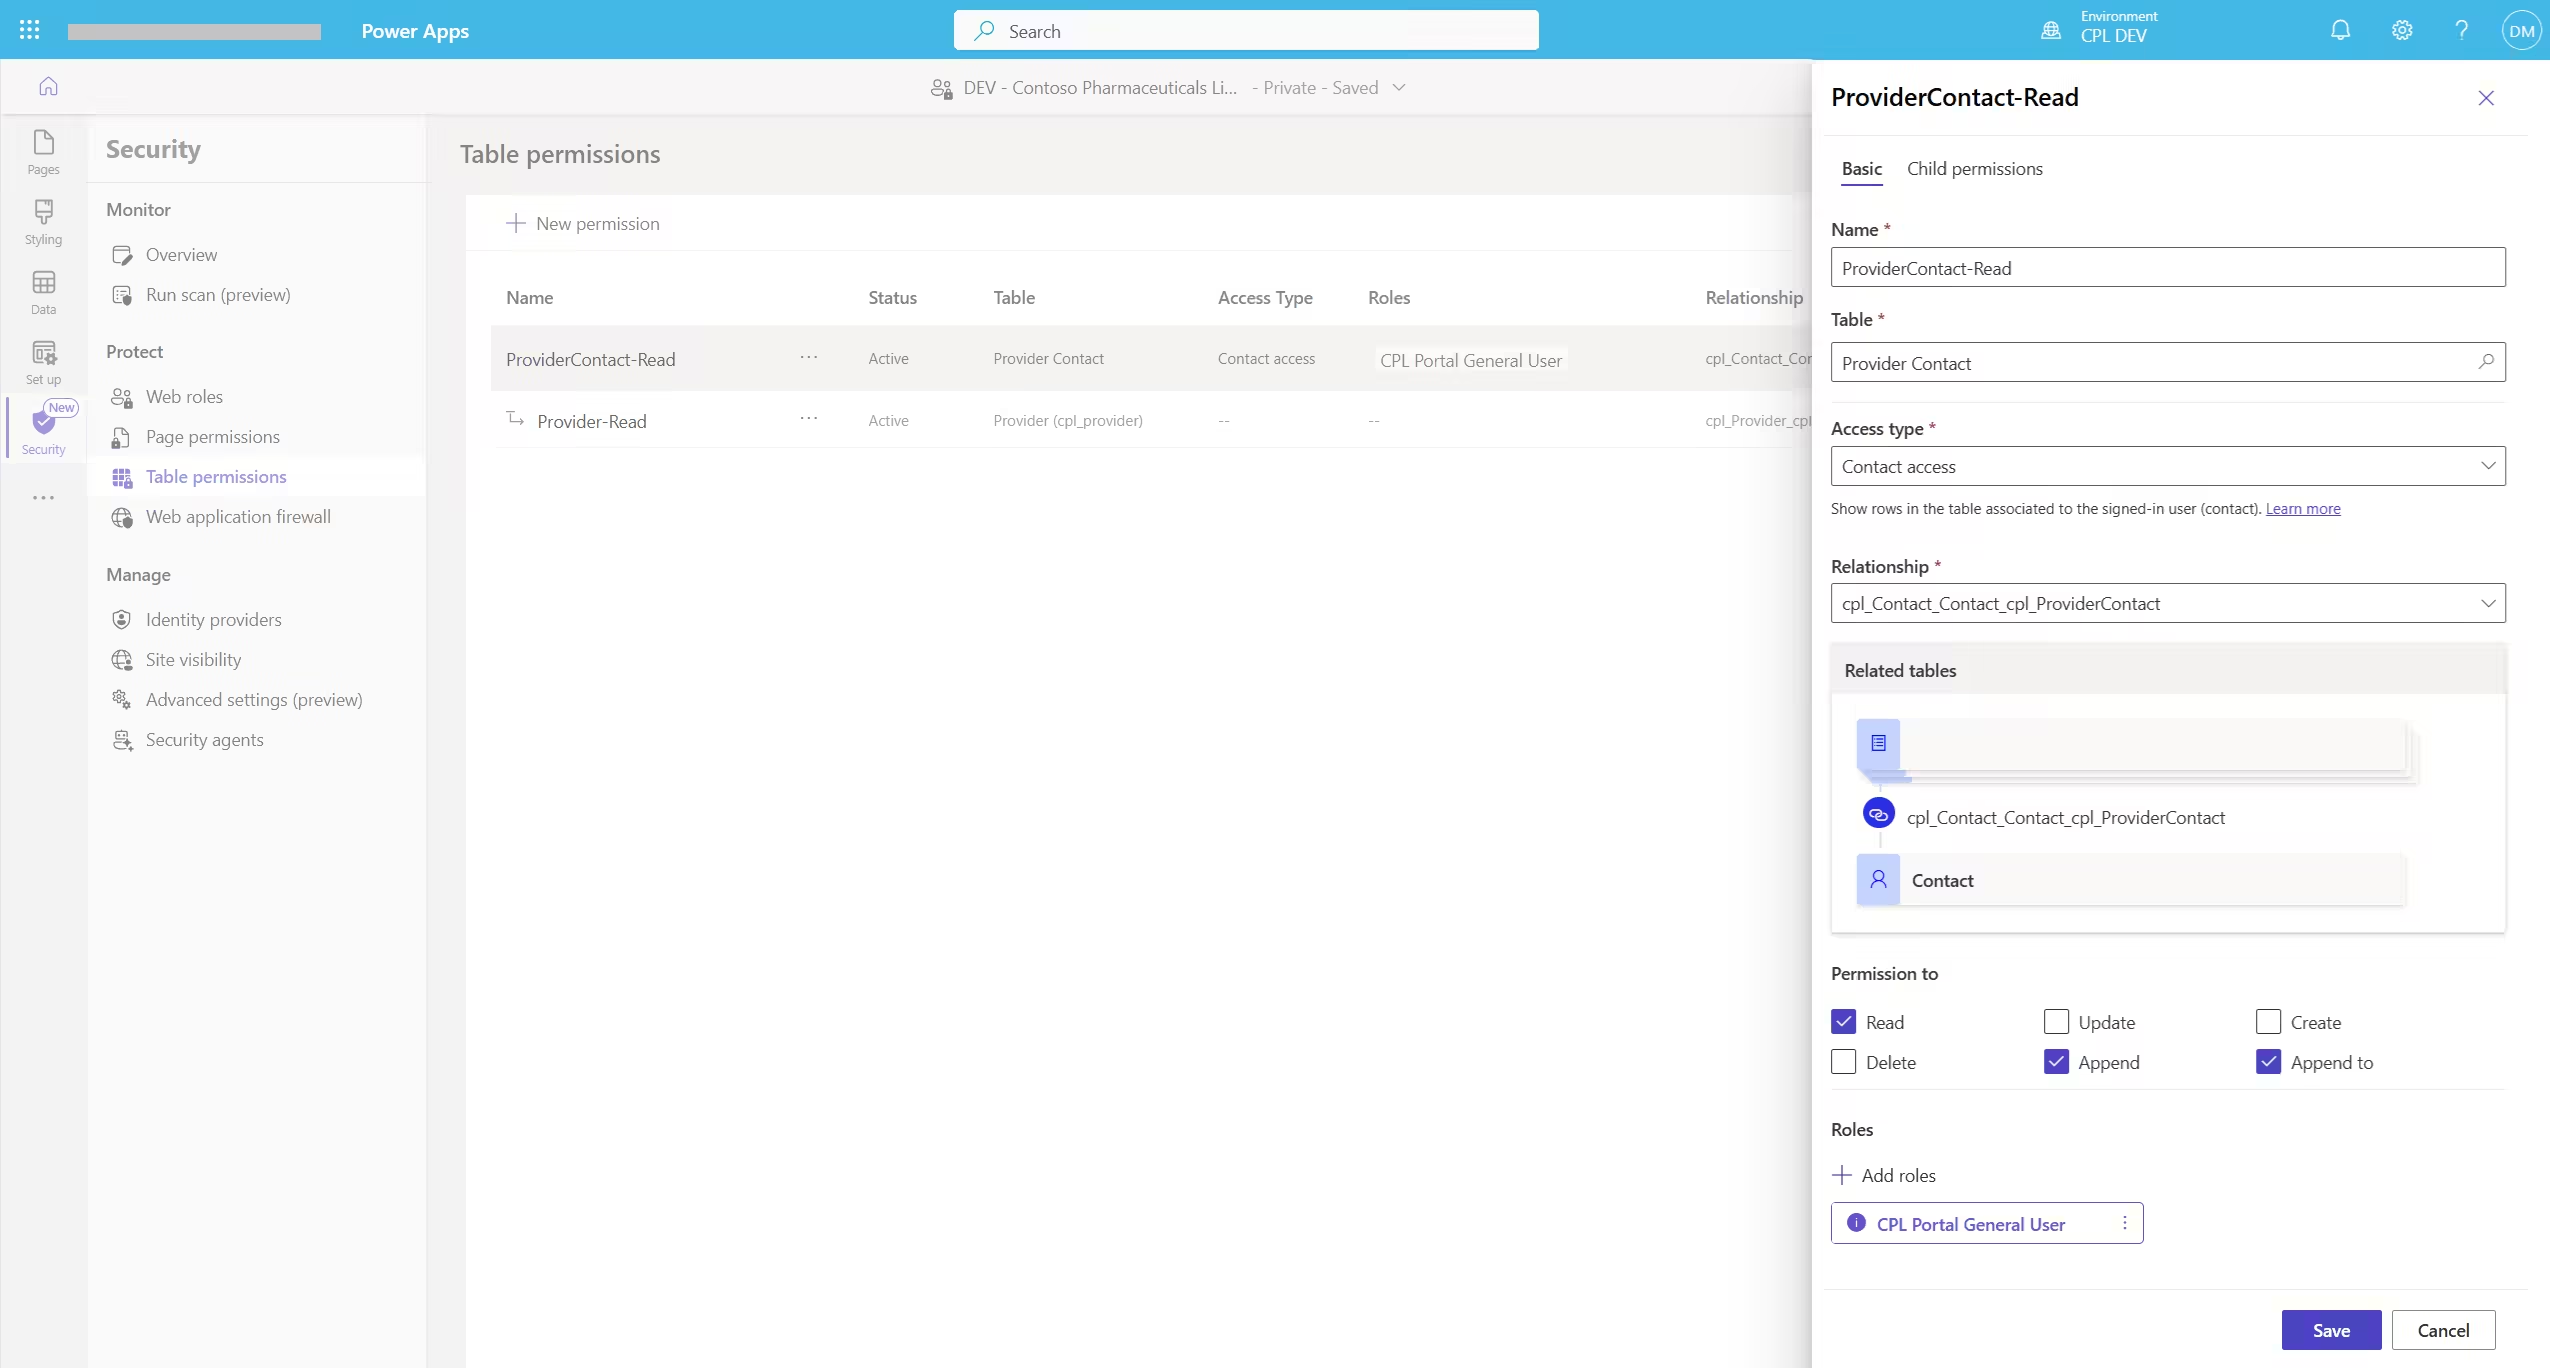
Create a child table permission on the provider table (Figure 5). This ensures the logged in portal user (contact) can only view providers associated through the parent table permission. This parent permission acts as a filter, establishing a cascading permission model, which determines the subset of providers displayed in the list view (Figure 6, 7 & 8)
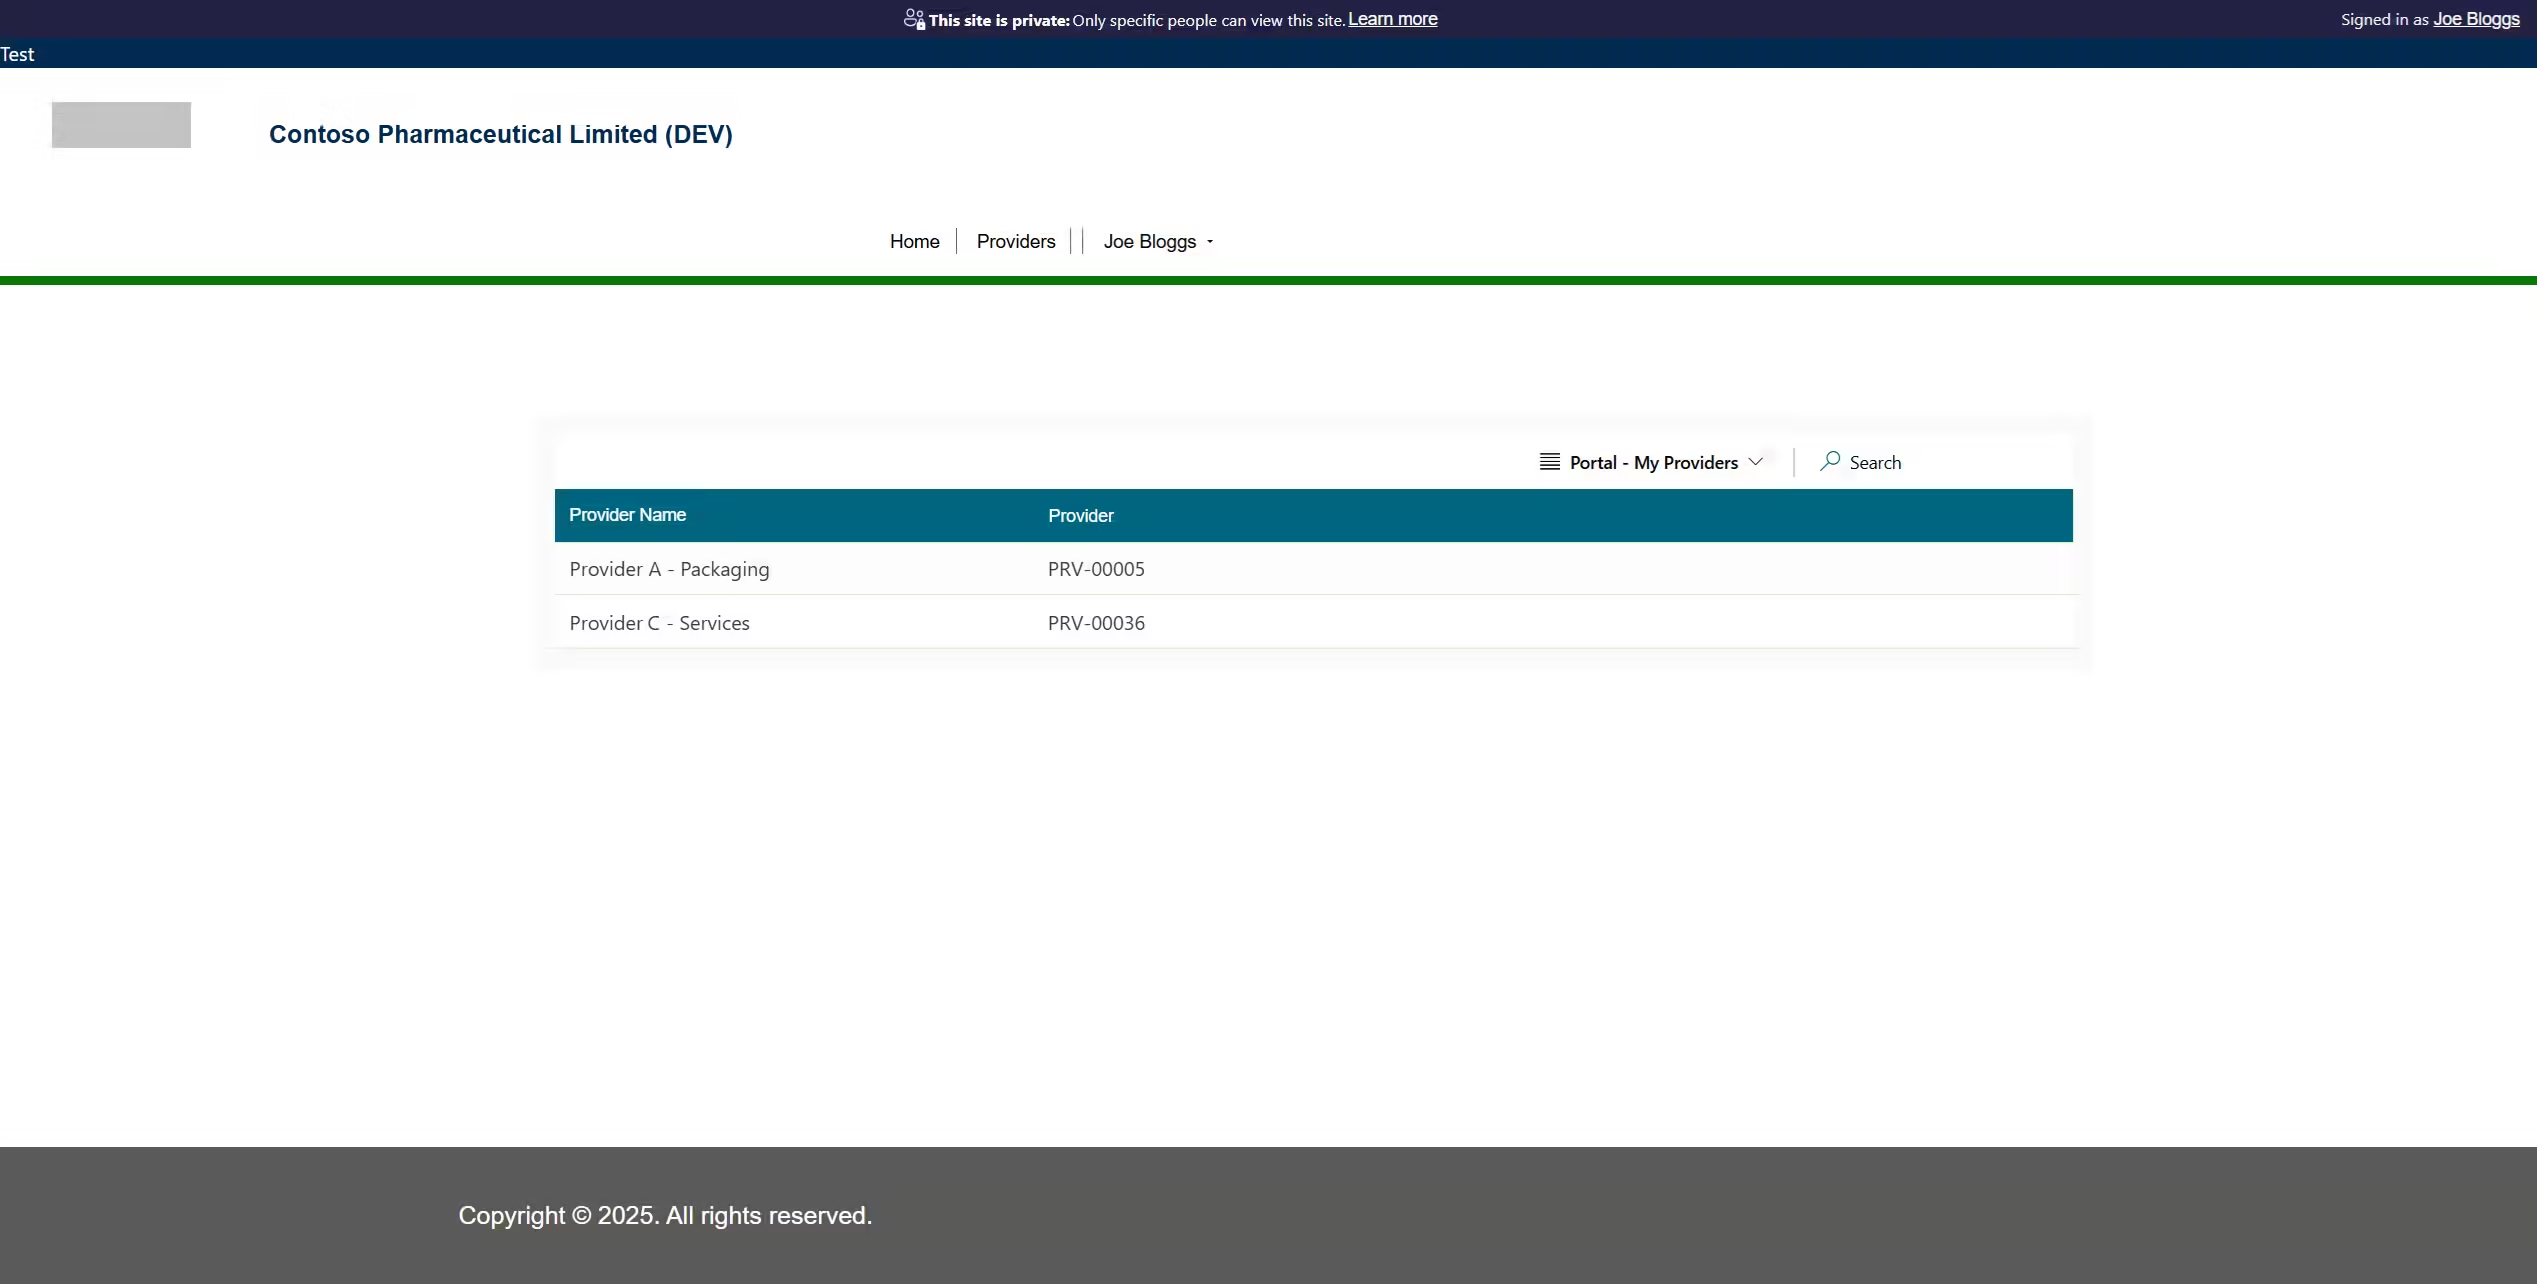
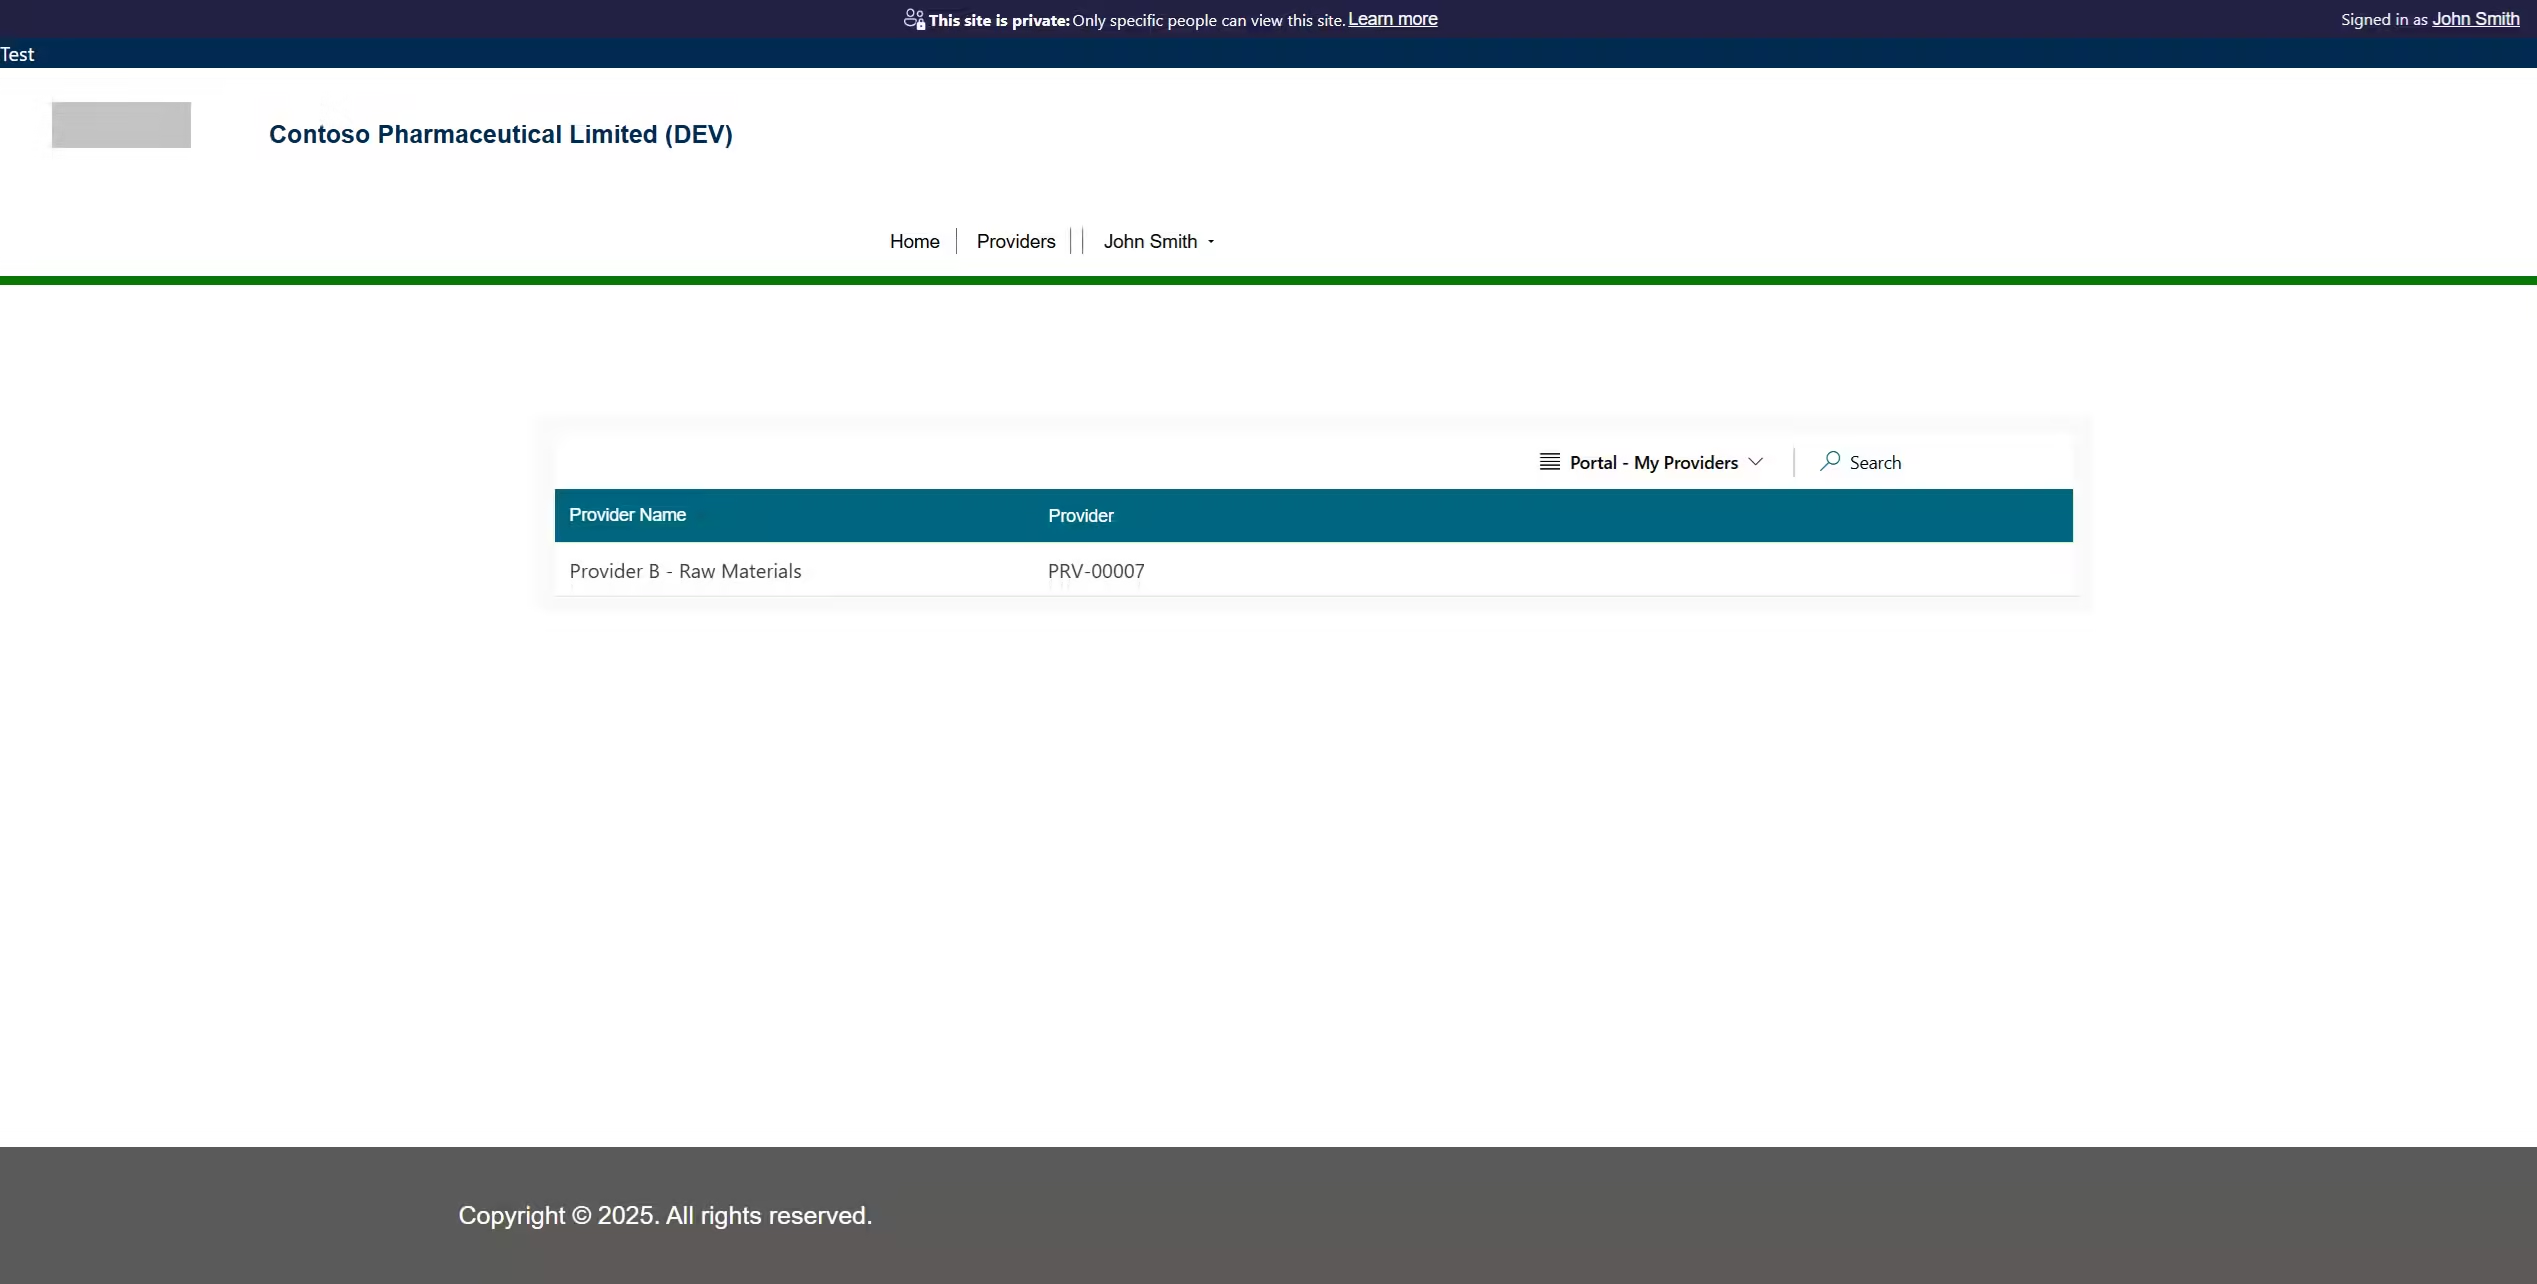
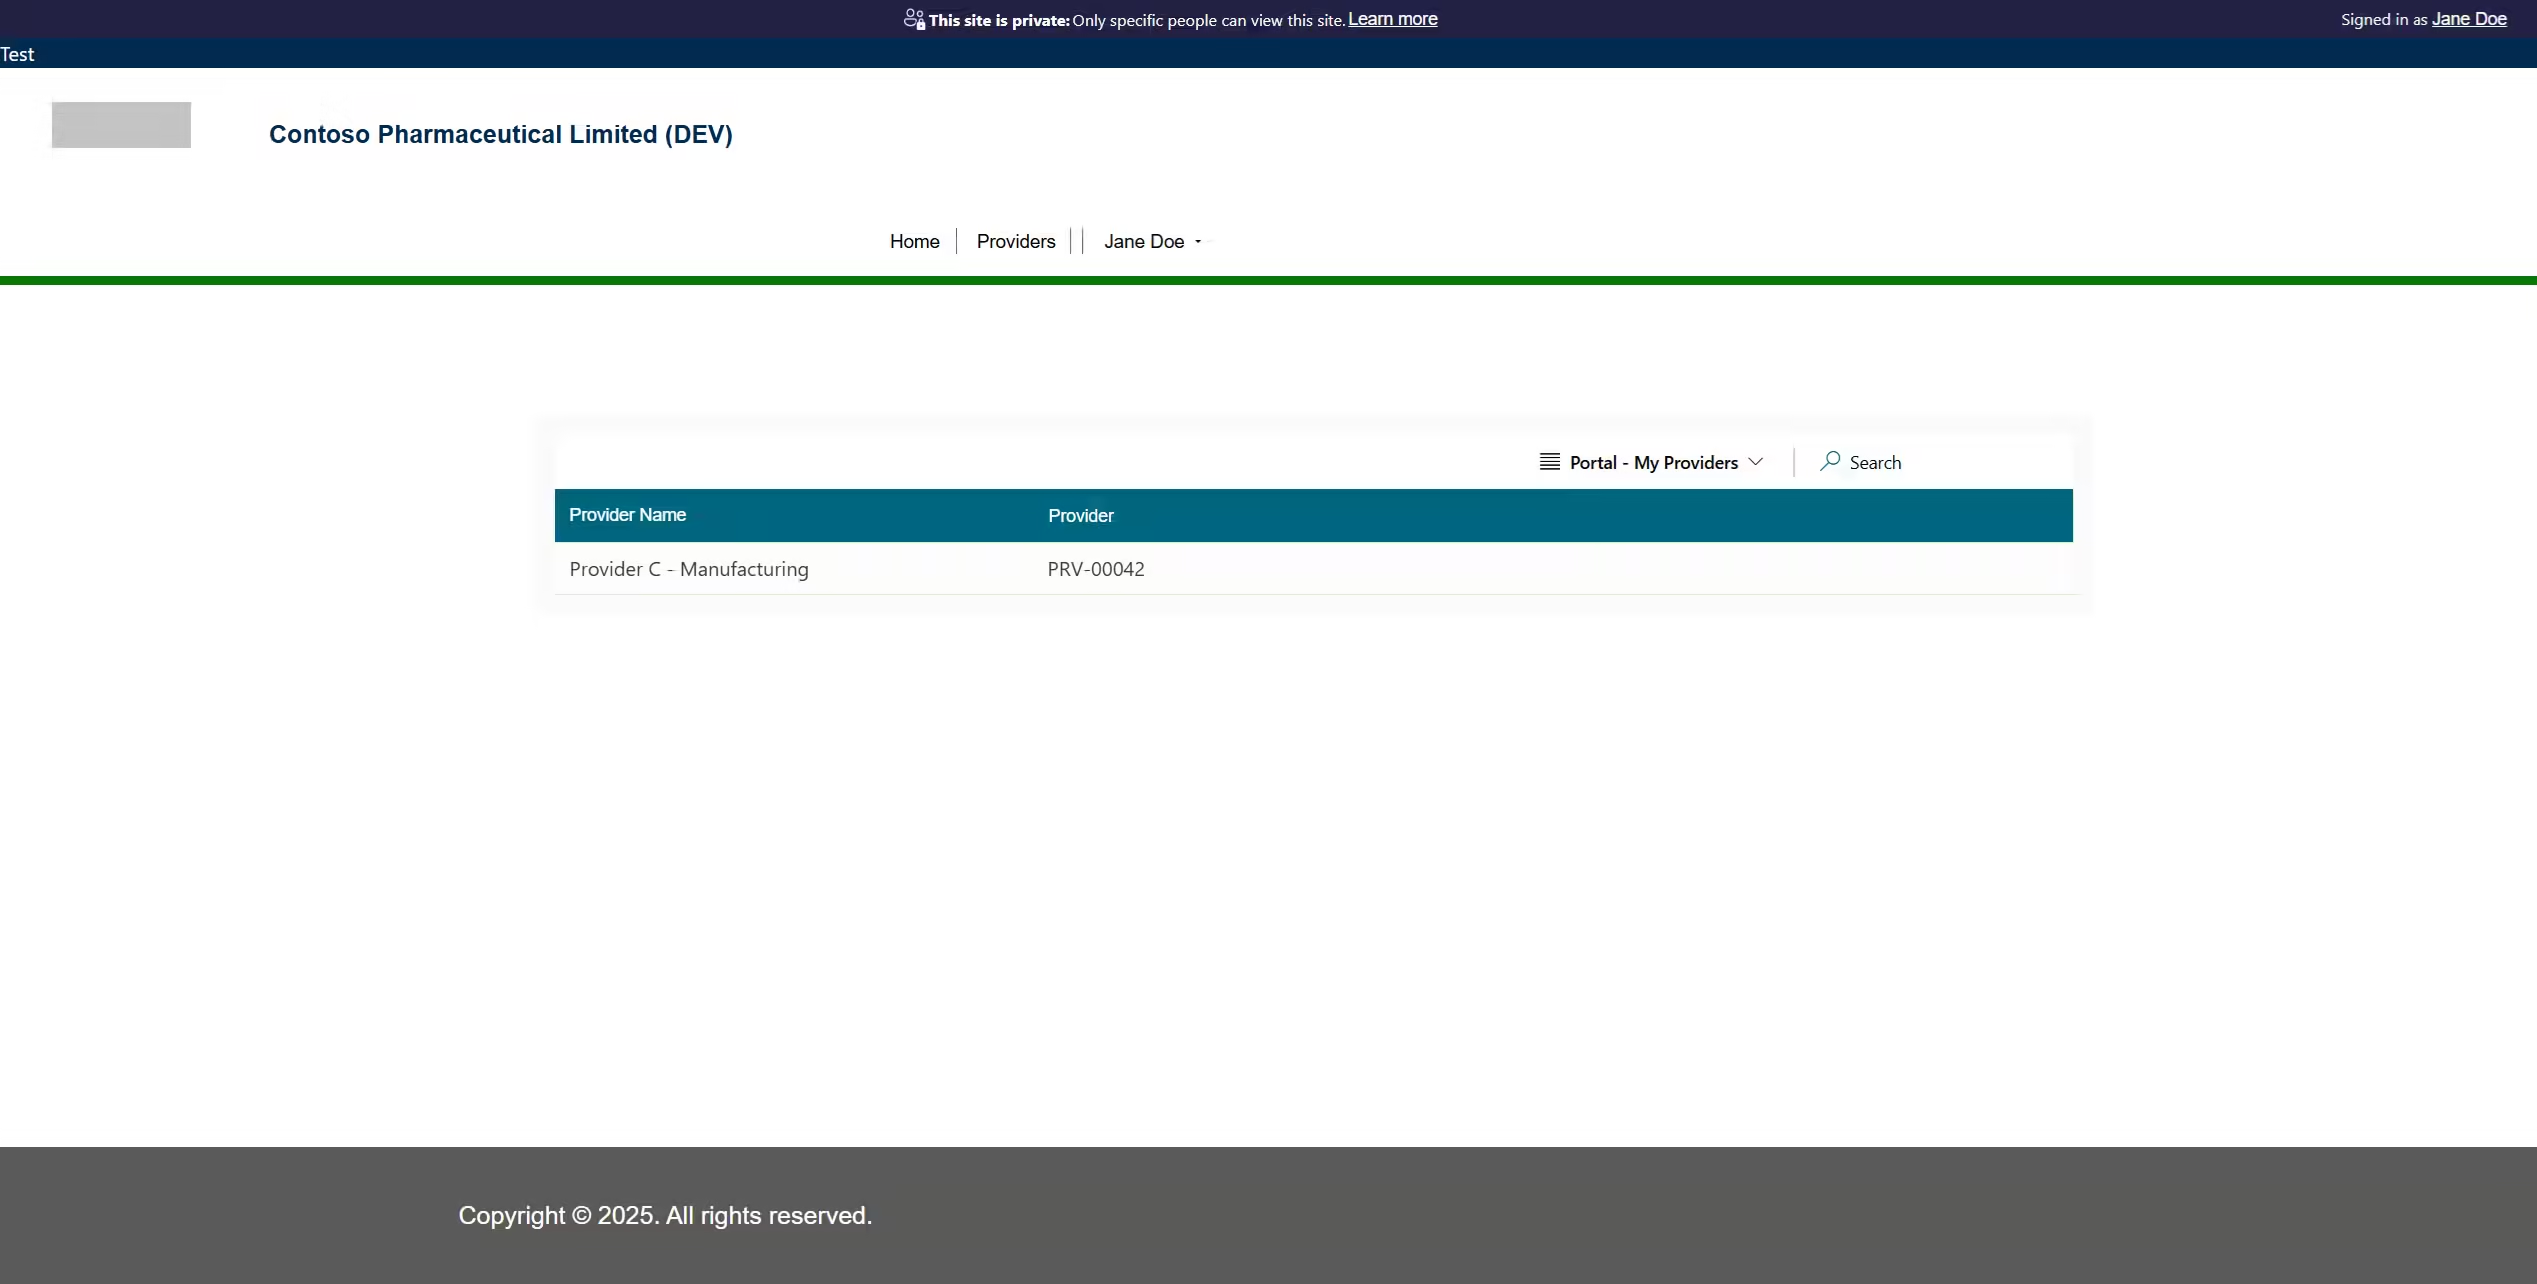
Step 4: Confirm Contact level filtering
With table permissions in place, the logged in portal user (contact) will only see provider records they’re associated to. So, the three contacts will each see a different list of provider records
Summary
By leveraging N:N relationships and contact-level table permissions, it’s possible to precisely control record visibility in Power Pages. This approach enhances data security while delivering tailored user experiences
References
https://learn.microsoft.com/en-us/power-pages/security/table-permissions