This post steps through the migration of data from a legacy system (the legacy data being extracted into spreadsheets) into a Dynamics 365 environment. Specifically, it covers the migration of contacts, including their residential addresses
Note: This is an example of a small migration. For a larger migration, I would consider setting up staging tables rather than using spreadsheets. These tables would mirror the structure of the Dynamics 365 / Dataverse tables
Steps to migrate data into Dynamics 365
Generate empty spreadsheets
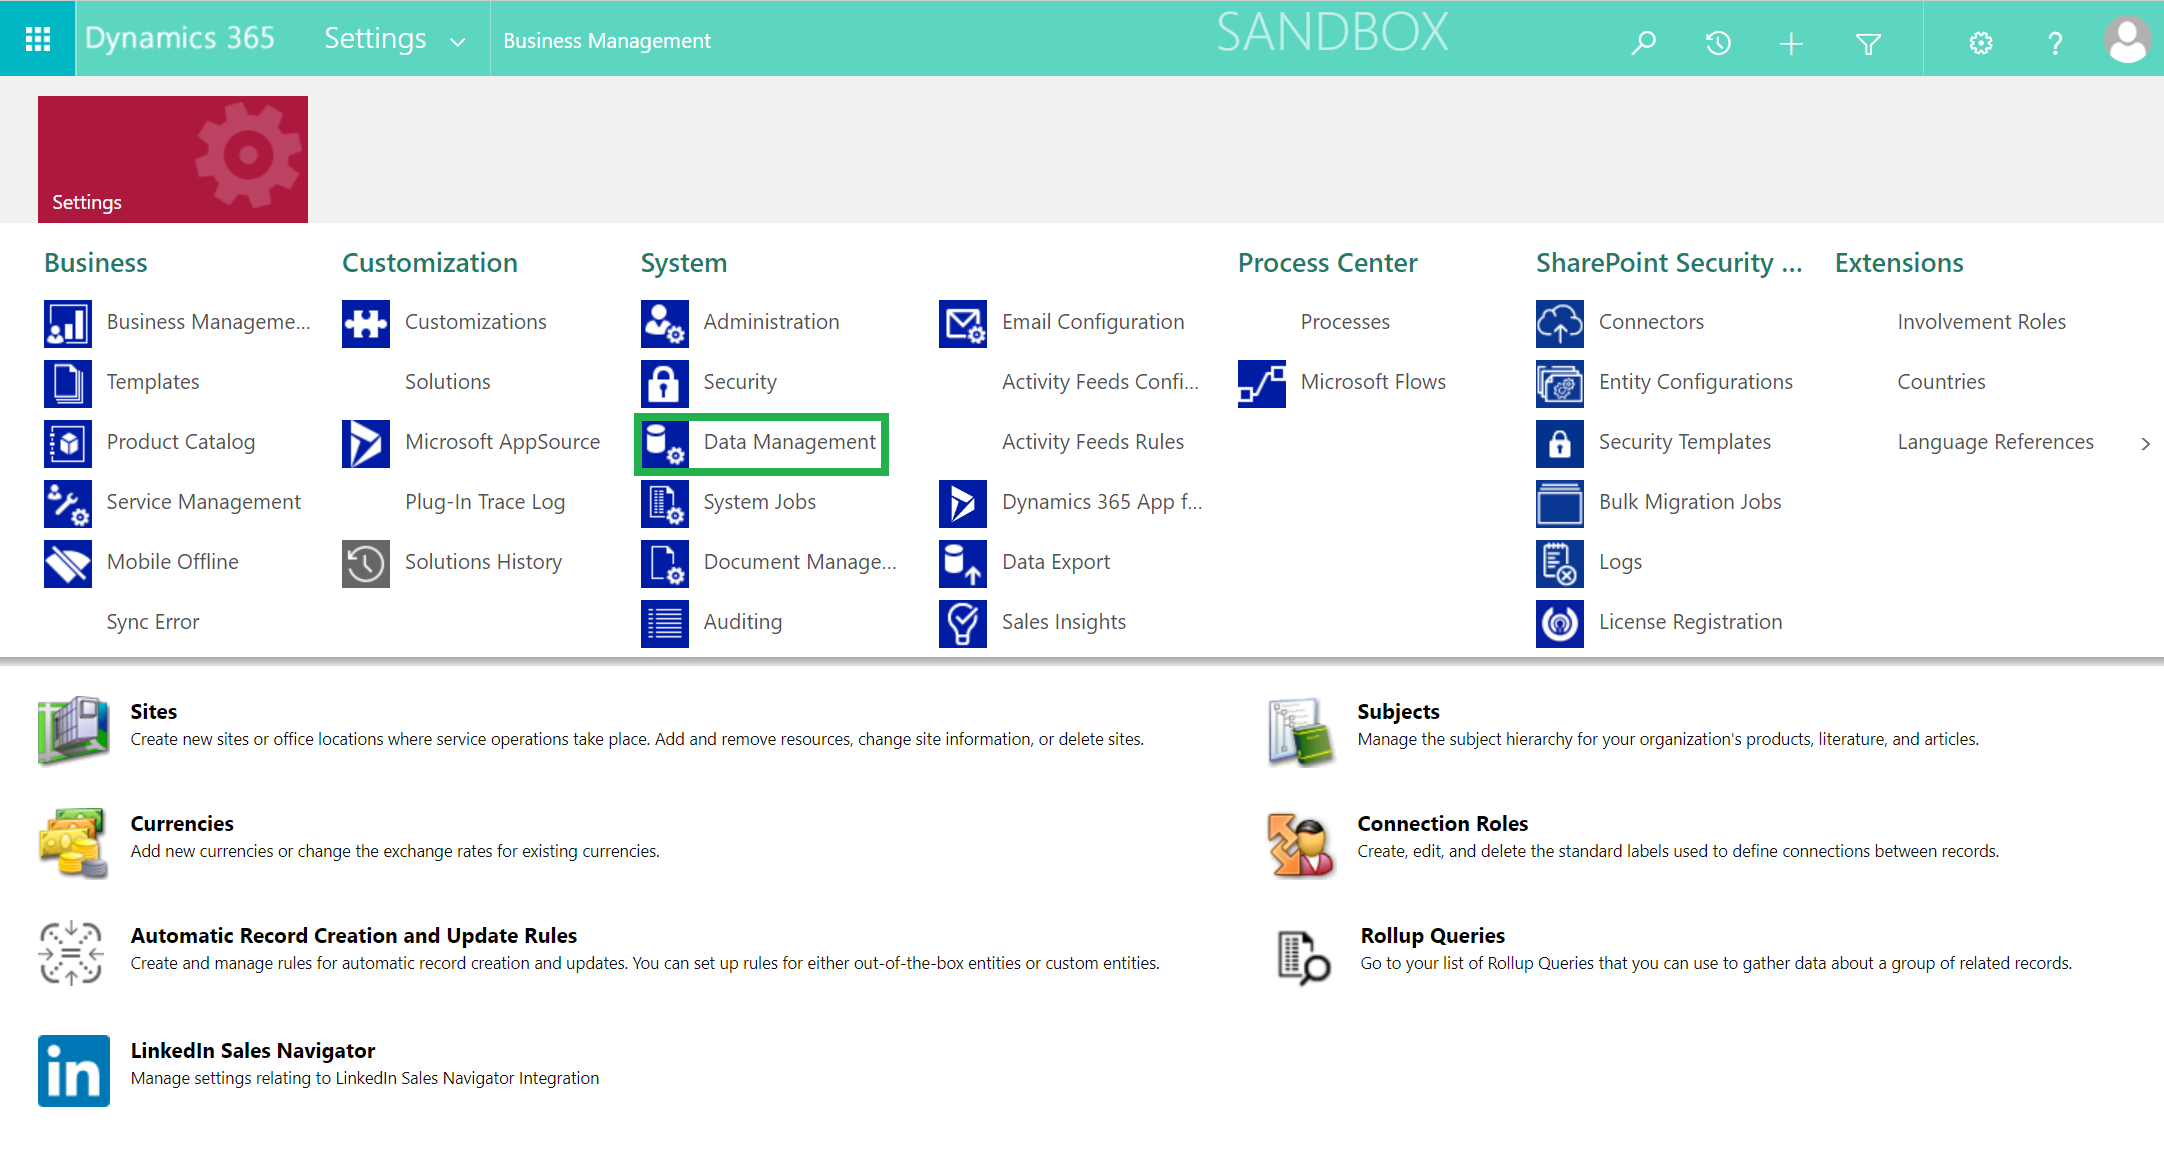
1.) Within Dynamics 365, click on Settings, Data Management (Figure 1)
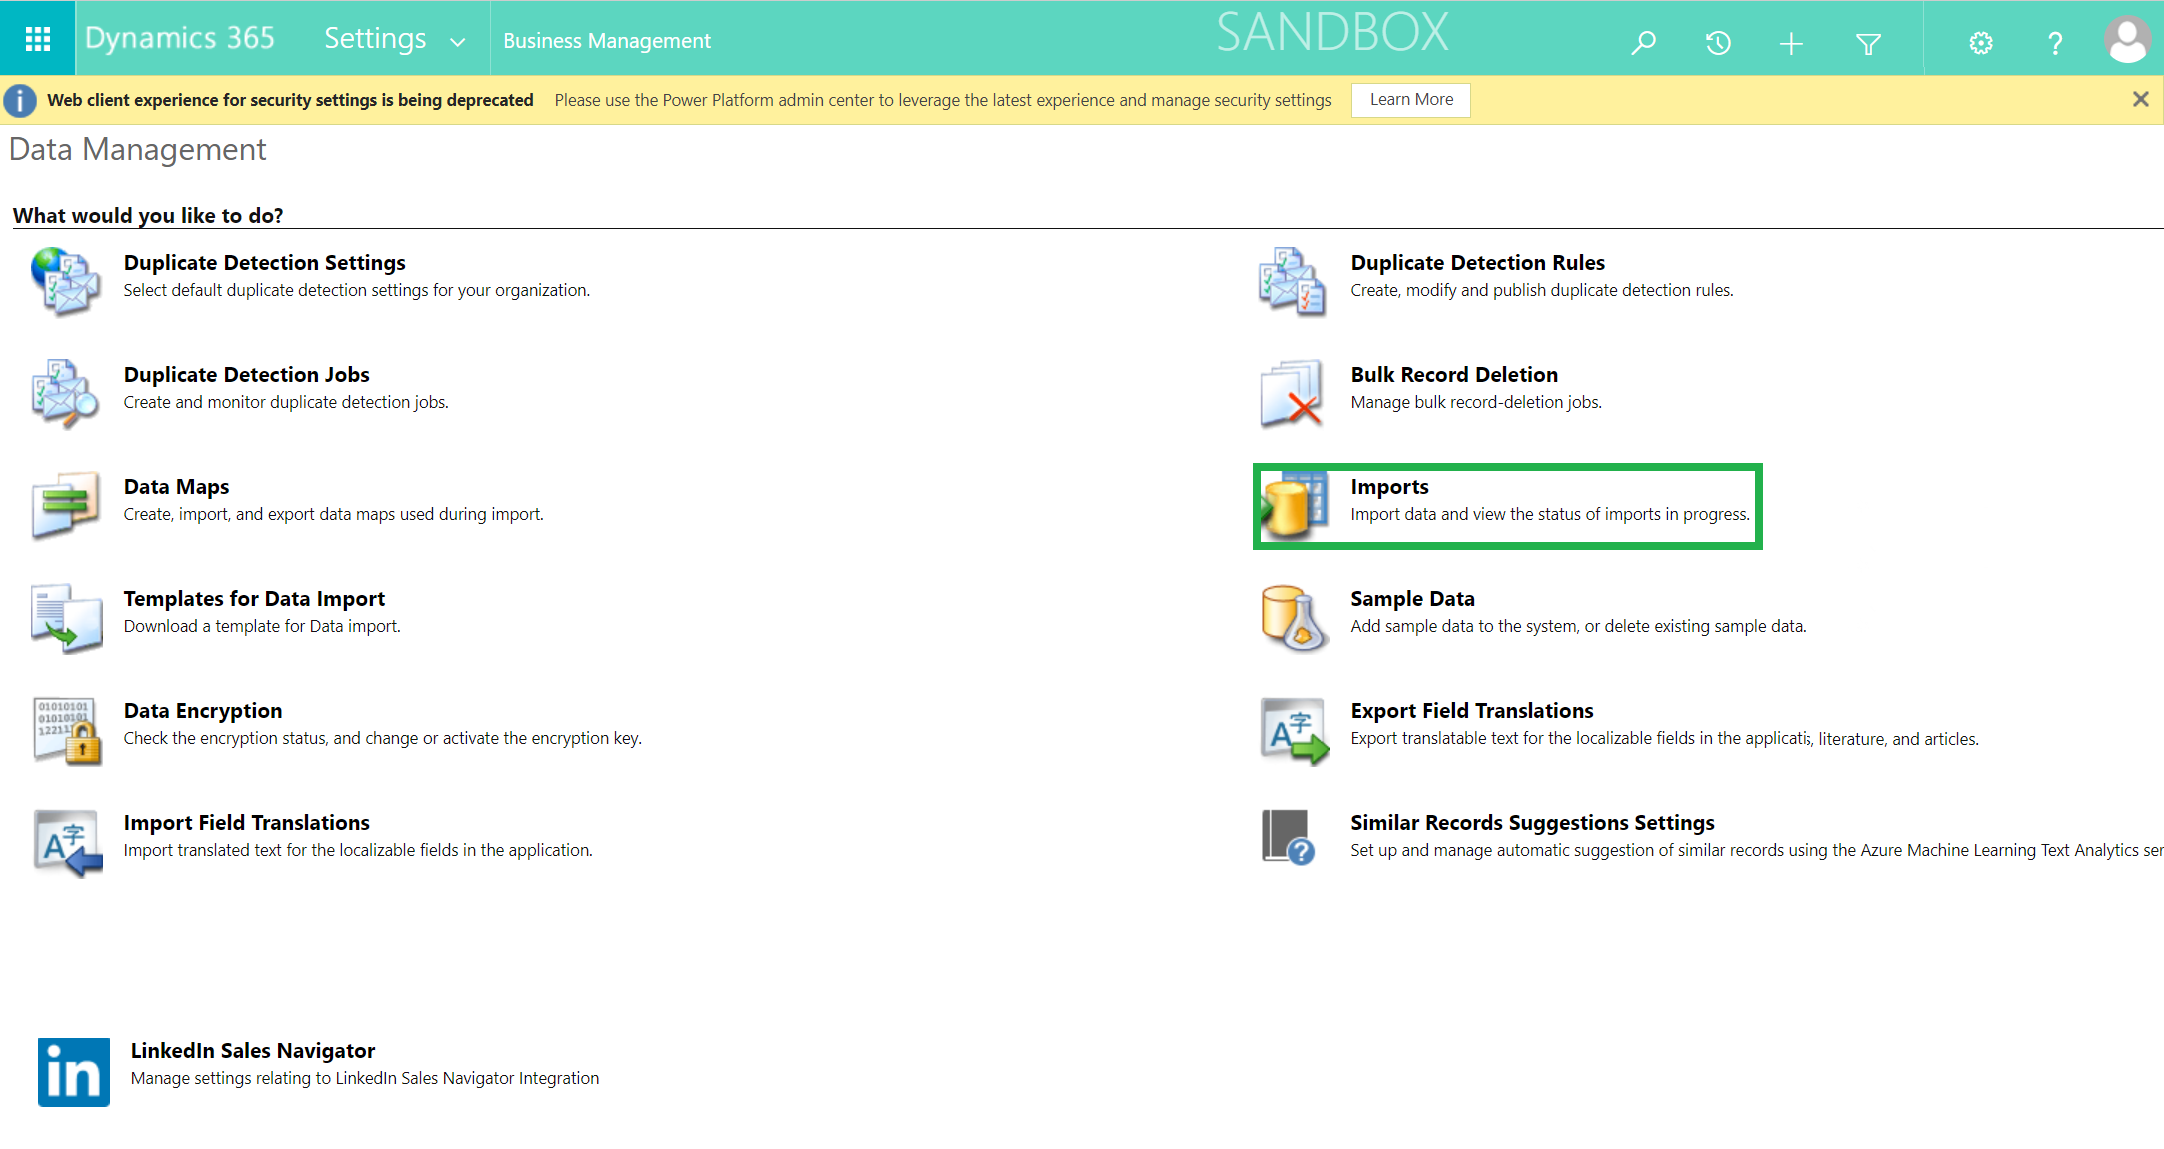
2.) Next, click on ‘Imports’ (Figure 2)
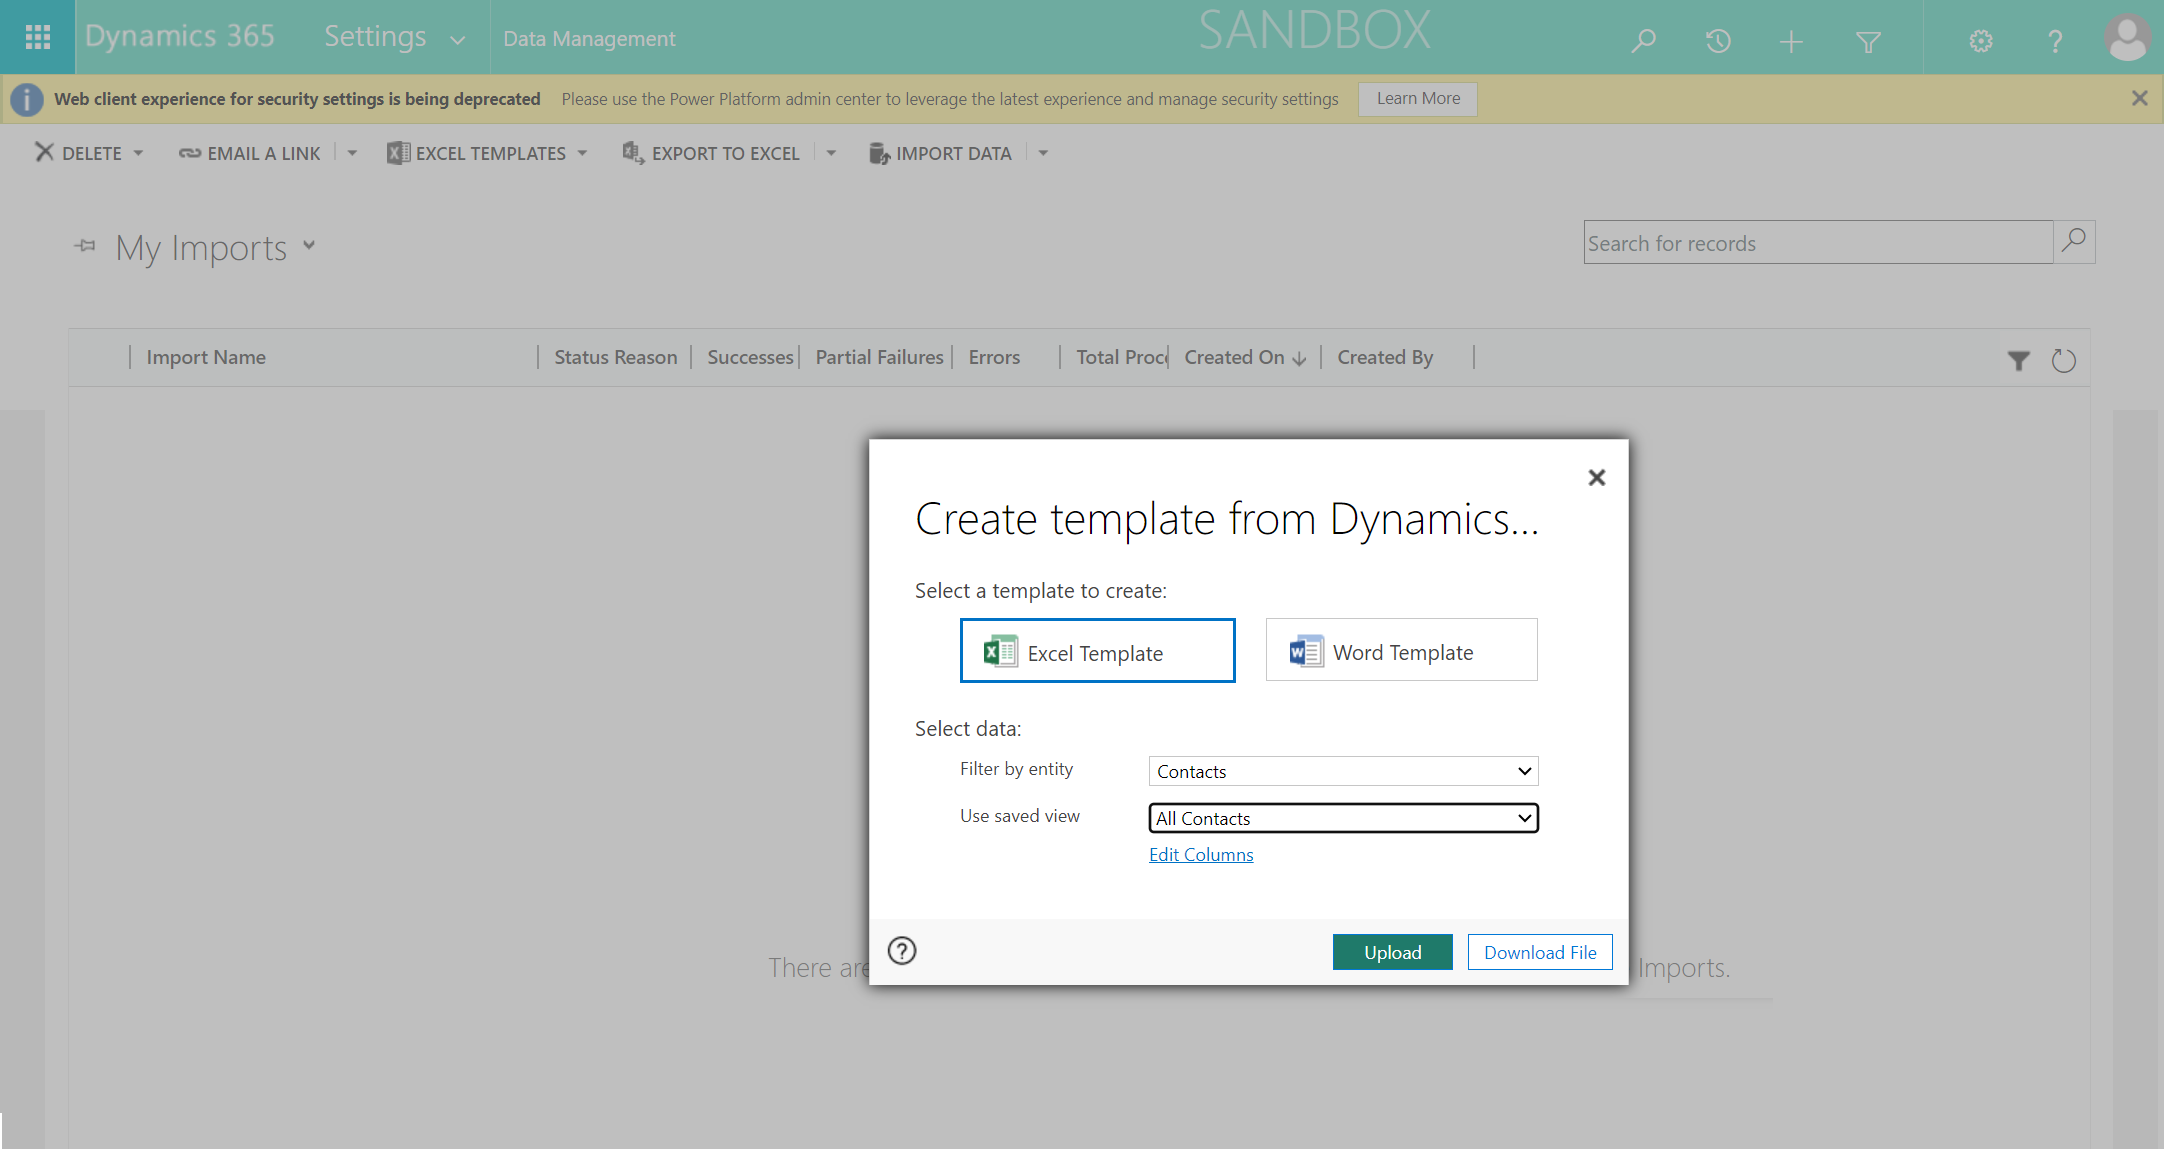
3.) Export the Contact and Address tables into two spreadsheet templates (Figure 3)
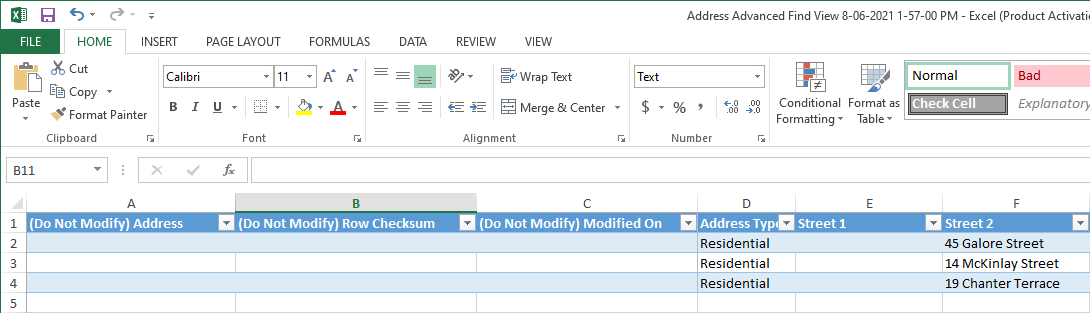
4.) Clear any data contained in the spreadsheets (Figure 4)
Populate the spreadsheets
5.) Cleanse and apply uniform formatting to the legacy data displayed in Figure 5. For example, ensure the formatting of the ‘Date of Birth’ in each record matches

6.) Copy the cleansed legacy data into the ‘Contact’ and ‘Address’ spreadsheets created in the previous section.
(Although not shown in this example, if the ‘created on’ date for each legacy record needs to be maintained, map this value to the Dataverse column ‘Record Created On’ (logical name overriddencreatedon). The value placed here will be written to the Dataverse column ‘Created on’ during the data import process.)
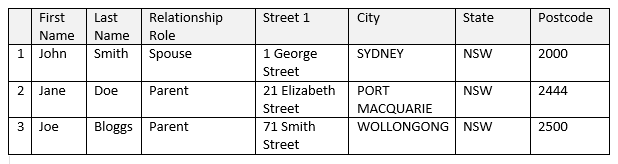
7.) Take the ‘Address’ spreadsheet (Figure 6) and ensure each address is unique by highlighting the cells in the ‘Street 1’ column, selecting ‘Conditional Formatting’, ‘Highlight Cell Rules’ and finally selecting ‘Duplicate Values’.

8.) Create a column called ‘AddressRef’ which will be used to link the ‘Address’ spreadsheet to the ‘Contact’ spreadsheet
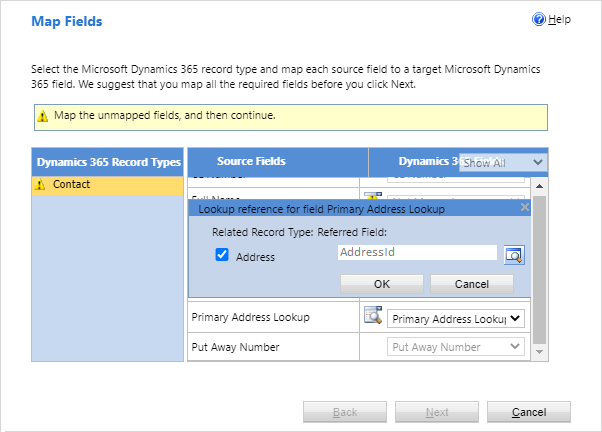
9.) Take the ‘Contact’ spreadsheet and create a VLOOKUP to the address spreadsheet. Also, link the Contact spreadsheet to the Address spreadsheet via the column ‘Primary Address Lookup’

10.) Ensure that the Option set and Owner columns within the spreadsheets contain values that already exist in the Dynamics 365 environment. Otherwise, the import of that particular spreadsheet would fail.
11.) Place the spreadsheets on OneDrive in share them securely and maintain their version history. (I needed to set the spreadsheet on One Drive to Region – Australia to resolve issues I was having with dates. That is, some date values where showing in Australian format whilst others were shown in US format.)
Import the data into Dynamics 365
12.) Import the Address spreadsheet into Dynamics 365
13.) Then import the Contact spreadsheet making sure to set the lookup reference (Figure 8)
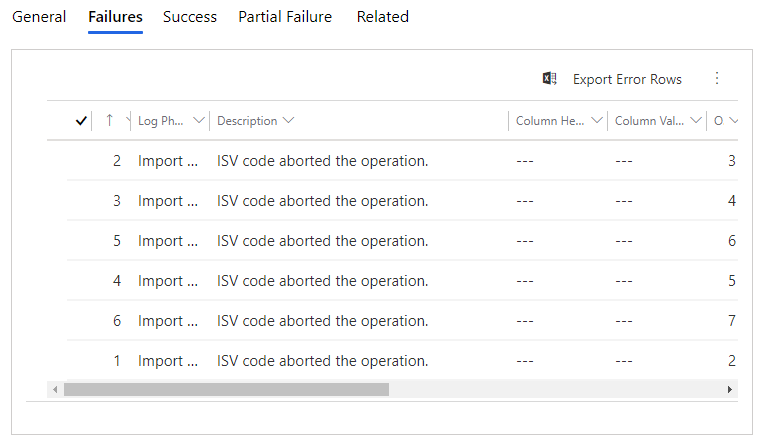
Note: An active plugin or workflow may stop data being imported (Figure 9). An example of this is trying to import invoices when the corresponding mandatory orders don’t yet exist. That is, when a new invoice is created, the plugin/workflow tries to retrieve the corresponding order to perform some logic
Appendix
1.) Updating Business Process Flows (BPFs)
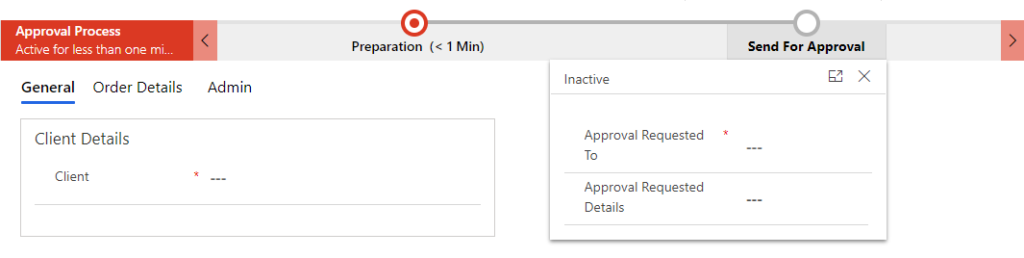
Migrated tables that contain a business process flow may need that flow updated after the migration. Referring to Figure 10, the BPF needs to be placed in the ‘complete’ state.
To place all the relevant BPFs in the complete state, follow these steps
- Use the XrmToolBox BPF plugin to perform a bulk move from the stage ‘Preparation’ to ‘Send For Approval’
- In the ‘Form’ entity, perform a bulk set of the field ‘Approval Requested To’
- For the BPF entity, update
- ‘Completed On’ to current date
- ‘Status Reason’ to finished
- ‘Status’ to inactive
2.) Prepare legacy data to be imported into Dynamics 365
The example shown in Figure 5 takes legacy data from one legacy database table and maps it to two Dynamics 365 tables. This example takes two legacy database tables (Figure 11 and 12) and consolidates them into one Dynamics 365 table

The following SQL retrieves the data from the two legacy tables and maps them to the columns of a Dynamics 365 table (Figure 13)

The result set is then placed imported into the Dynamics 365 environment via a spreadsheet or using the XrmToolBox plugin ‘SQL 4 CDS’
3.) Prepare plugin generated data to be imported into Dataverse (Dynamics 365)
In this example, consider when contact records are migrated from a legacy system into a Dataverse production environment. As part of this migration, plugins in the Dataverse environment are turned off. So as a post migration step, a contact table column called cpl_personage (which is normally populated by a plugin) needs to be populated.
Within the SQL 4 CDS plugin in the XrmToolBox:
a.) In the Dataverse staging environment, the following record (just showing one record for simplicity) is inserted in a Dataverse staging table with JSON data which is normally generated by a plugin e.g. {“active”:”0,0,0,0″,”inactive”:true}
insert into cpl_stagingtable (cpl_contactid, cpl_personage) values (’92cf9ceb-e960-9dd0-f643-0002c03c0d07′, ‘{“active”:”0,0,0,0″,”inactive”:true}’)
b.) Then, in the Dataverse production environment, the cpl_personage column in the contact record is updated with the data stored in the staging environment
update c set c.cpl_personage = d.cpl_personage from contact c inner join [Staging Environment].dbo.cpl_stagingtable d on d.cpl_contactid = c.contactid where c.cpl_personage is null OPTION (USE HINT (‘BYPASS_CUSTOM_PLUGIN_EXECUTION’))
Further reading
Maintain the same guids in Dynamics 365 environments
References
https://support.microsoft.com/en-us/office/vlookup-function-0bbc8083-26fe-4963-8ab8-93a18ad188a1