This post explains how to ‘re-wire’ the ‘Add Existing Court Orders’ button (Figure 1) to call the Xrm.Utility.lookupObjects client API (with custom defined parameters). The purpose of this being to control which Court Order records are available for selection in Figure 2.
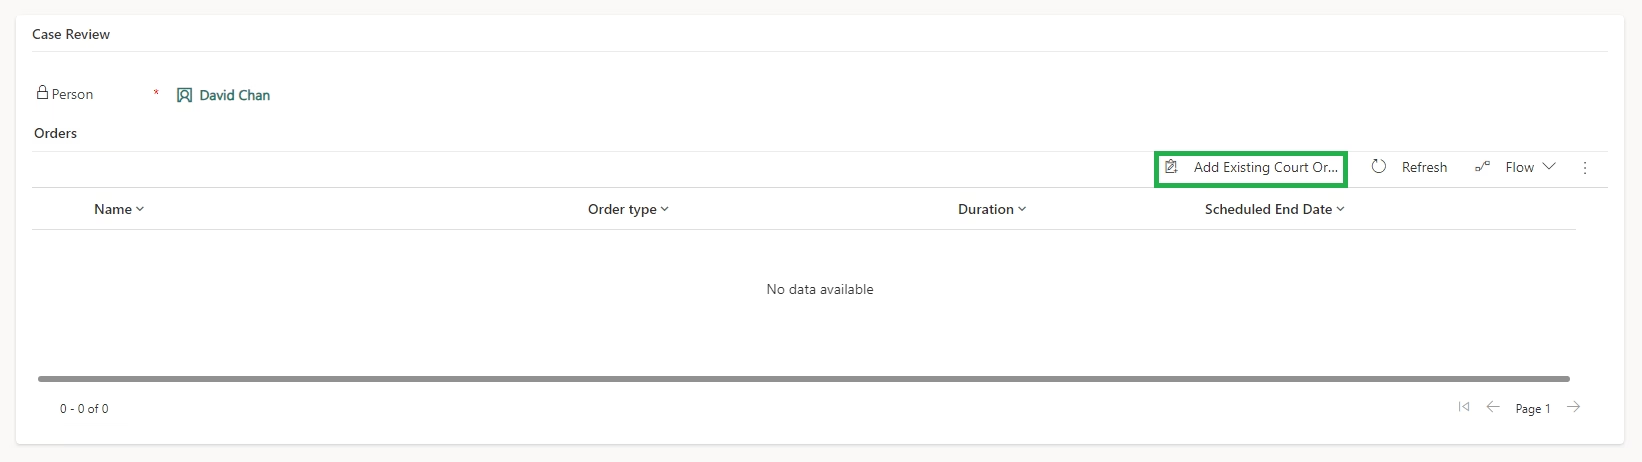
Figure 2 shows the ‘Lookup Records’ dialog which is generated when Xrm.Utility.lookupObjects is executed.
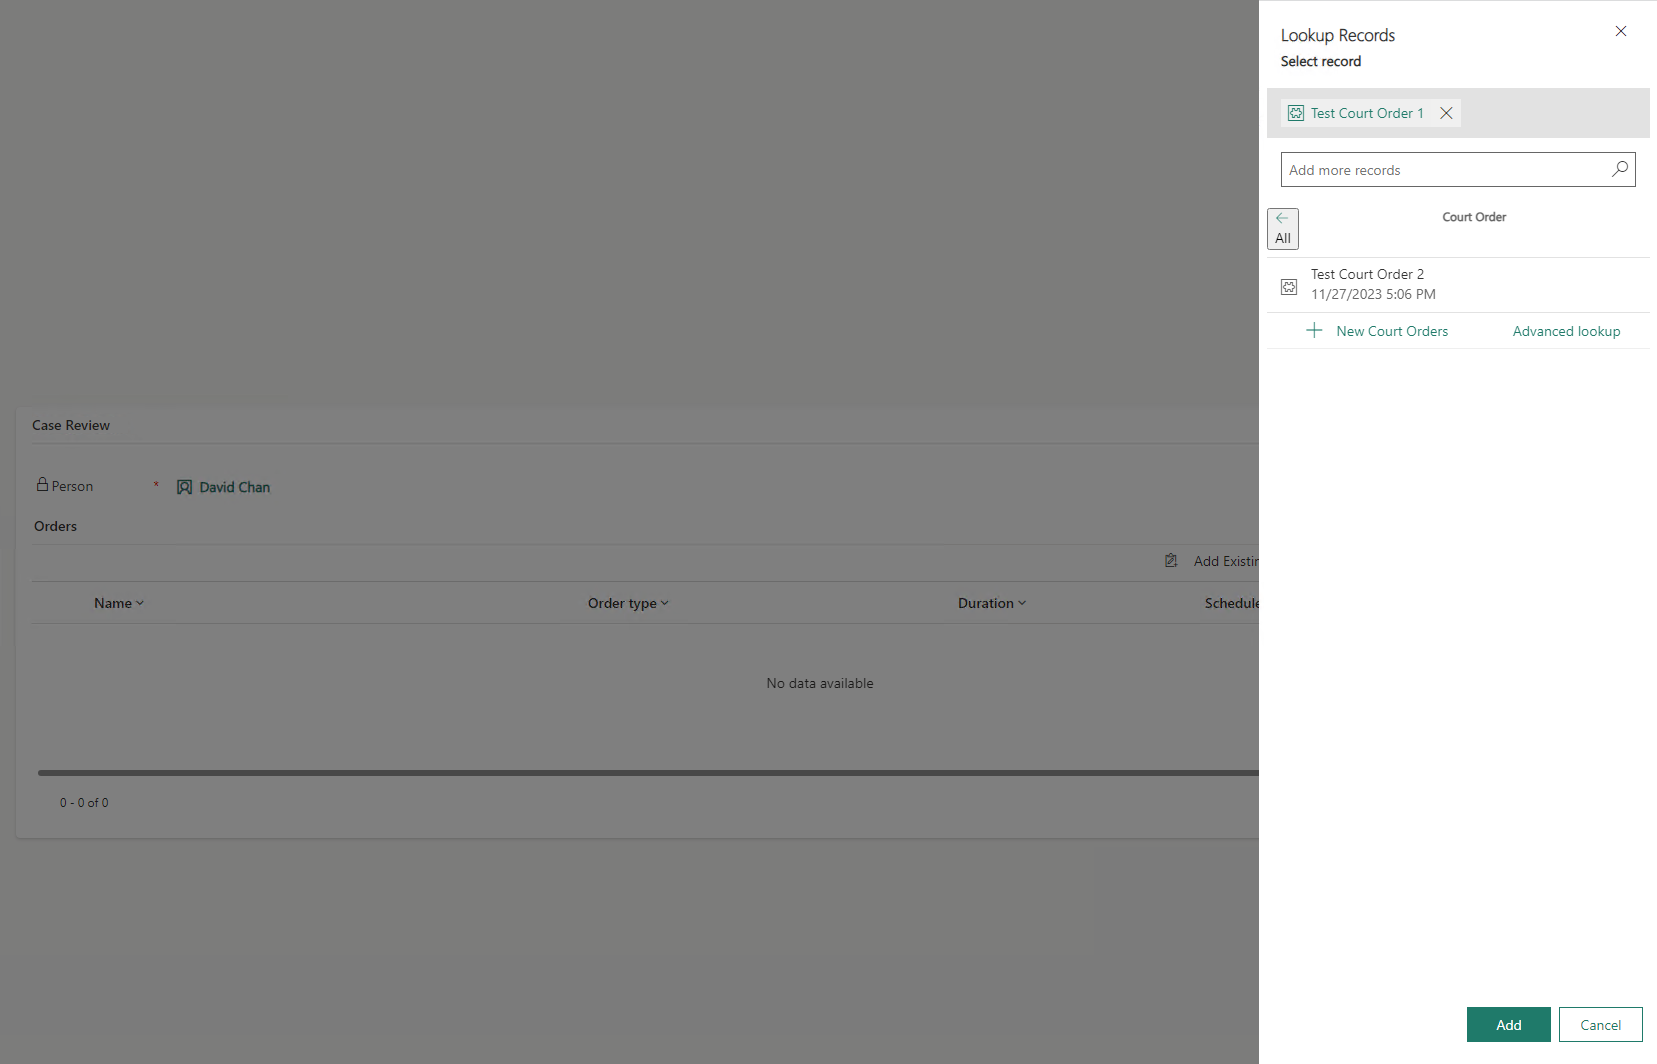
Note: this dialog references records such as ‘Test Court Order 2’ via it’s entity reference (displayed in the code sample below). (Click on the magnifying glass icon to see the filtered list.)
entityType = "cpl_courtorder"
id = "{4936E866-F3AE-E11B-DD51-00E3A6AB3E9F}"
name = "Test Court Order 2"In detail
Referring back to Figure 2, once the user has selected one or more records and pressed the ‘Add’ button, Xrm.Utility.lookupObjects returns (line 3 of the code snippet below). The function associateAddExistingResults() then adds the selected record/s (i.e. the entity reference/s stored in the ‘results’ field)) to the subgrid (i.e. the Orders subgrid displayed in Figure 1).
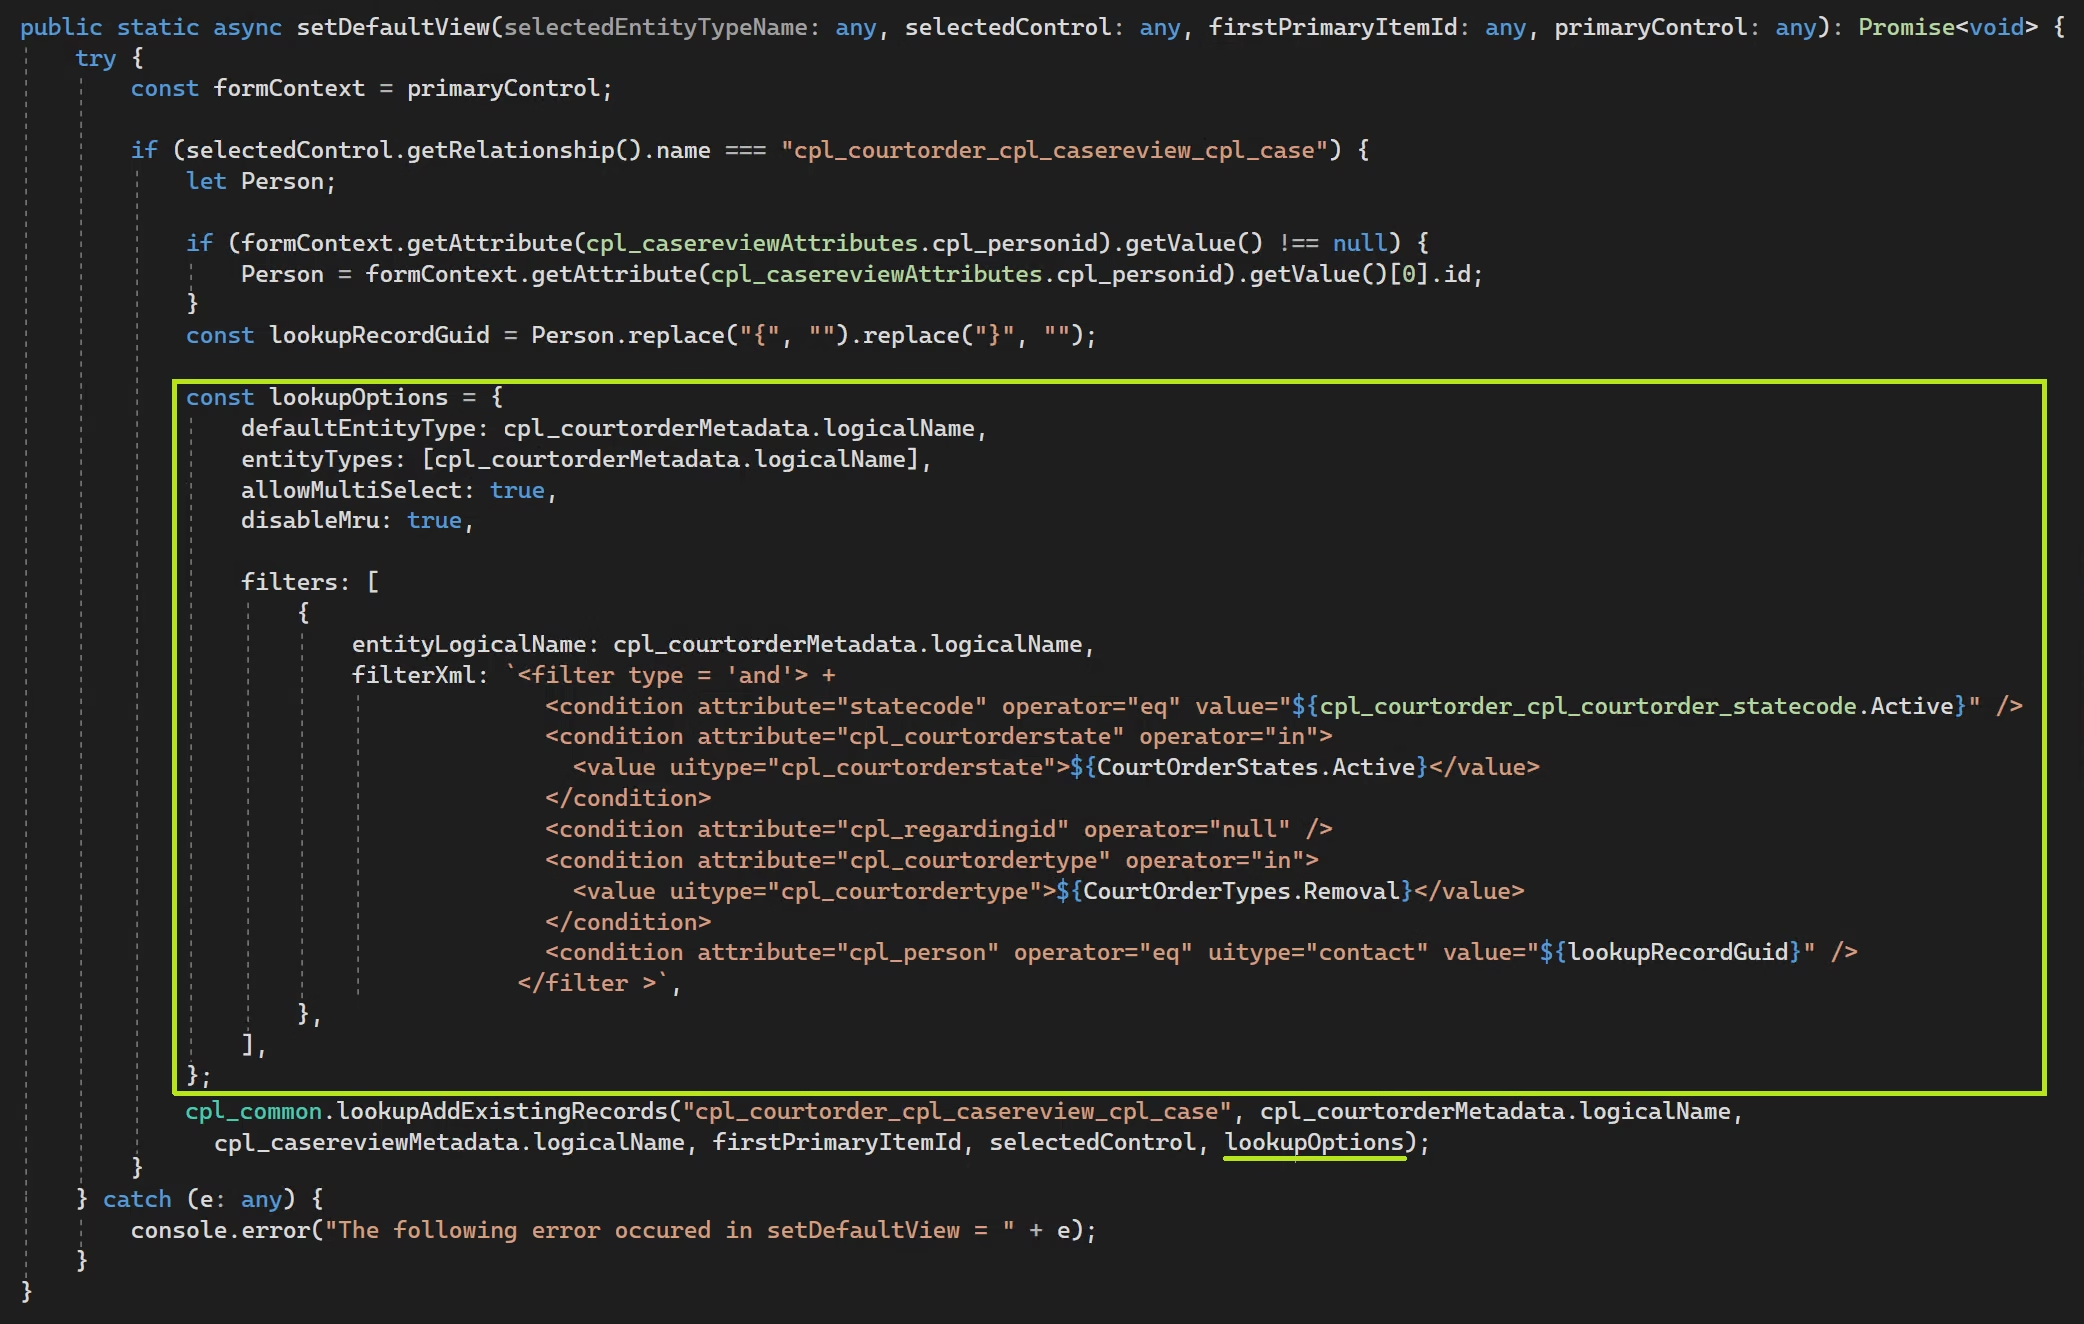
(Note: the code for the associateAddExistingResults() function isn’t listed in this post. However, the code to generate lookupOptions, which is passed to Xrm.Utility.lookupObjects() is displayed in Figure 3.)
public static lookupAddExistingRecords(relationshipName: any, primaryEntity: any, relatedEntity: any, parentRecordId: any, gridControl: any, lookupOptions: any) {
Xrm.Utility.lookupObjects(lookupOptions).then(function (results: any) {
if (results.length > 0) {
Xrm.Utility.getEntityMetadata(primaryEntity).then(function (primaryEntityData: any) {
const primaryEntitySetName = primaryEntityData.EntitySetName;
Xrm.Utility.getEntityMetadata(relatedEntity).then(function (relatedEntityData: any) {
const relatedEntitySetName = relatedEntityData.EntitySetName;
cpl_common.associateAddExistingResults(relationshipName, primaryEntitySetName, relatedEntitySetName, relatedEntity, parentRecordId.replace("{", "").replace("}", ""), gridControl, results, 0);
});
});
}
});
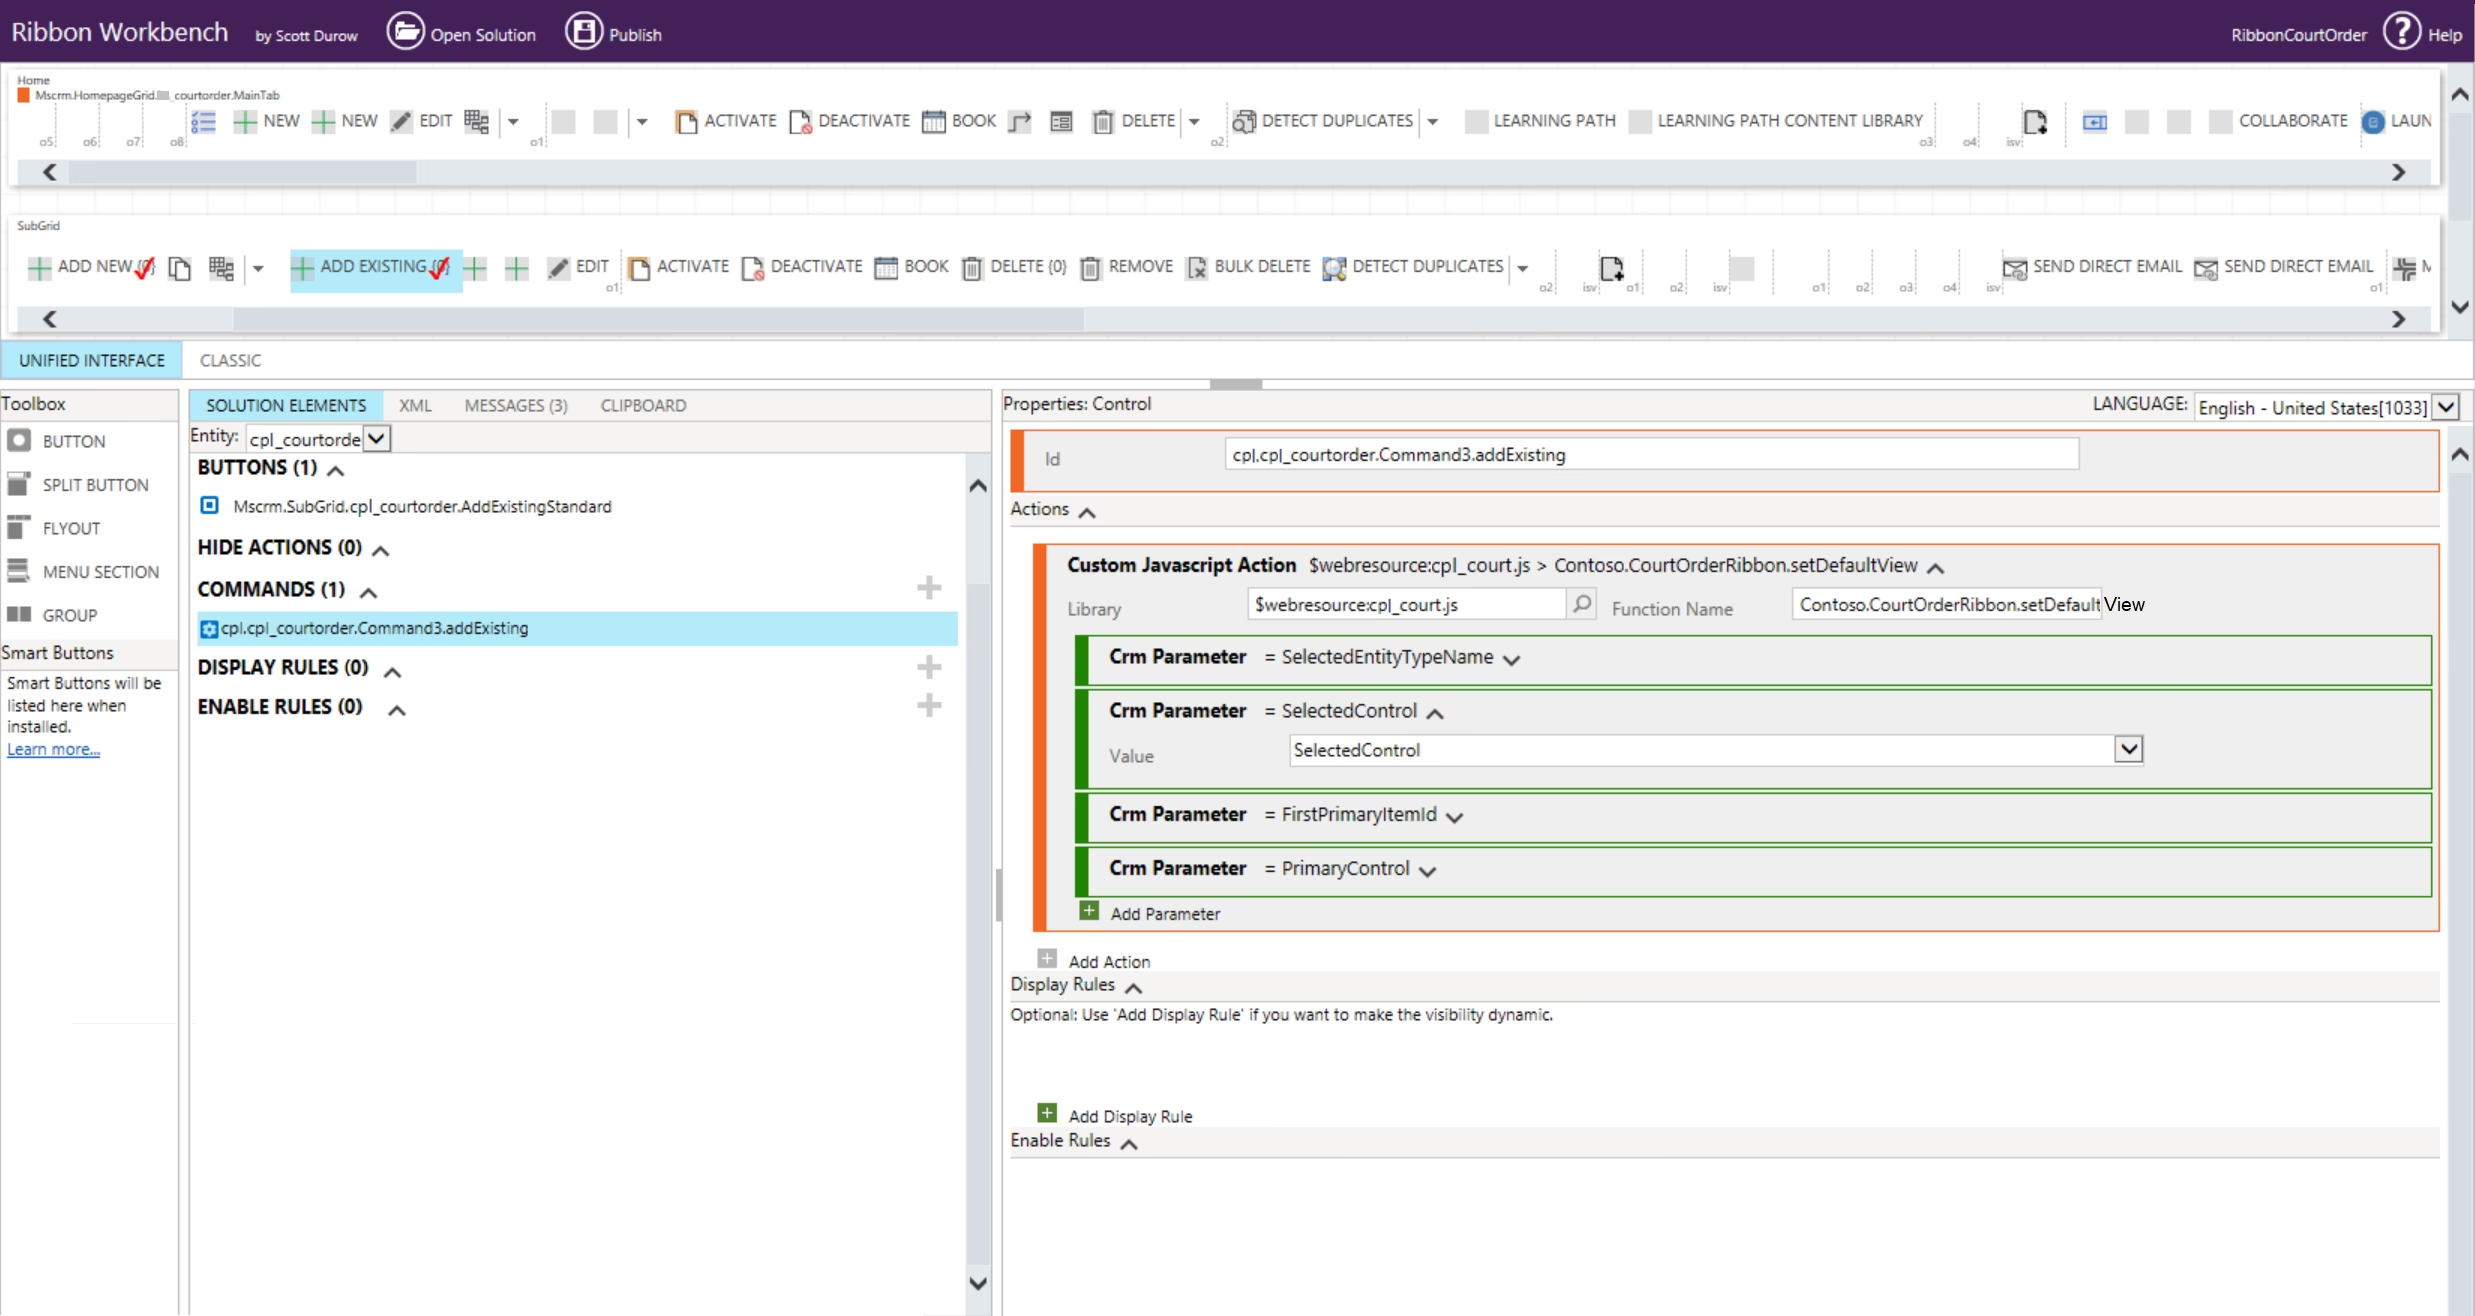
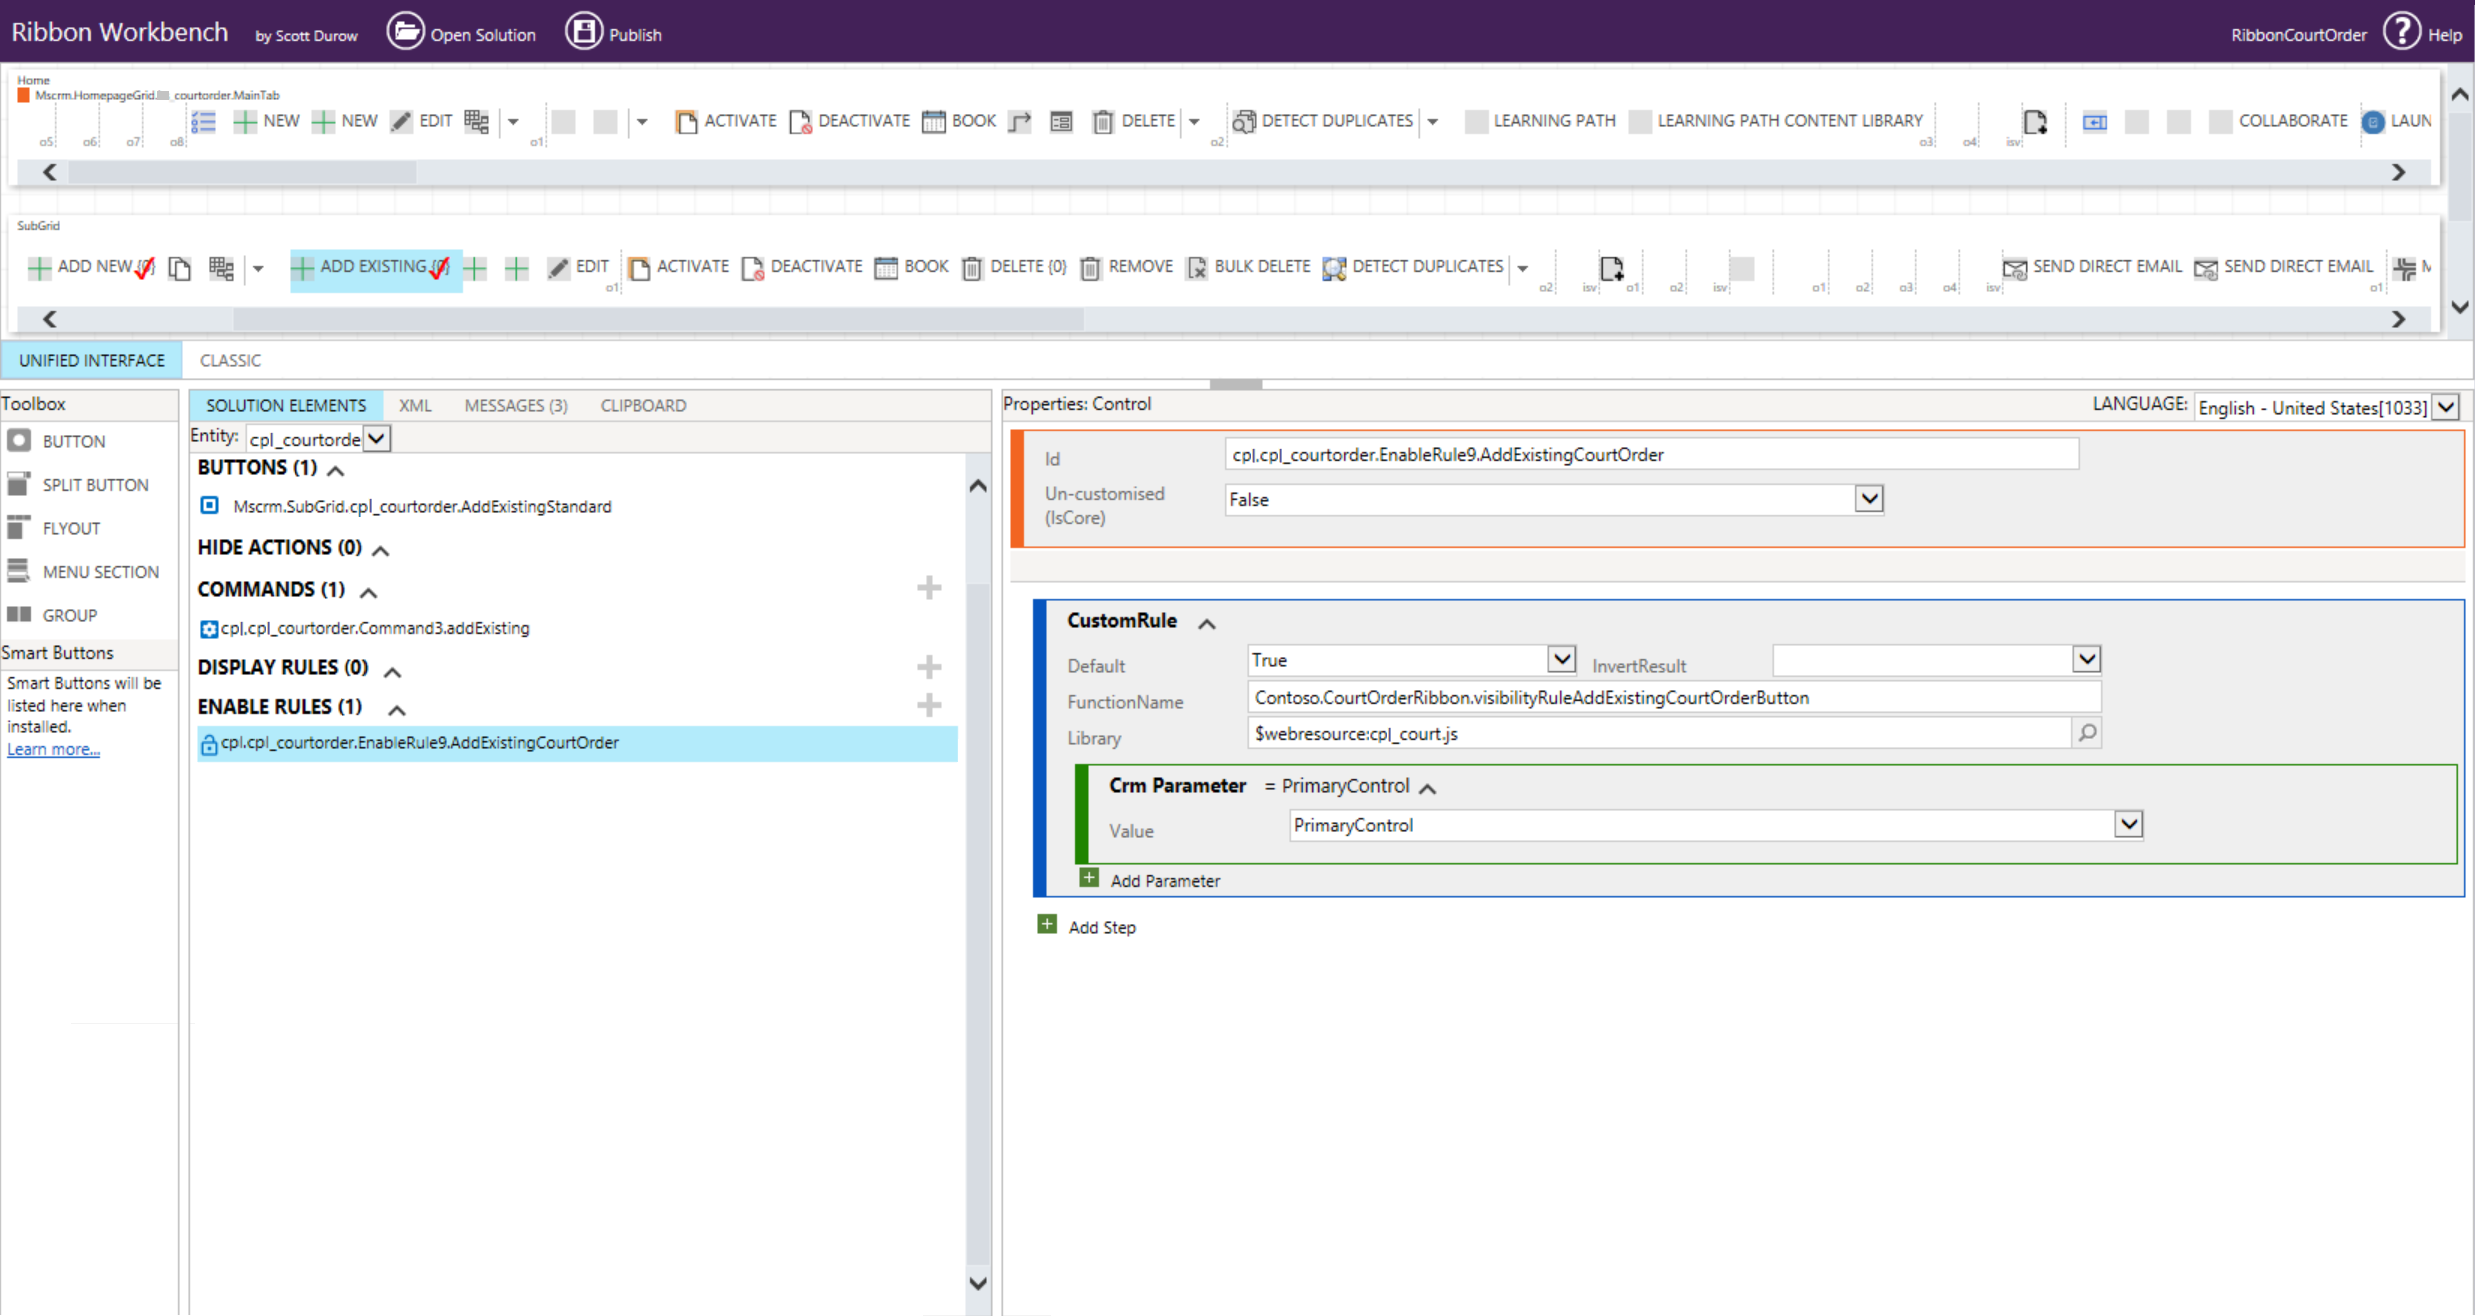
}The function setDefaultView() in Figure 3 is added to the court order ribbon (Figure 4).
Note:
- When customising the OOTB ‘Add Existing {0}’ button, both ‘Customise Button’ and ‘Customise Command’ were selected. (Refer to the Appendix point 3). A better approach would have been to create a new button. The reason being is that the court order subgrid could be placed on entities other than case review. In this case, the modified ‘Add Existing’ button may not work as expected
Button Visibility
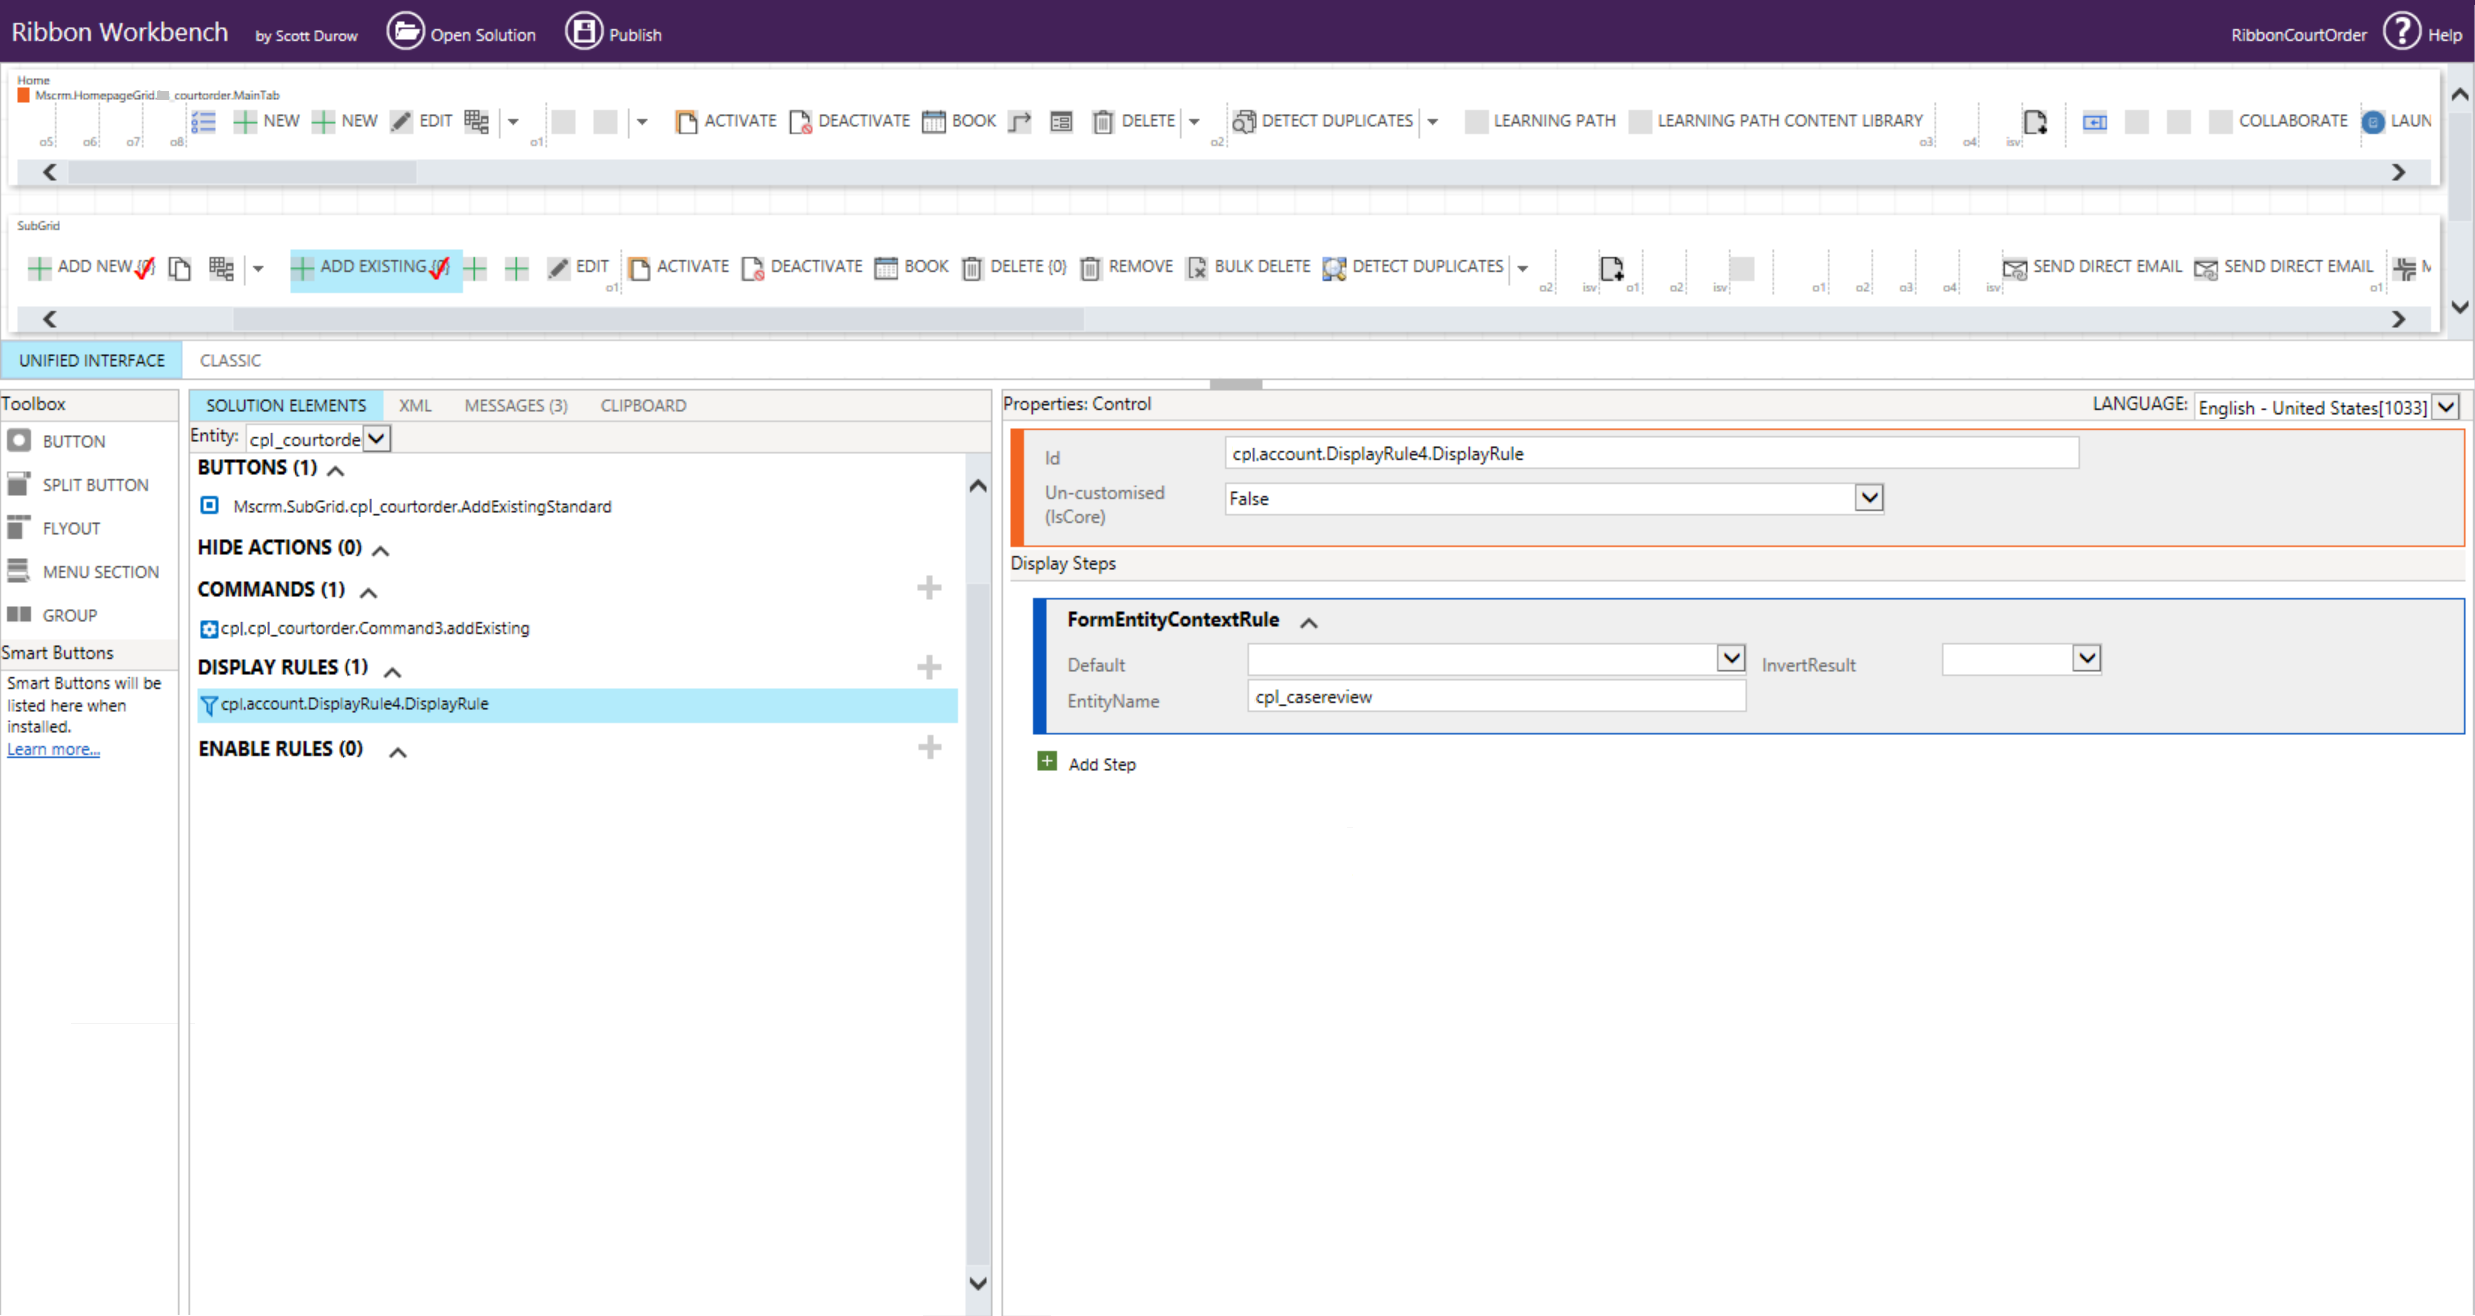
The ‘Add Existing’ button should appear only when the user is on a case review form. This can be controlled by using an Enable Rule combined with a JavaScript function. Another option would be to create a display rule (which runs on the server) and add a FormEntityContextRule step (see Appendix 2)
In Figure 5, the function visibilityRuleAddNewCourtOrderButton() determines whether the ‘Add Exisiting Court Orders’ button is shown
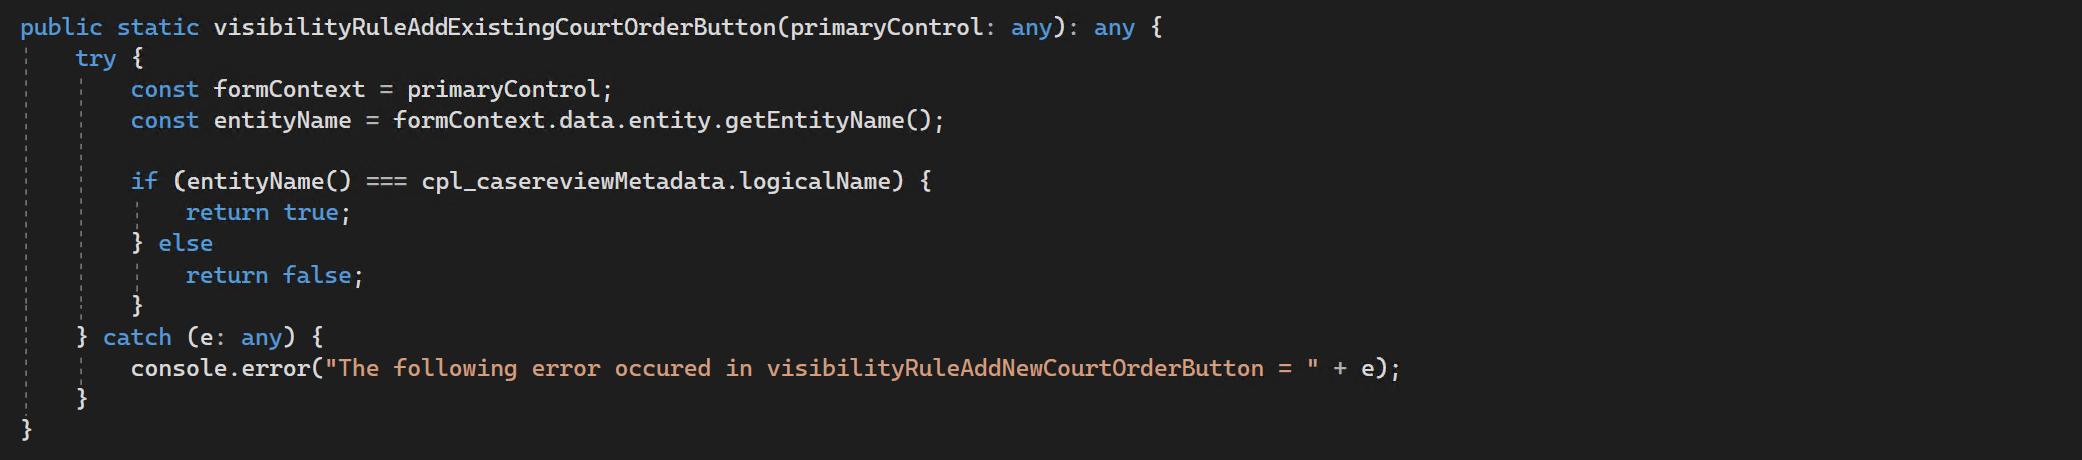
This function (visibilityRuleAddNewCourtOrderButton()) is added to the court order ribbon
Appendix
1.) Hidden parameter
To see how Microsoft leverages Xrm.Utility.lookupObjects, it’s possible to use the browser debugger to view the file Main_system_library.js.
Referring to Figure 1, when the button ‘Add Existing Court Orders’ (the out of the box version) is pressed, it sets the ‘regarding’ on the Court Order to the Case Review. It achieves this by using a hidden parameter called ‘createFromEntity’ (see below).
Xrm.Utility.lookupObject({
   allowMultiSelect: true,
   createFromEntity: currentEntity,
   defaultEntityType: entityName,
   entityTypes: [entityName],
   lookupType: "Lookup.Simple"
});2.) FormEntityContextRule
Referring to Figure 7, the subgrid (for cpl_courtorder) has been placed on a cpl_casereview form. Since FormEntityContextRule evaluates the form’s entity, the ‘Add Existing’ subgrid button will be visible when the subgrid is hosted on a case review form
a couple of things to note:
- Un-Customised = False means that the button (the out of the box version) has customisation
- ‘Invert Result’ will, for example & unsurprisingly, invert a result from false to true
3.) Customise Button vs Customise Control
Within the Ribbon workbench, when right mouse clicking on a button, two of the options displayed are ‘customise button’ and ‘customise command’.
- The ‘Customise Button’ is for modifying the UI and placement of the button on the ribbon. For example, changing the label, icon…. (When selected, a red tick icon is displayed on the button.)
- The ‘Customise Command’ is for defining the button’s logic. For example,
- which JavaScript function runs
- or button visibility by adding a display rule to the particular command
Further reading
Display associated records on a Dynamics 365 forms related tab
References
Mastering Ribbon Workbench 2016 – Part 5 – Hiding buttons conditional to the form context