The purpose of this post is to provide an introduction on how to set up automated unit testing (using xrm-mock) of Dynamics 365 client-side TypeScript
Initial Install & Setup
1.) Install node.js if not already installed (for npm & package.json support)
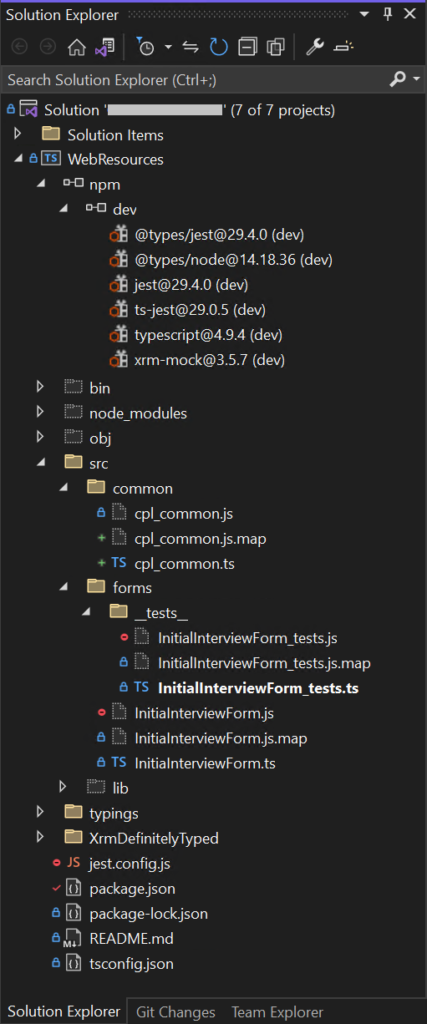
2.) Create a project (such as a ‘Blank Node.js Console Application’ project) with the name ‘WebResources’
3.) Install the following npm packages (either via the Solution Explorer or the terminal window) displayed in Figure 1
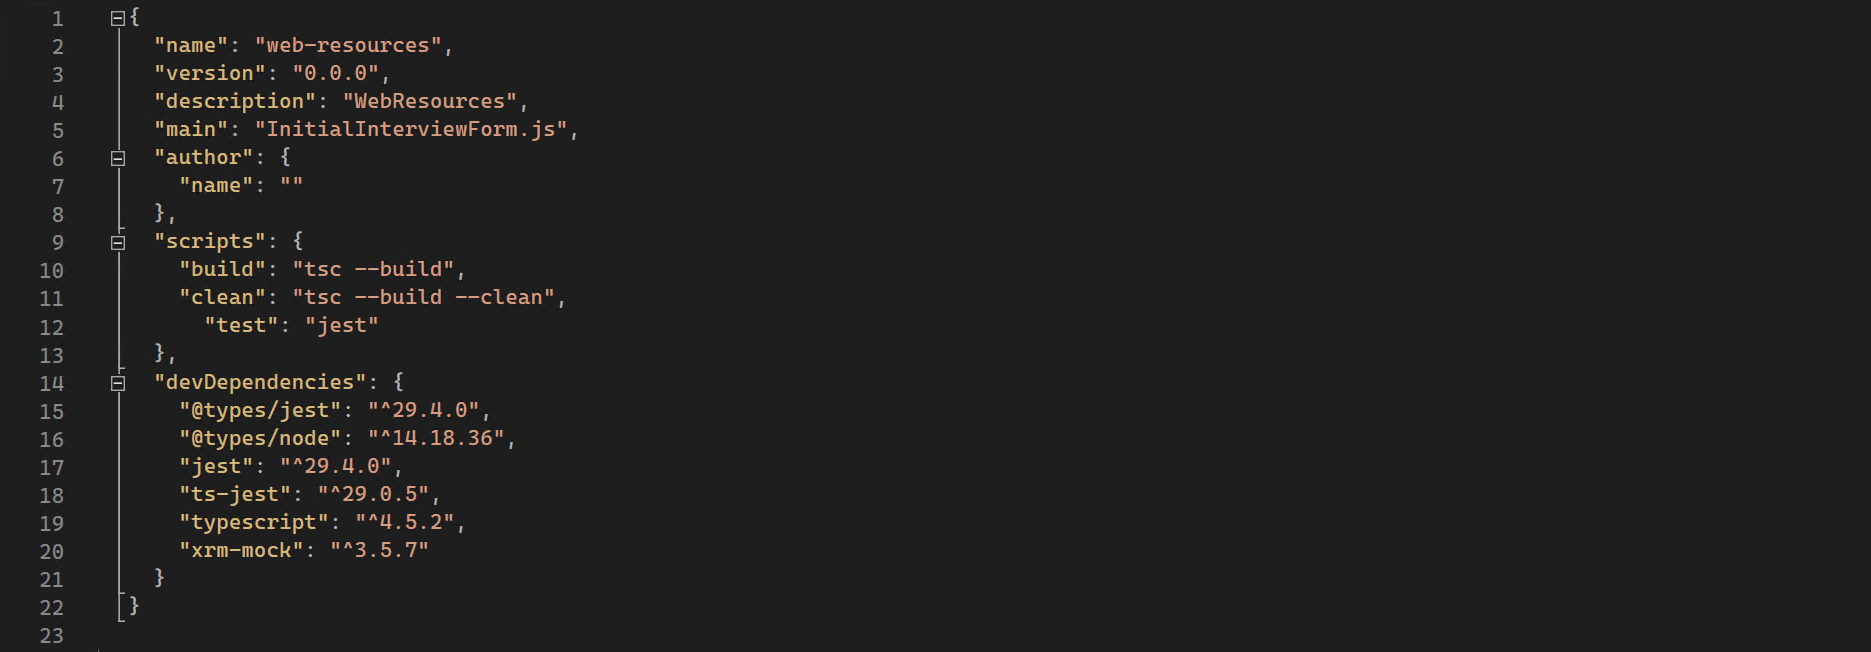
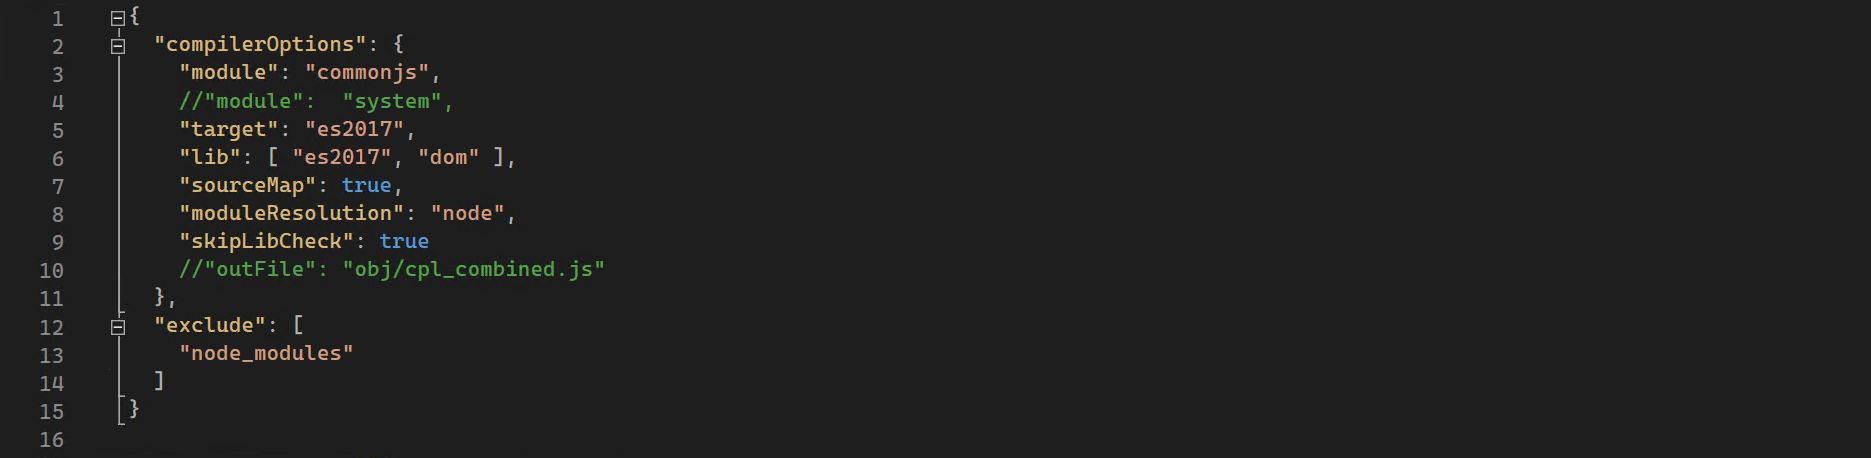
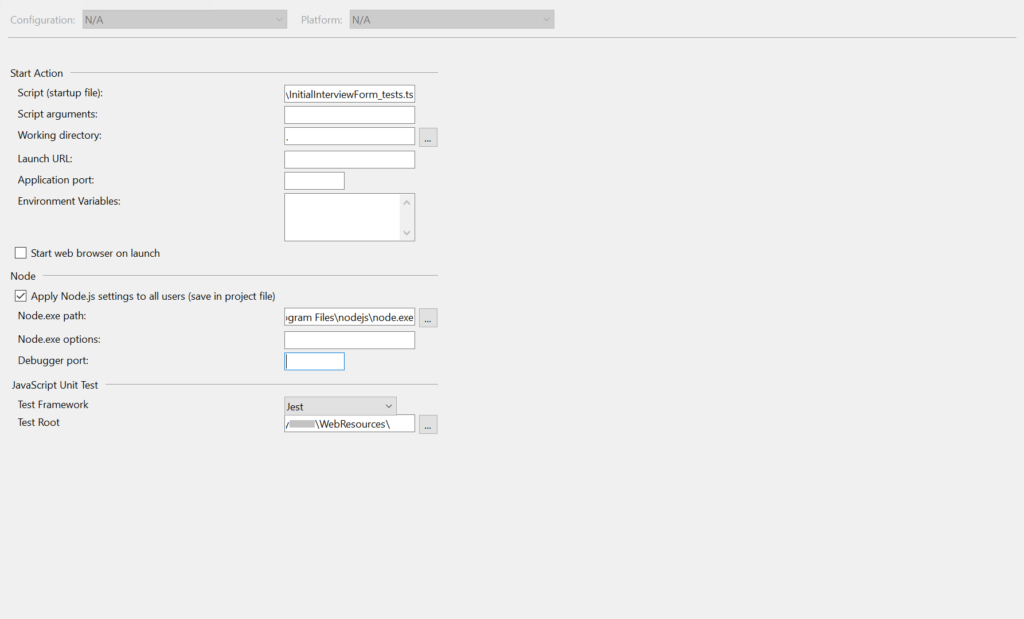
4.) Ensure the configuration files are as follows

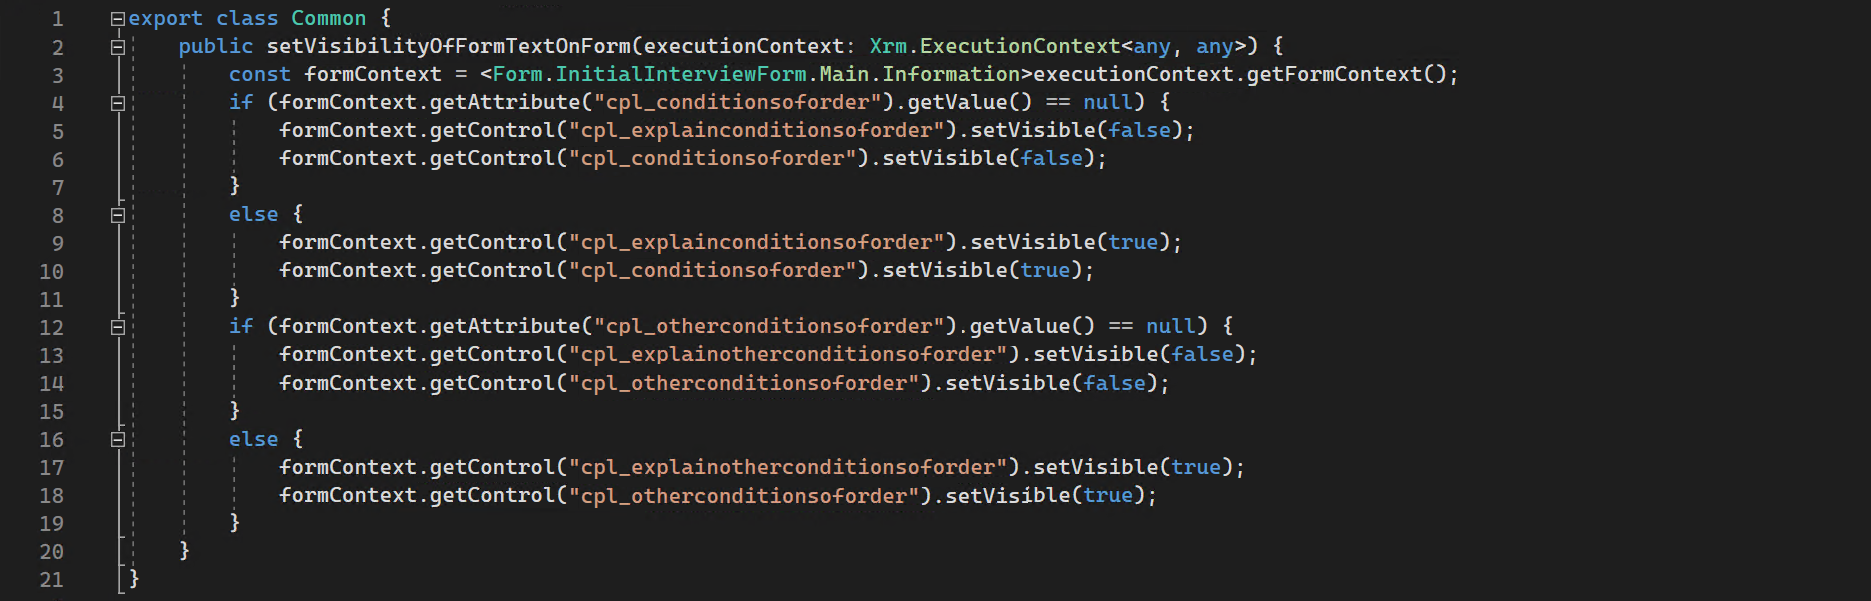
TypeScript code to be unit tested

TypeScript unit test
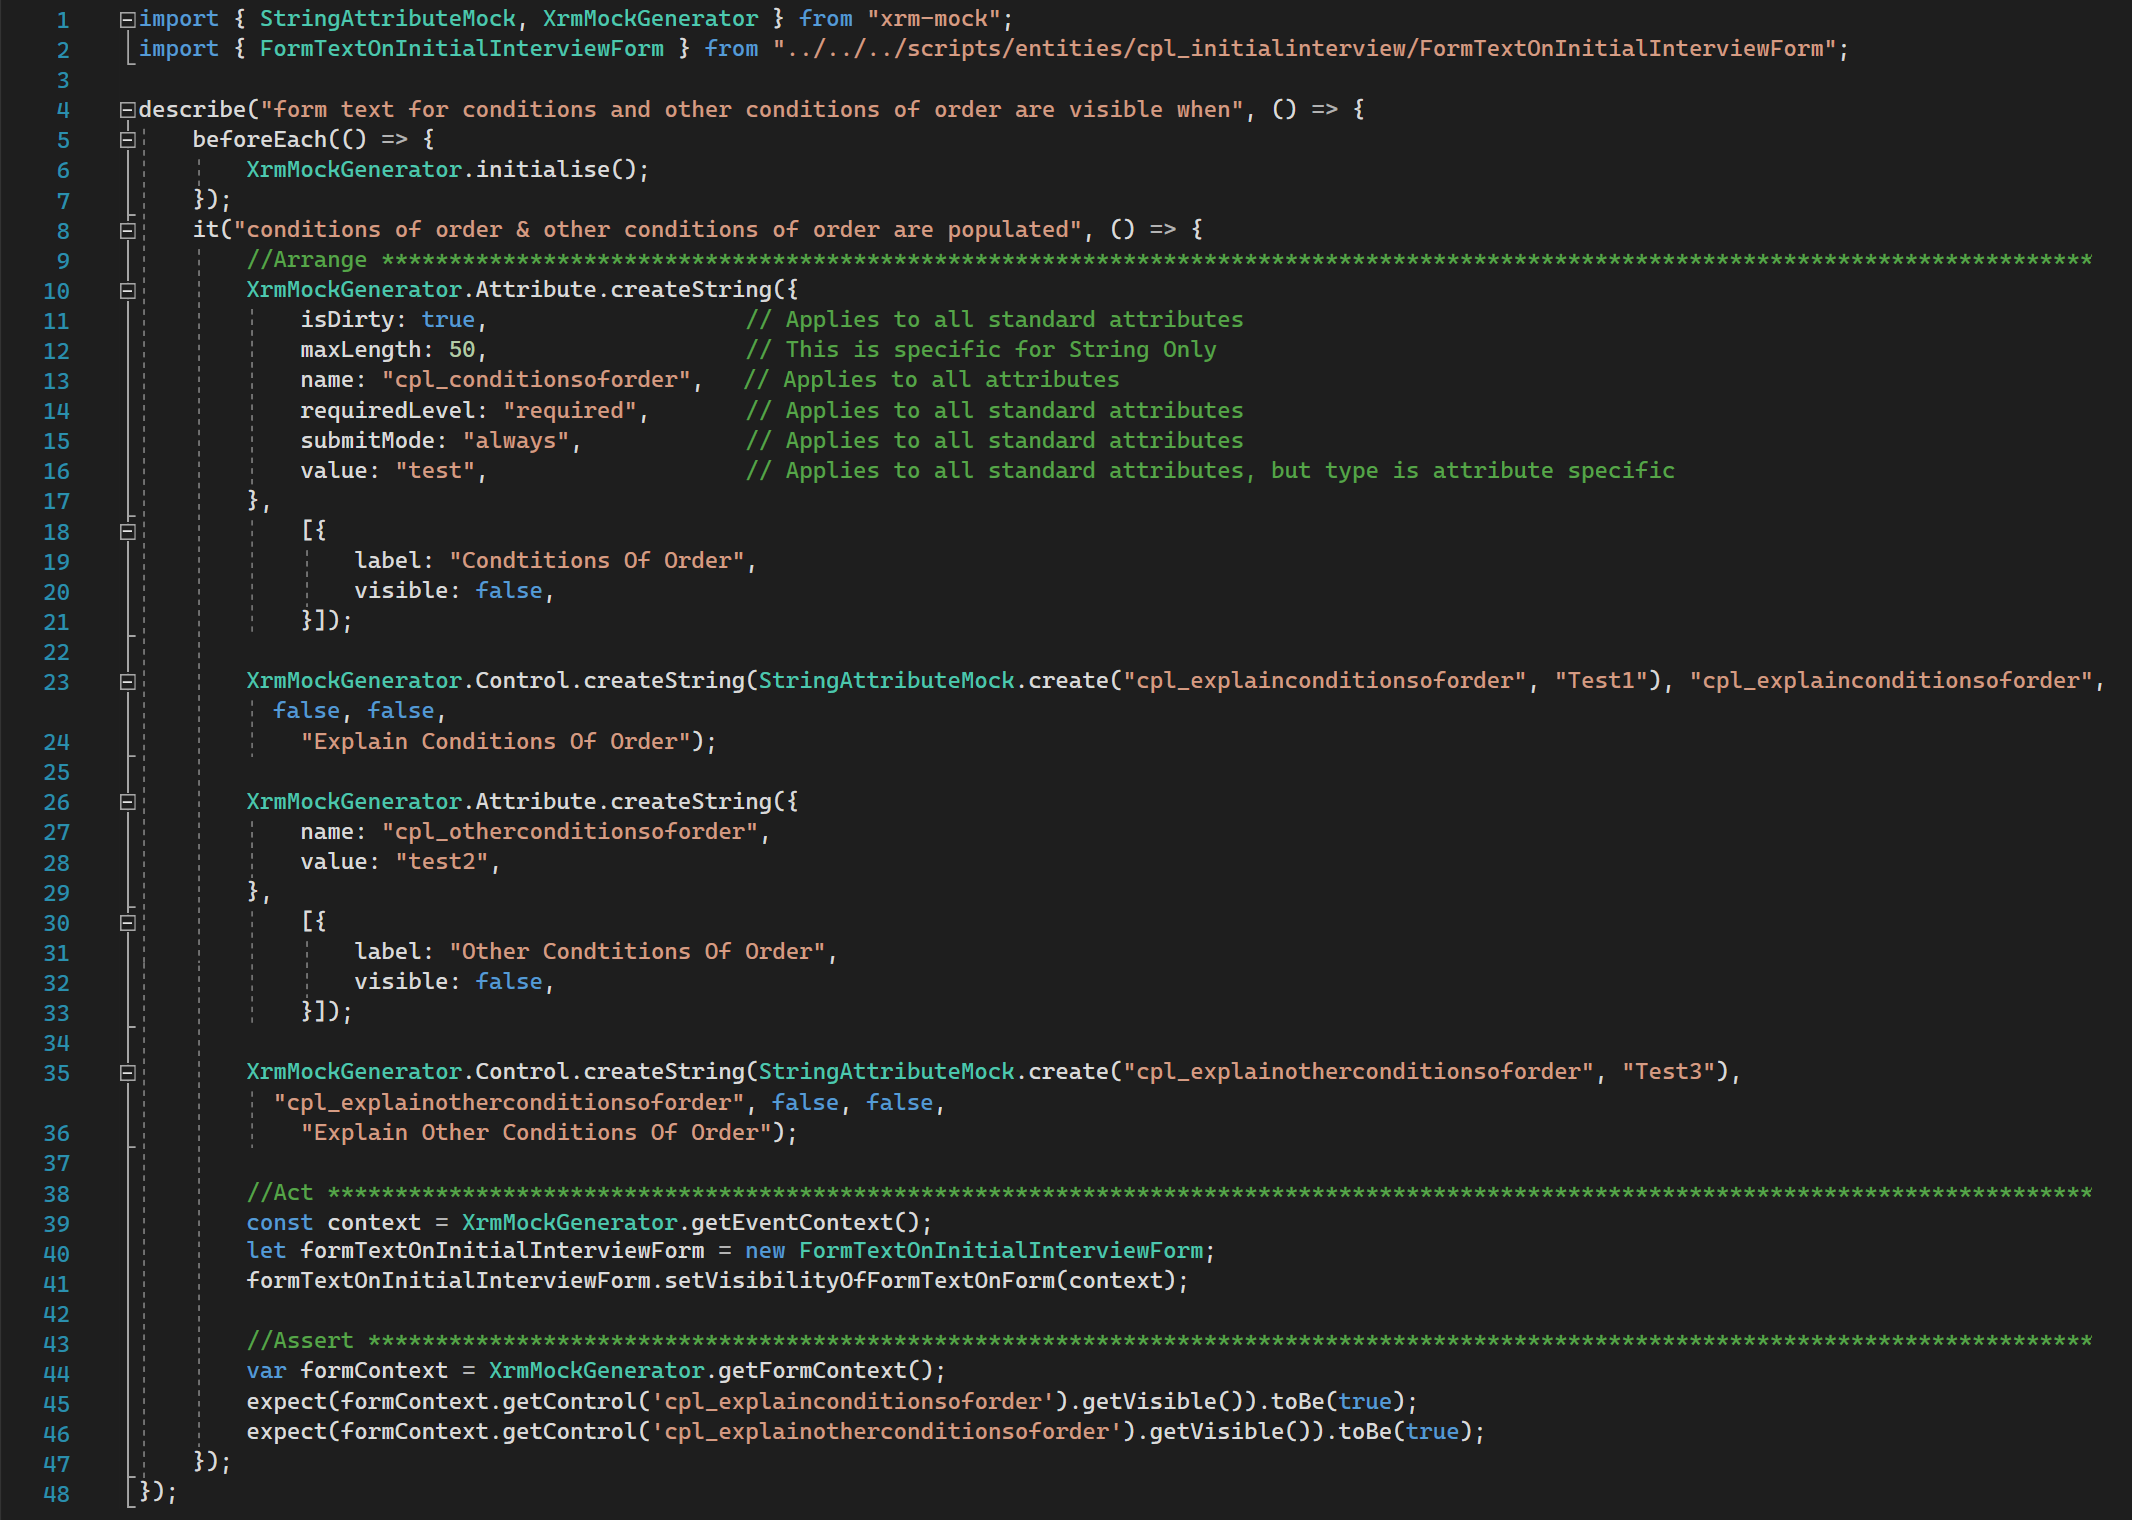
Referring to Figure 7, mock attributes cpl_conditionsoforder, cpl_otherconditionsoforder, cpl_explainconditionsoforder and cpl_explainotherconditionsoforder are created. These attributes need to be created because they are referenced in the function being tested (Figure 5)
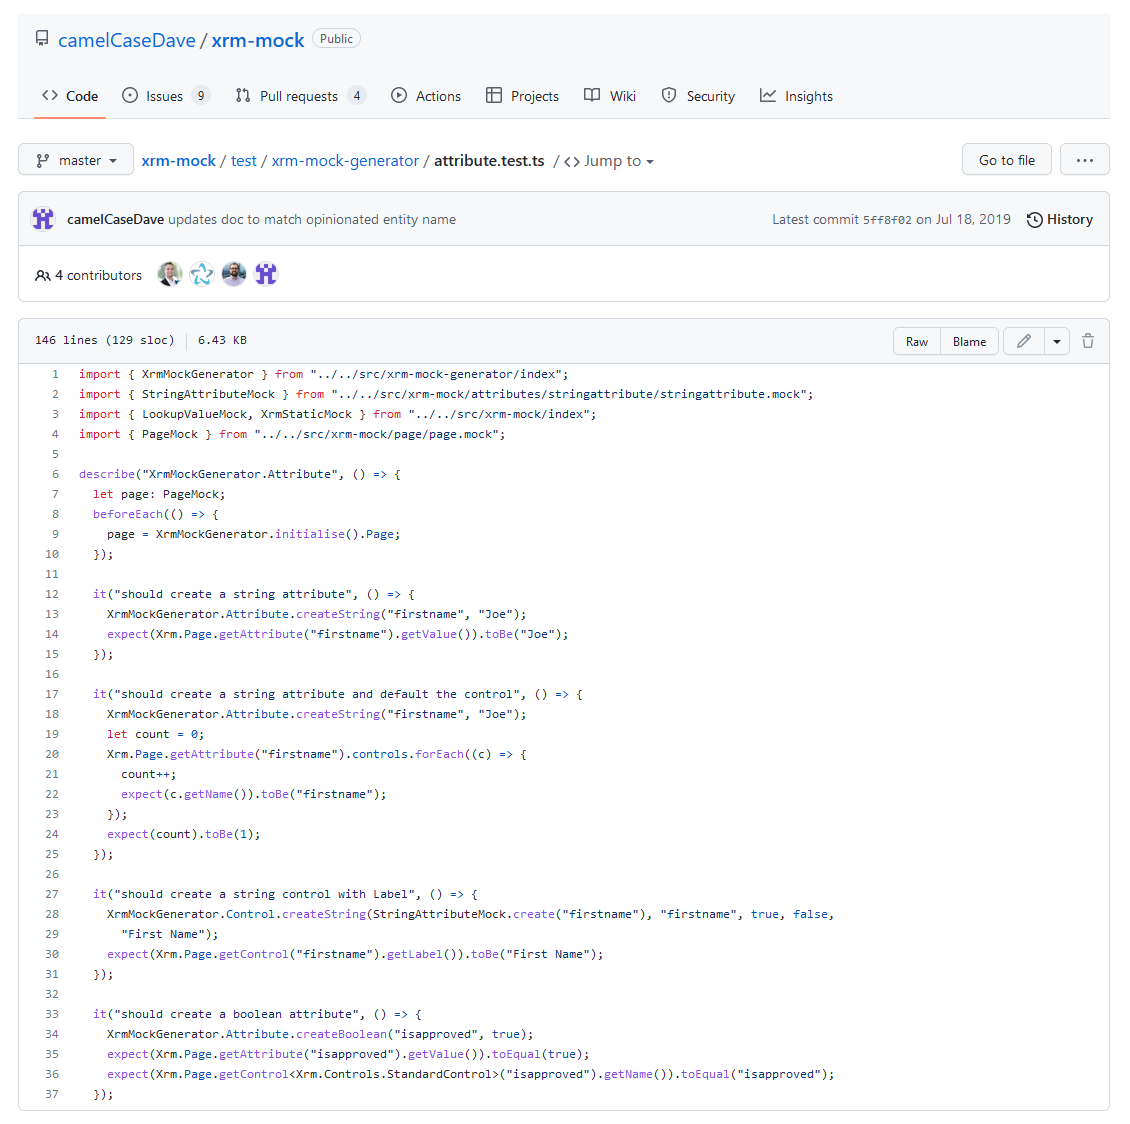
Referring to Figure 8, to learn the syntax for creating xrm-mock test cases, I recommend looking at these pages
Executing the unit tests
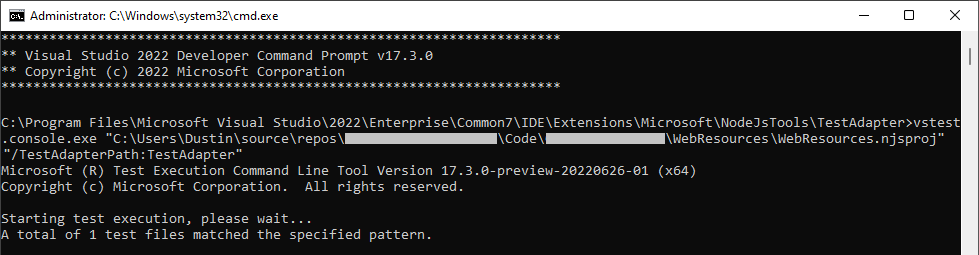
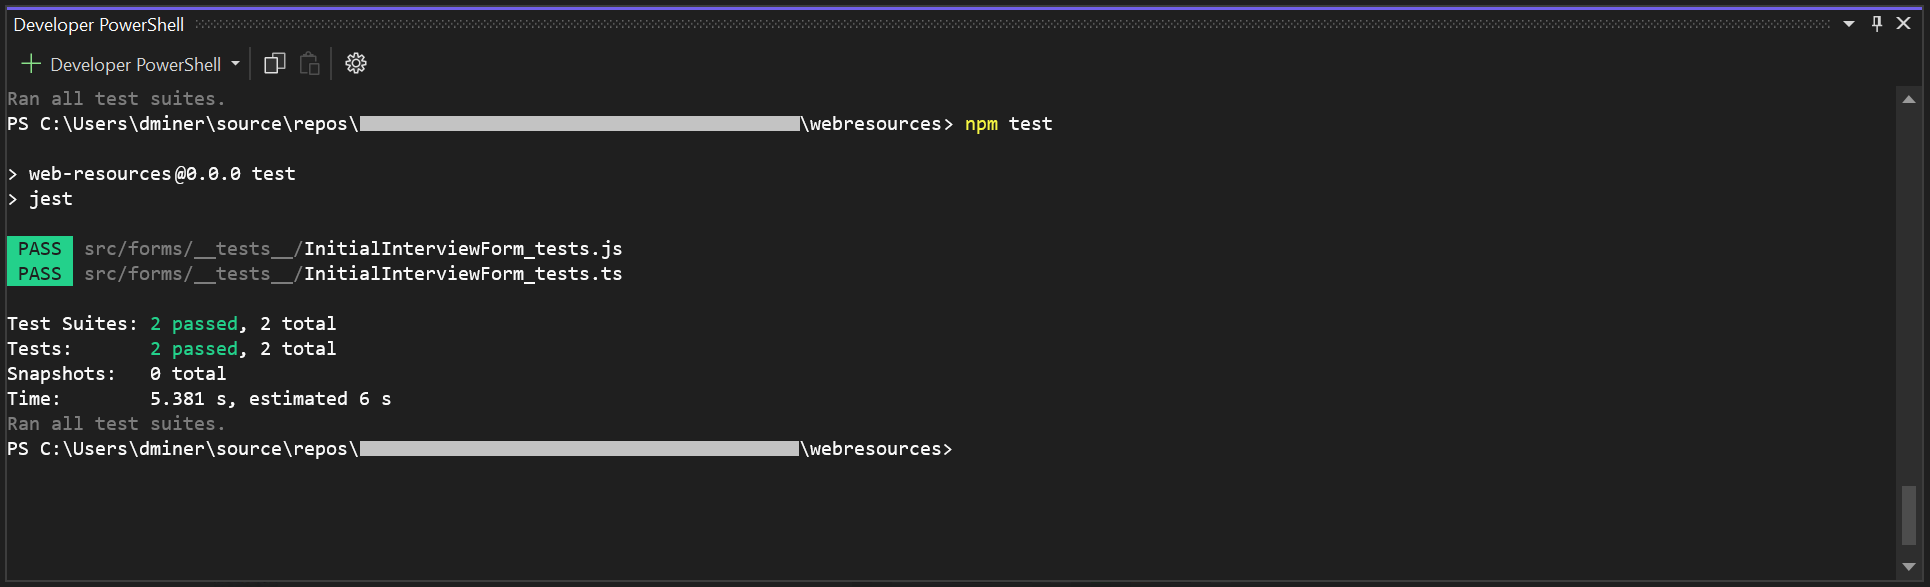
Referring to Figure 11, note that console.info debug statements will be displayed here
Appendix
npm packages
@types/jest – TypeScript definitions for jest. Without this, words such as ‘describe’ wouldn’t resolve (Figure 7)
@types/node – TypeScript definitions for Node. js
jest – A JavaScript testing framework designed to ensure correctness of any JavaScript codebase
ts-jest – A TypeScript preprocessor with source map support for Jest that lets you use Jest to test projects written in TypeScript
typescript – A TypeScript is a language for application scale JavaScript development
xrm-mock – A fake implementation of the Dynamics 365 Client API and Xrm object model
Further reading
Unit testing with xrm mock in visual studio code
References
Daryl Labar –TypeScripting the Heck Out Of Model Driven Forms
Scott Durow – Building javascript web resources using TypeScript
Dave Clark – https://github.com/camelCaseDave/xrm-mock